
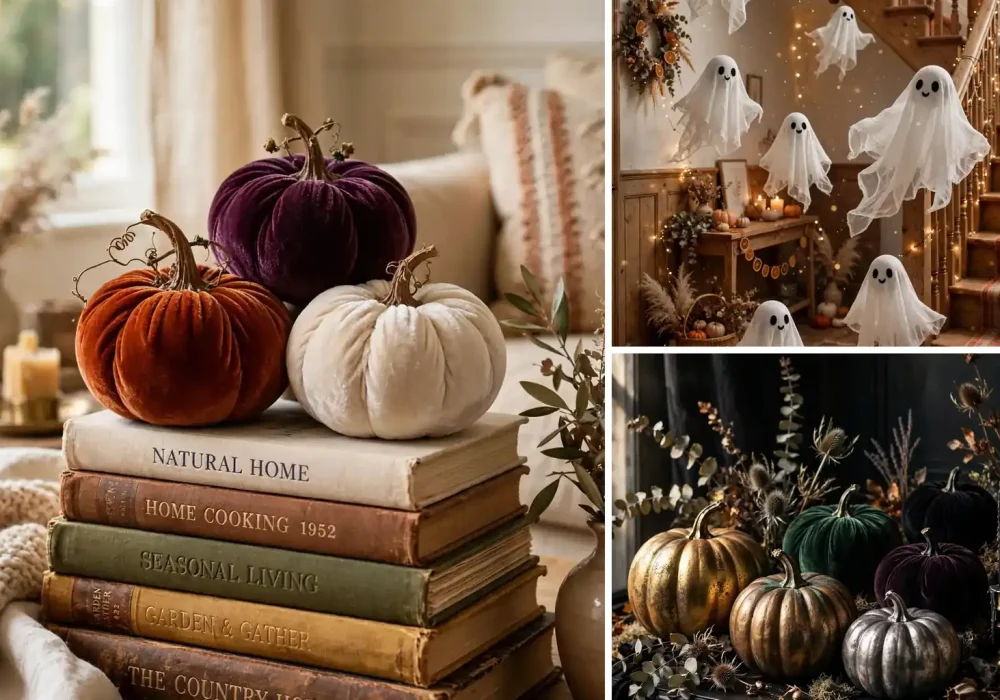
Halloween 2026 belongs to the makers. The biggest shift in Halloween decorating this year is away from mass produced plastic and toward handmade pieces with texture, weight, and personality. Pinterest calls it the Handmade Halloween movement, and the idea is simple: decorations you craft yourself look more intentional than anything you can buy in a bag.
The secret to DIYs that look expensive is not spending more money. It is choosing the right materials, working in a tight color palette, and finishing every piece properly. A five dollar project in velvet and matte black reads as luxury. A twenty dollar project in shiny orange plastic reads as a party store.
These fifteen projects all follow the expensive looking formula. Each one lists exact materials, clear steps, the cost, and the styling trick that elevates it from craft project to decor piece.
How to Make Cheap DIYs Look Expensive: 5 Rules
Before you touch a glue gun, these five rules separate the DIYs people compliment from the ones people politely ignore.
Rule 1: Pick a tight color palette. Expensive looking Halloween decor lives in three to four colors max. The 2026 palette is matte black, warm cream, dusty orange, and one metallic (aged gold or antique brass). When every project shares the same palette, your whole house looks designed.
Rule 2: Choose matte over shiny. Shine reads cheap in Halloween decor. Matte black paint, unbleached muslin, raw wood, and natural textures photograph beautifully and look collected rather than purchased. Save shine for one accent, like a metallic pumpkin, so it stands out.
Rule 3: Finish the back and edges. The difference between craft and decor is finishing. Sand rough edges, tuck in loose fabric, paint the underside. Nobody should be able to tell where the project ends and the store bought piece begins.
Rule 4: Group in odd numbers. Three pumpkins beat two. Five bats beat four. Odd groupings look styled; even groupings look placed. This one trick makes every project on this list look twice as good.
Rule 5: Add one natural element. Dried eucalyptus, bare branches, moss, or dried orange slices next to any Halloween DIY instantly make it look organic and high end. Nature is the cheapest luxury material there is.
1. Velvet Pumpkins

Wrap foam pumpkins in stretch velvet for the single most expensive looking Halloween DIY that exists. The velvet catches light like real fabric because it is real fabric, and the soft texture reads as luxury immediately.
Materials: Foam pumpkins in varied sizes, stretch velvet fabric in rust, plum, and cream, hot glue, real pumpkin stems or cinnamon sticks, scissors.
Steps:
- Cut a circle of velvet about twice the diameter of your pumpkin.
- Place the pumpkin in the center and gather the fabric up around it.
- Glue the gathered fabric underneath, pleating as you go for a natural look.
- Glue a real stem or a cinnamon stick bundle on top.
- Fluff the pleats and let dry.
Cost: About 3 to 5 dollars per pumpkin.
Time: 15 minutes each.
Pro tip: Group three in different sizes and colors on a stack of old books. The height variation is what makes the display look styled.
2. Ghostly Gauze Lanterns

Wrap mason jars in cheesecloth, add a spooky face, and drop in a battery tealight. In daylight they look like soft textile art. At night they glow like haunted lanterns.
Materials: Mason jars, cheesecloth or gauze, battery operated tealights, black craft paint, small brush, twine.
Steps:
- Drape two layers of cheesecloth over each jar, letting it hang unevenly.
- Tie twine around the neck to secure the fabric.
- Paint simple ghost faces on the fabric with black craft paint. Keep faces minimal, two eyes and a mouth.
- Place a battery tealight inside each jar.
Cost: About 2 dollars per lantern.
Time: 10 minutes each plus drying.
Pro tip: Vary the face expressions. One surprised, one sleepy, one mischievous. Personality is what makes people smile.
3. Apothecary Potion Bottles

Turn empty glass bottles into a mad scientist shelf with tinted water and vintage style labels. This is pure atmosphere, and it costs almost nothing.
Materials: Assorted glass bottles and jars, food coloring, water, printable label paper or kraft paper, glue, twine, small corks if needed.
Steps:
- Clean and dry all bottles thoroughly.
- Fill each about three quarters with water tinted with food coloring. Deep greens, purples, and blood reds work best.
- Design or print labels with names like Nightshade Tonic, Ghost Pepper Elixir, and Moonwater.
- Glue labels on, tie twine around necks, and arrange on a dark tray or shelf.
Cost: Under 10 dollars for a whole collection.
Time: 30 minutes.
Pro tip: Add a drop of dish soap to each bottle. It makes the liquid look slightly viscous and mysterious instead of just colored water.
4. Floating Cheesecloth Ghosts
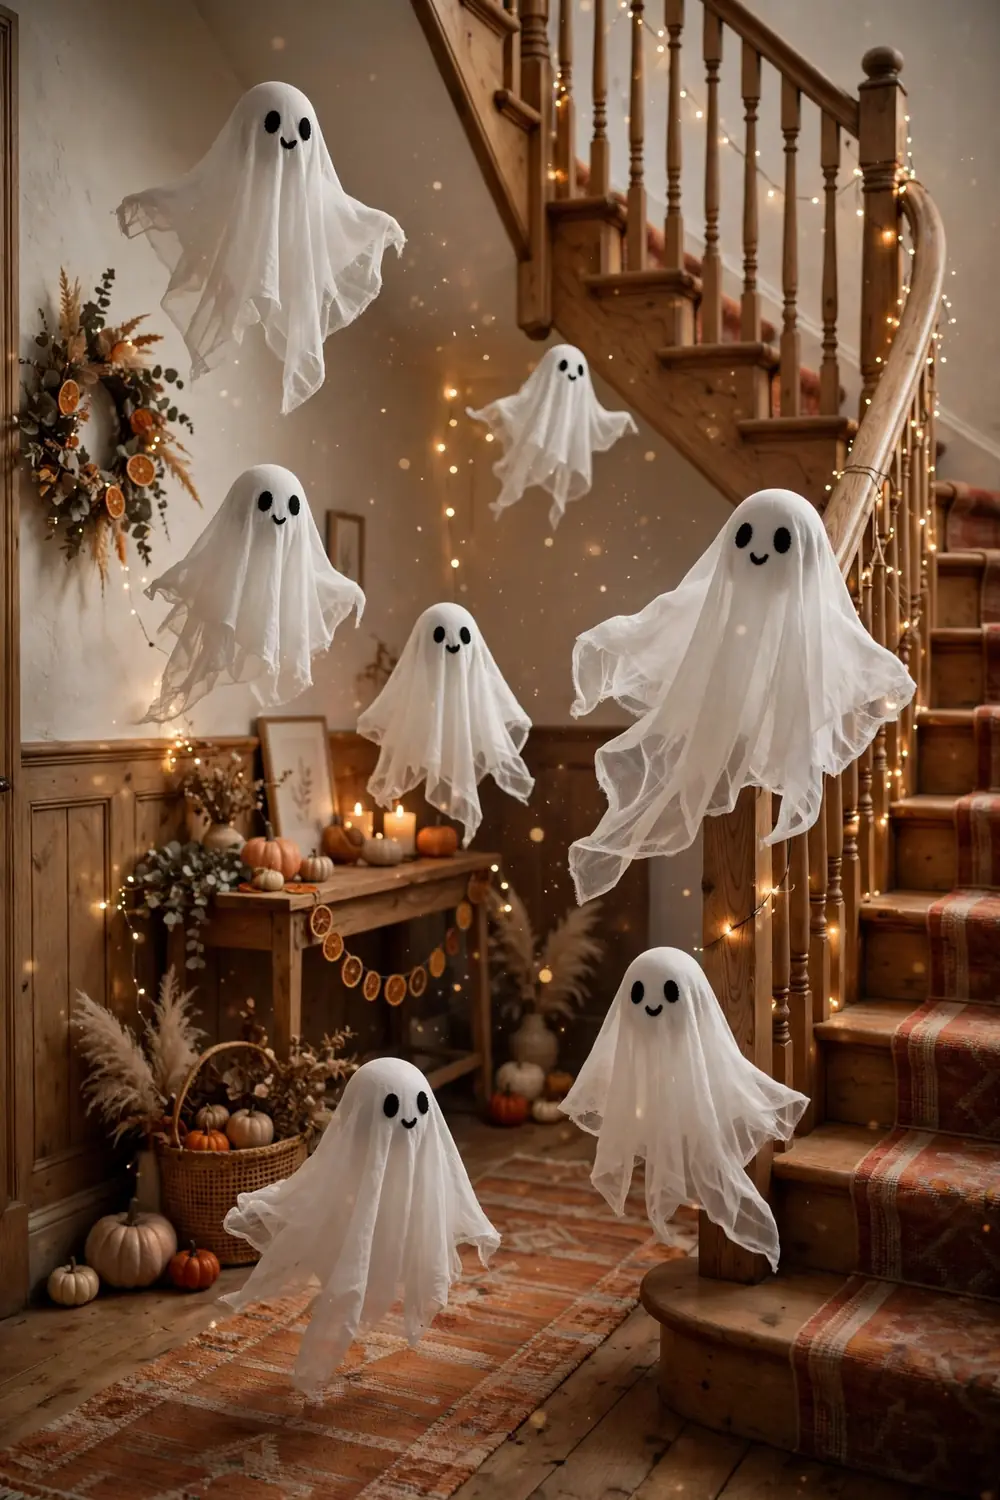
The classic floating ghost, done right. Starch stiffened cheesecloth over a balloon form creates ghosts that actually hold their shape and look ethereal rather than lumpy.
Materials: White cheesecloth, balloons, liquid starch, string, black felt, small bowls or cups for drying.
Steps:
- Blow up balloons to your desired ghost size and set each on a cup.
- Soak cheesecloth in liquid starch, wring lightly, and drape over the balloon in two layers.
- Shape the bottom edges into points and waves while wet.
- Let dry completely for 24 hours, then pop and remove the balloon.
- Glue on black felt eyes and hang with string.
Cost: About 1 dollar per ghost.
Time: 20 minutes active plus drying.
Pro tip: Hang at varied heights in a hallway or over a staircase. Movement in a draft makes them feel alive.
5. Bat Silhouette Garland
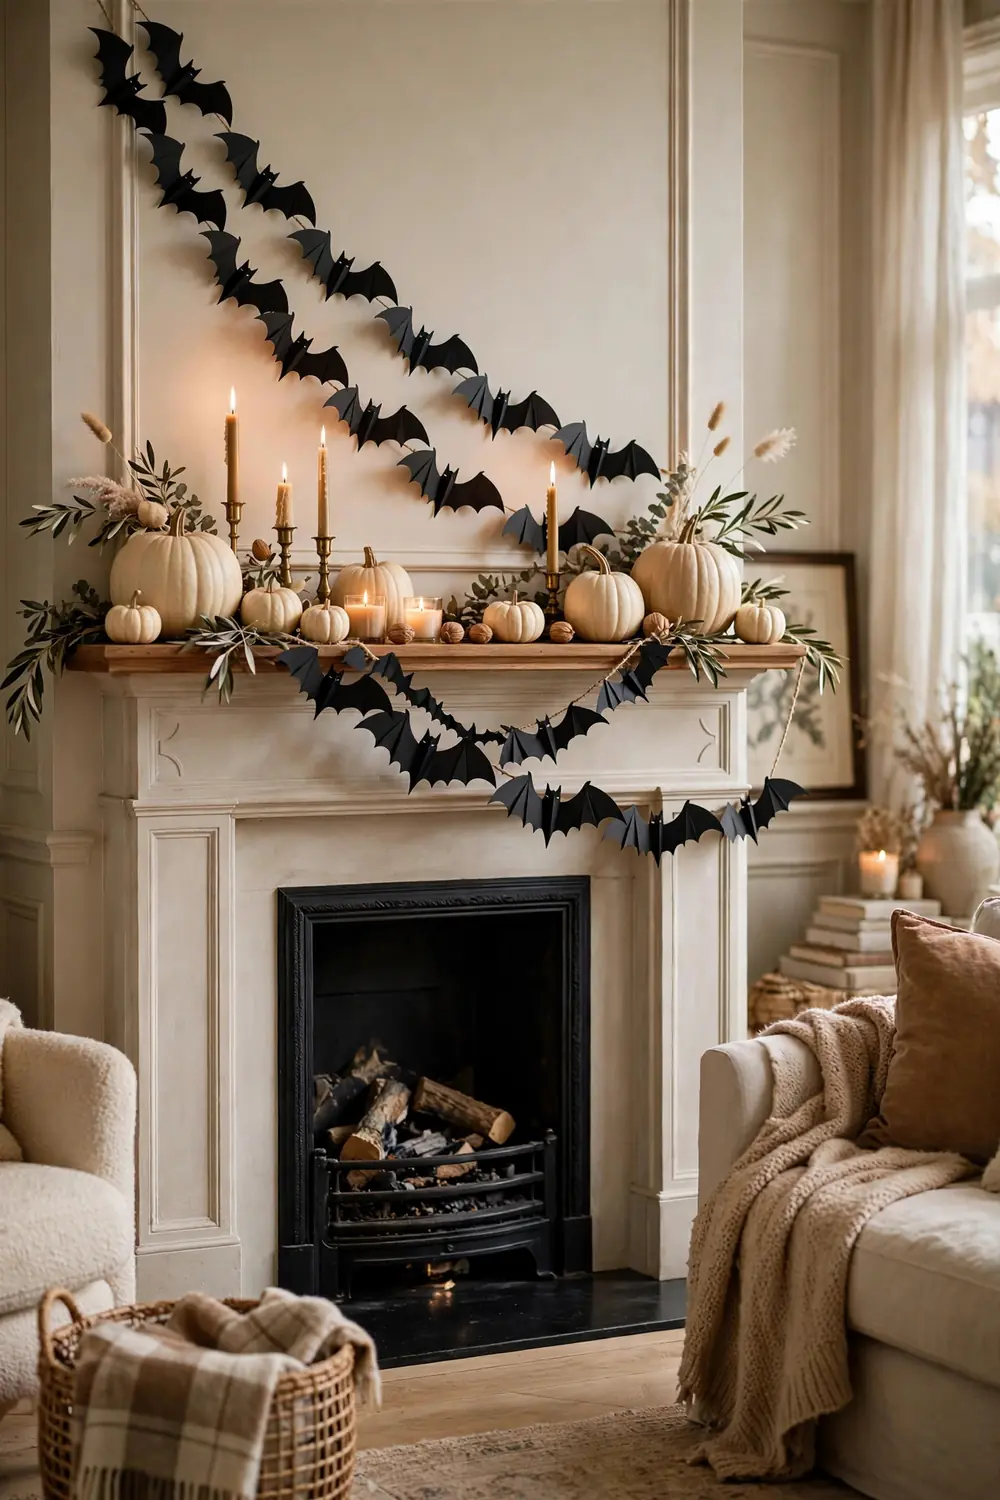
Cut bats from black cardstock and string them across mantels, doorways, and stair rails. Simple, graphic, and incredibly effective in large numbers.
Materials: Black cardstock or construction paper, bat template (print one free online), scissors, string or twine, tape or mini clothespins.
Steps:
- Print or draw a bat template in two or three sizes.
- Trace and cut as many bats as you can stand. Fifty is a good number for one garland.
- Fold each bat slightly down the middle so the wings have dimension.
- Attach to string with tape or mini clothespins, spacing unevenly.
Cost: Under 5 dollars.
Time: 45 minutes for a full garland.
Pro tip: Run the garland diagonally across a wall instead of straight. The diagonal line feels dynamic and designed.
6. Spider Web Windows
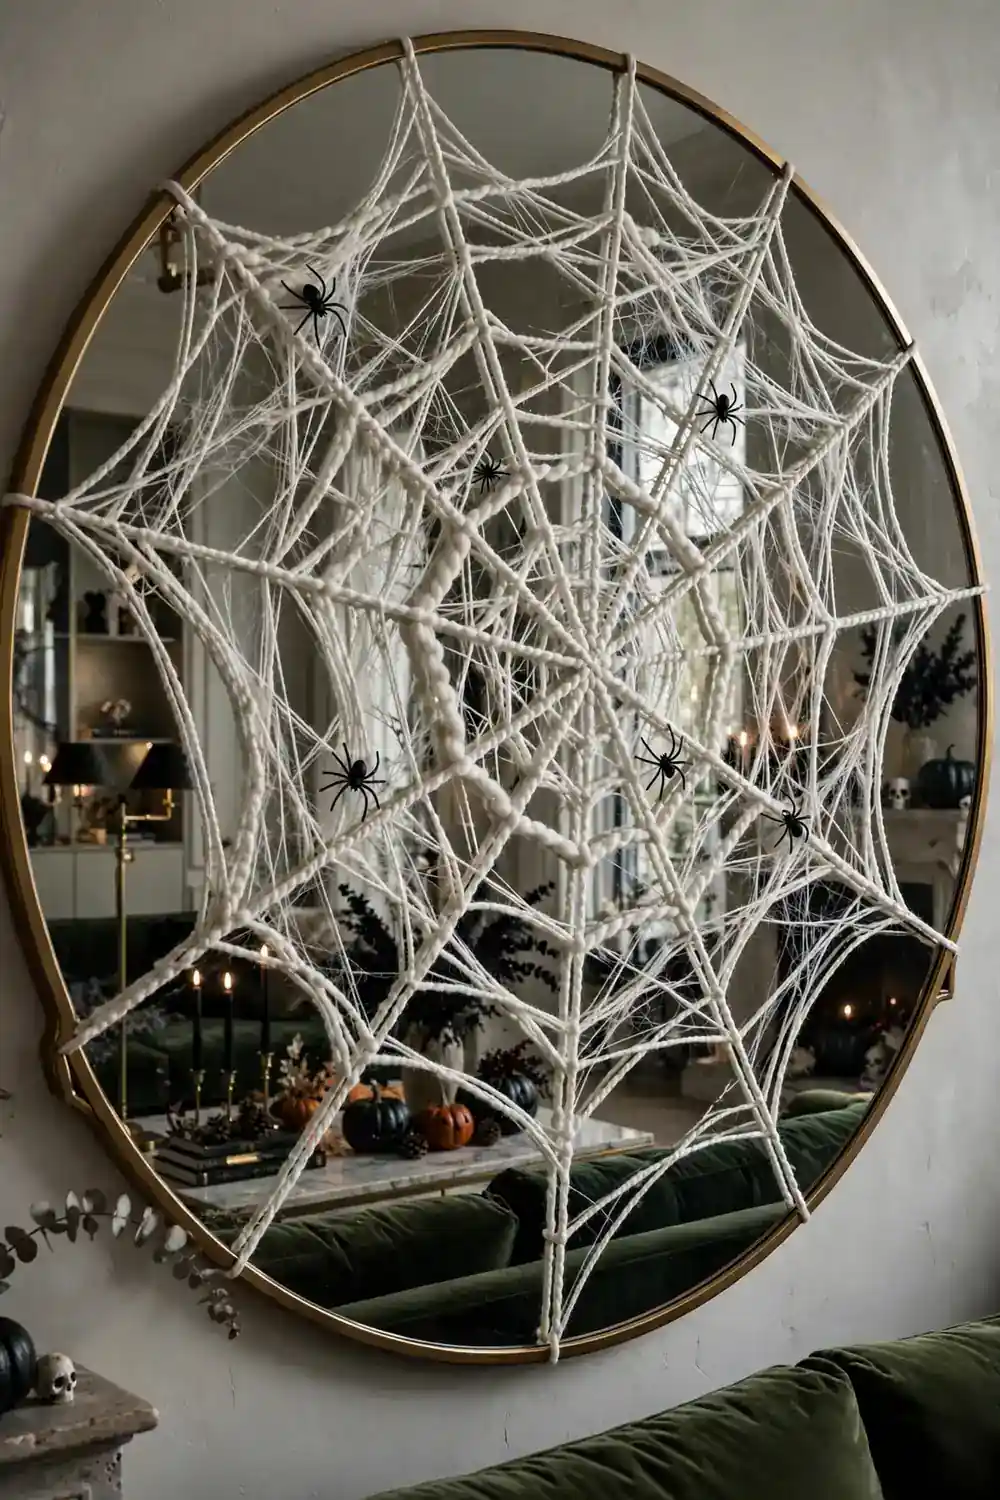
Weave giant webs from white yarn across windows and mirrors. The scale is what makes this impressive, a web that fills a whole window looks intentional and dramatic.
Materials: White or cream yarn, tape, plastic spiders, scissors.
Steps:
- Tape six to eight long yarn strands radiating from a center point on the window, like spokes.
- Starting near the center, weave yarn in a spiral around the spokes, looping loosely.
- Work outward, keeping the spiral slightly saggy for an organic look.
- Attach two or three plastic spiders at different points.
Cost: About 3 dollars.
Time: 20 minutes per window.
Pro tip: Do this on a mirror instead of a window for double the visual impact. The reflection makes the web look twice as big.
7. Rustic Witch Brooms
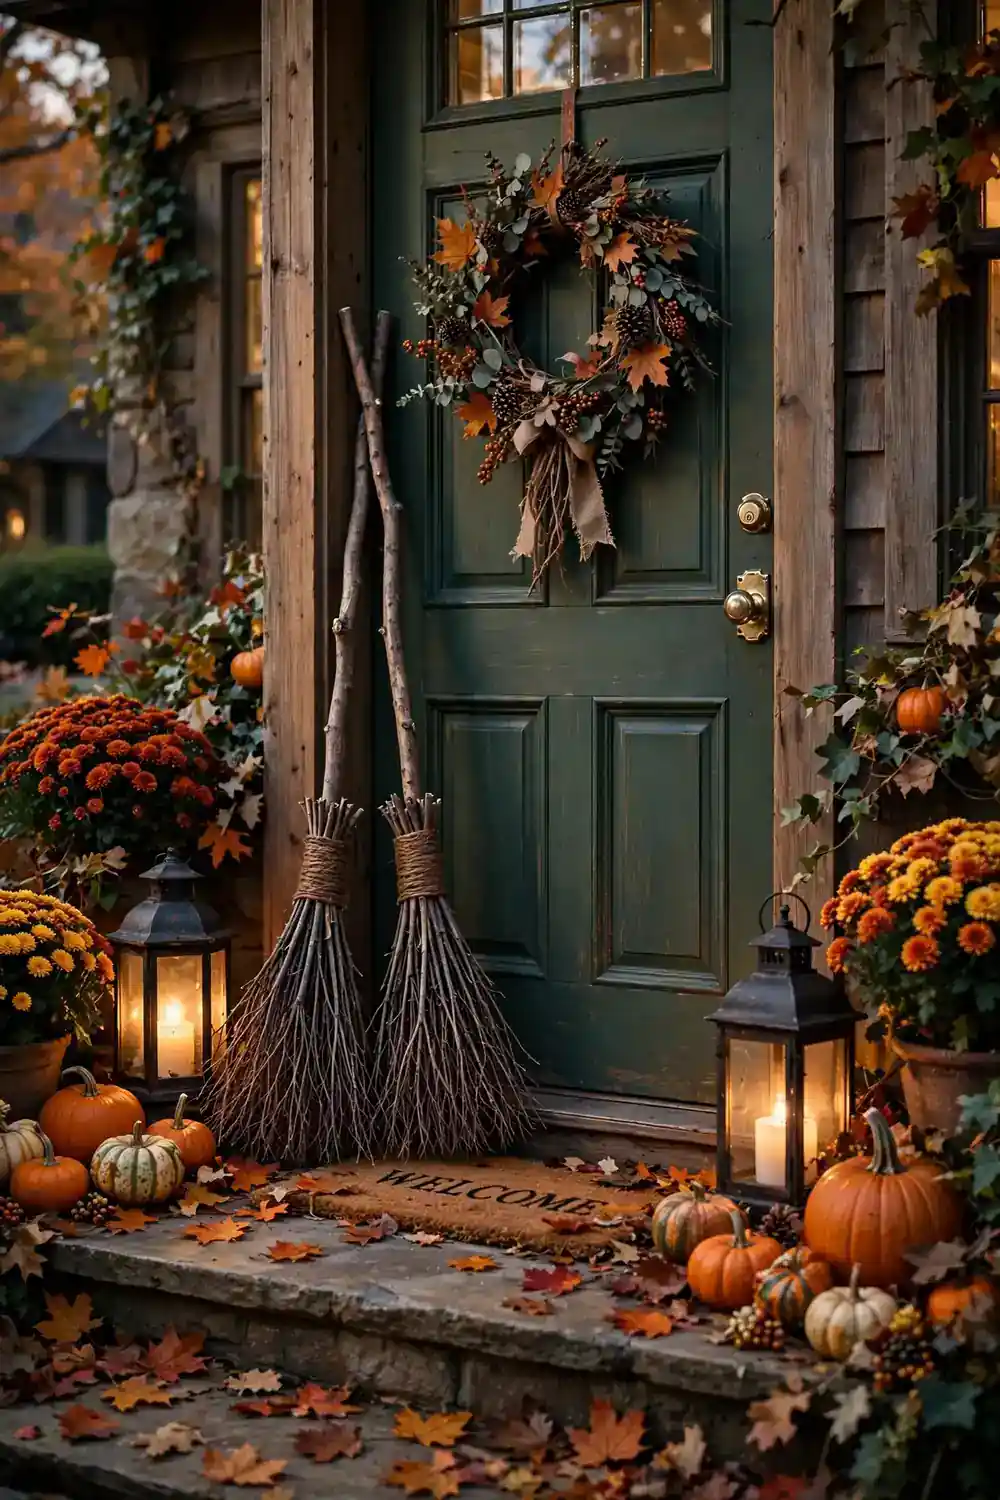
Bundle twigs into broomsticks and lean them by the front door. This is entryway styling that costs nothing if you have a yard, and it sets the Halloween tone before anyone steps inside.
Materials: A sturdy branch for the handle, thin twigs for bristles, twine, pruning shears.
Steps:
- Cut a handle branch about four feet long.
- Gather a thick bundle of thin twigs, all roughly the same length.
- Bind the twig bundle tightly to the bottom of the handle with twine, wrapping several times.
- Trim the bristle ends into a rough point or leave them wild.
Cost: Free to 5 dollars.
Time: 20 minutes.
Pro tip: Lean two brooms at slightly different angles flanking the door, and add a lantern between them. Instant vignette.
8. Black Lace Table Runner
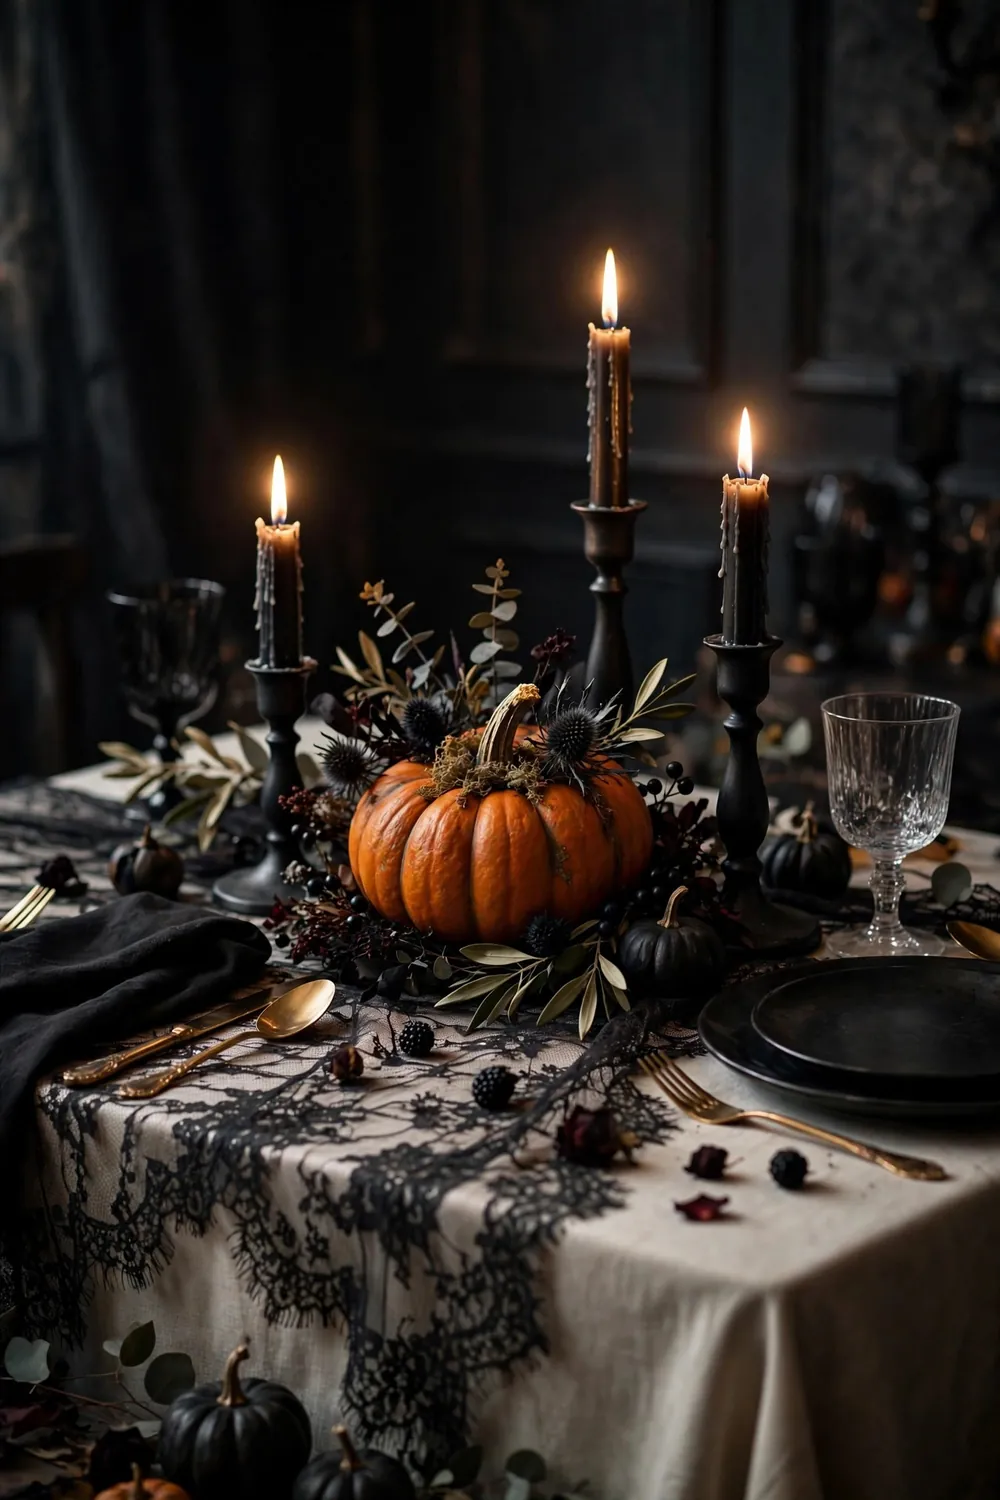
Layer black lace over a cream tablecloth for a dining table that looks straight out of a gothic romance. The contrast does all the work.
Materials: Black lace fabric or lace curtains from a thrift store, cream or white tablecloth, scissors.
Steps:
- Lay the cream tablecloth as your base layer.
- Cut black lace to runner length, or use a full lace panel as an overlay.
- Let the lace hang slightly longer than the base cloth at the ends.
- Style the table with matte black candlesticks and one low pumpkin centerpiece.
Cost: 5 to 15 dollars depending on lace source.
Time: 10 minutes.
Pro tip: Thrift stores are full of lace curtains for a few dollars. They make perfect overlays and nobody will know the difference.
9. Painted Metallic Pumpkins

Spray paint real or faux pumpkins in matte metallics, antique gold, aged bronze, or pewter. Metallic pumpkins are the jewelry of Halloween decor, small doses of shine that elevate everything around them.
Materials: Pumpkins (real or foam), spray primer, metallic spray paint in your chosen finish, drop cloth, gloves.
Steps:
- Clean pumpkins and let dry completely.
- Apply one coat of primer and let dry.
- Spray with metallic paint in light, even coats. Two thin coats beat one thick coat.
- Let cure for 24 hours before handling.
Cost: About 4 dollars per pumpkin including paint share.
Time: 15 minutes active plus drying.
Pro tip: Mix metallic pumpkins with your velvet pumpkins from idea 1. The texture contrast between shine and soft is what looks expensive.
10. Dripping Ghost Candles

Melt white pillar candles slightly and let wax drip down the sides, then paint tiny ghost faces. They look like haunted manor candles and take almost no skill.
Materials: White pillar candles, black craft paint or marker, lighter or heat gun, tray.
Steps:
- Light the candle and let it burn for a few minutes until wax softens at the top.
- Tilt the candle to encourage drips down the sides. Let it cool and harden.
- Repeat once or twice for a properly haunted look.
- Paint or draw small ghost faces on the smooth areas.
Cost: 3 to 8 dollars per candle.
Time: 20 minutes plus cooling.
Pro tip: Group three candles of different heights on a dark tray with some moss around the base. The grouping is everything.
11. Haunted Thrift Store Gallery Wall
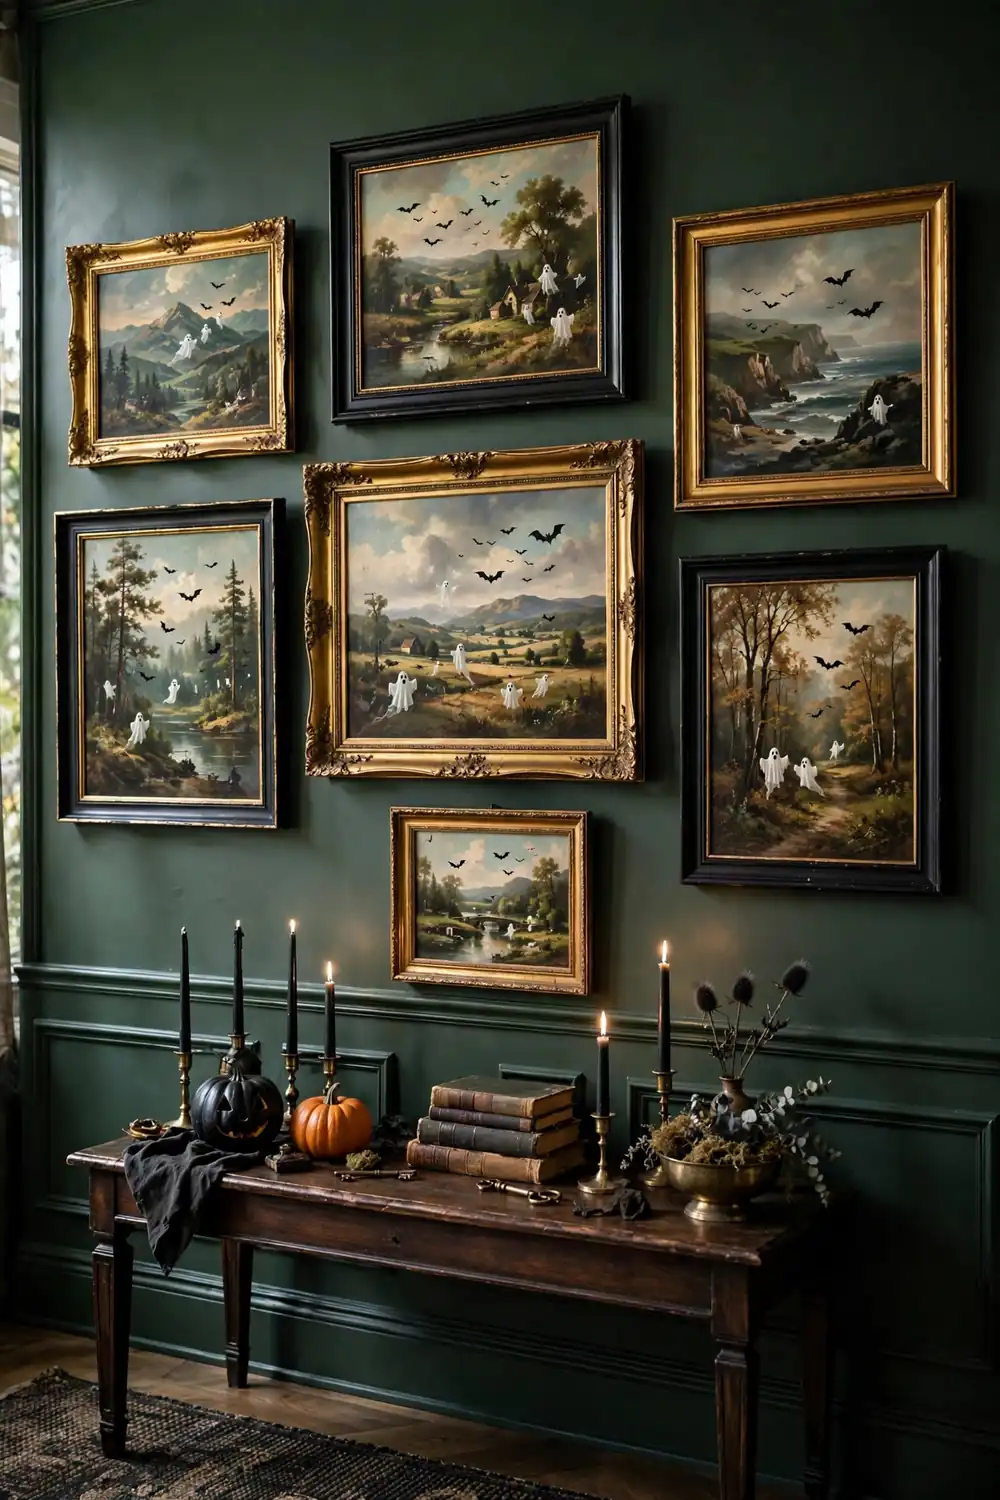
Buy cheap landscape prints from a thrift store and paint spooky additions directly on them, ghosts in the sky, bats over the hills. This viral craft looks like expensive art with a Halloween twist.
Materials: Thrifted framed art (landscapes work best), white and black acrylic paint, small brushes.
Steps:
- Choose prints with skies or open backgrounds where additions will show.
- Paint small white ghosts floating in the sky areas.
- Add tiny black bats or a distant haunted house silhouette.
- Keep additions small and few. Restraint is what makes it art instead of a joke.
Cost: 2 to 5 dollars per piece.
Time: 30 minutes per painting.
Pro tip: Hang three or four together as a gallery wall. The collection reads as a curated art installation.
12. Dried Floral Halloween Wreath

Build a wreath from dried grasses, black painted roses, and bare twigs. Dried and moody beats fresh and bright for Halloween, and it lasts for years. Want to dry your own blooms for this? Our pressed flower decor ideas include a complete drying and pressing guide.
Materials: Grapevine wreath base, dried grasses and wheat, faux black or deep red roses, hot glue, ribbon for hanging.
Steps:
- Glue dried grasses around the wreath base, all pointing the same direction.
- Tuck in roses at three points around the wreath, following the odd numbers rule.
- Add a few bare twigs poking outward for drama.
- Hang with a wide black ribbon.
Cost: 10 to 20 dollars.
Time: 45 minutes.
Pro tip: Spray the finished wreath lightly with matte sealant. It preserves the dried materials and deepens the colors.
13. Skeleton Hand Planters

Pose plastic skeleton hands so they appear to hold small air plants or succulents. Macabre meets botanical, and guests always ask about these.
Materials: Plastic skeleton hands, small air plants or succulents, small pots or moss, glue.
Steps:
- Position the skeleton hand with fingers curled as if holding something.
- Glue the hand to a small base or pot for stability.
- Nestle an air plant or small succulent into the curled fingers.
- Add a little moss around the base to hide the mechanics.
Cost: 5 to 8 dollars each.
Time: 15 minutes.
Pro tip: Place one on a stack of old books next to a candle. It becomes a still life instead of a novelty.
14. Paper Bat Wall Swarm

Cover one wall with dozens of paper bats flying in formation from a corner. The swarm effect is dramatic in photos and costs almost nothing.
Materials: Black cardstock, bat template, removable adhesive dots, scissors.
Steps:
- Cut bats in three sizes, at least sixty total for a good swarm.
- Plan the swarm shape on the floor first, a curved flight path from one corner.
- Stick bats to the wall with removable dots, denser at the start of the path and sparser at the end.
- Fold wings slightly for dimension before sticking.
Cost: Under 8 dollars.
Time: 1 hour.
Pro tip: Start the swarm from behind a piece of furniture or a doorway. Bats appearing to fly out from somewhere look magical.
15. Eerie Mirror Messages
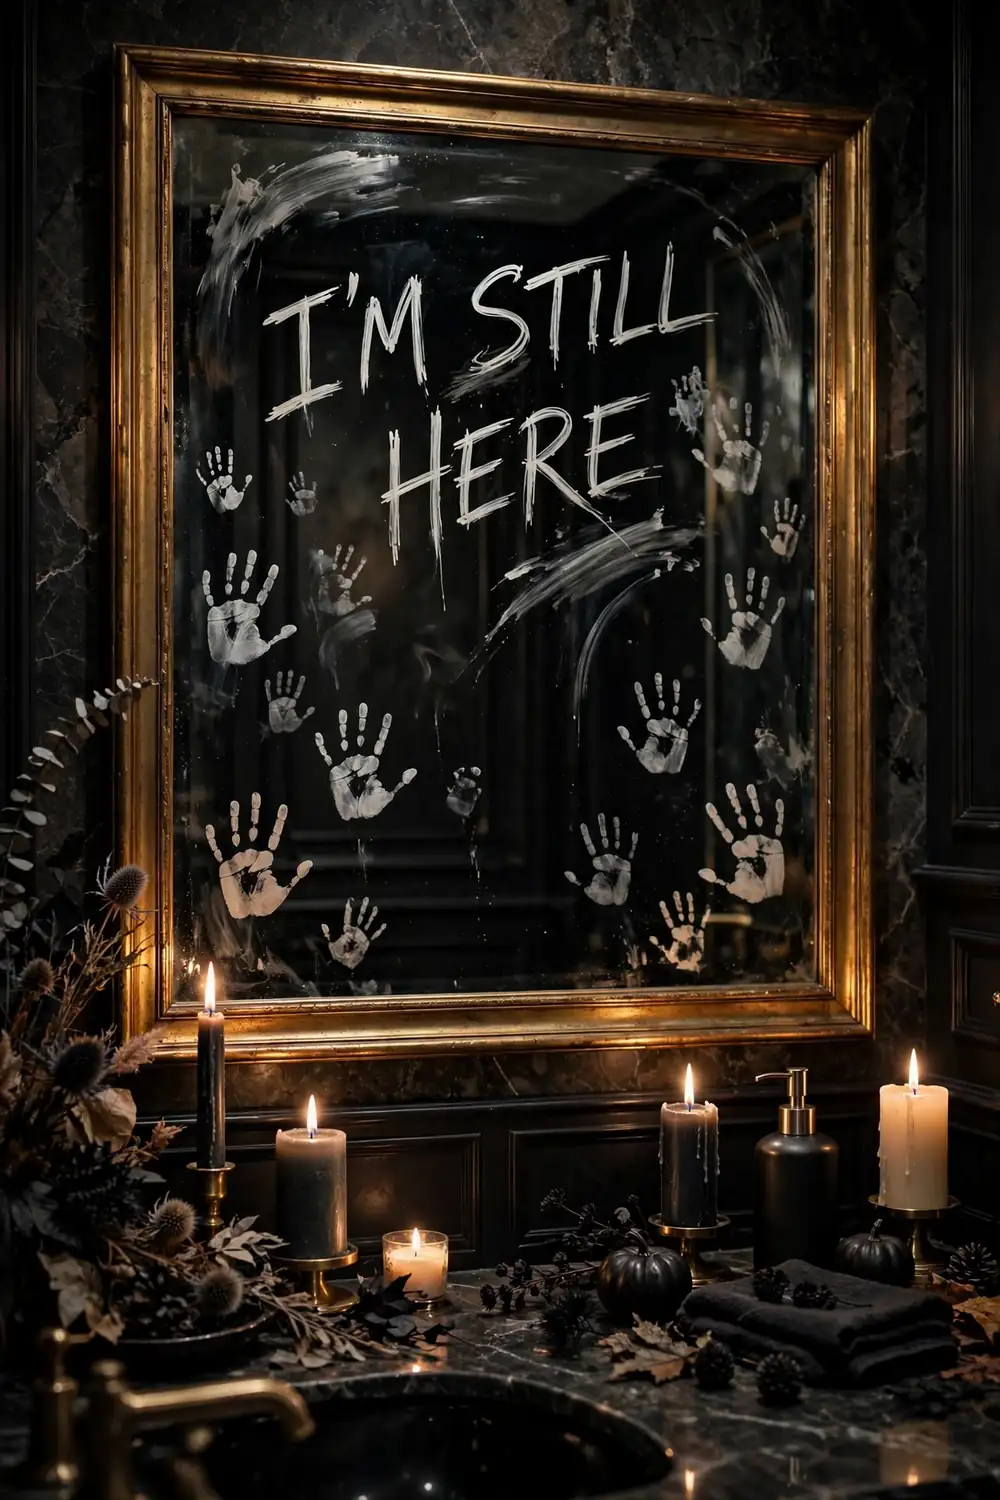
Write spooky messages on mirrors and windows with a glass marker, as if a ghost left a note. It is subtle, surprising, and completely free.
Materials: White or silver glass marker (removable), mirrors or windows.
Steps:
- Clean the mirror surface.
- Write a short message in flowing script: “we see you” or “happy haunting” or “behind you”.
- Add a small handprint or two beside the message.
- Let dry. It wipes off with glass cleaner after Halloween.
Cost: 3 dollars for the marker.
Time: 5 minutes.
Pro tip: Put the message on the bathroom mirror. Guests discover it privately, which makes it ten times creepier and more memorable.
DIY Halloween Mistakes to Avoid
Using every Halloween color at once: Orange plus purple plus green plus black reads as a costume shop. Fix: stick to the tight palette from the five rules. Three colors, one metallic.
Skipping the prep work: Unprimed paint peels, unsealed dried flowers crumble, wet glue shows. Fix: prime, seal, and let everything dry fully. Patience is a crafting supply.
Making everything the same size: Ten identical pumpkins in a row look manufactured. Fix: vary sizes dramatically. One large, two medium, three small beats six mediums every time.
Forgetting lighting: Halloween decor lives or dies by lighting. Fix: every display gets a light source. Battery tealights, string lights, or a single spotlight transform flat decor into atmosphere.
Overcrowding: A shelf crammed with twenty small items looks cluttered, not decorated. Fix: edit ruthlessly. Five strong pieces with breathing room beat fifteen competing ones.
Final Thoughts
The most expensive looking Halloween decor this year is the kind with fingerprints on it. Handmade pieces carry intention, and intention is what luxury actually is. Start with the velvet pumpkins, since they take fifteen minutes and change a whole room, then add one project per weekend until Halloween.
If you love the idea of bold handmade statements, our striped ceiling DIY guide takes the same philosophy to your walls, with a full tutorial for painting crisp FunHaus stripes overhead. And if you love budget friendly seasonal crafts, our dollar tree thanksgiving decor diys carry the same handmade spirit into November.
