
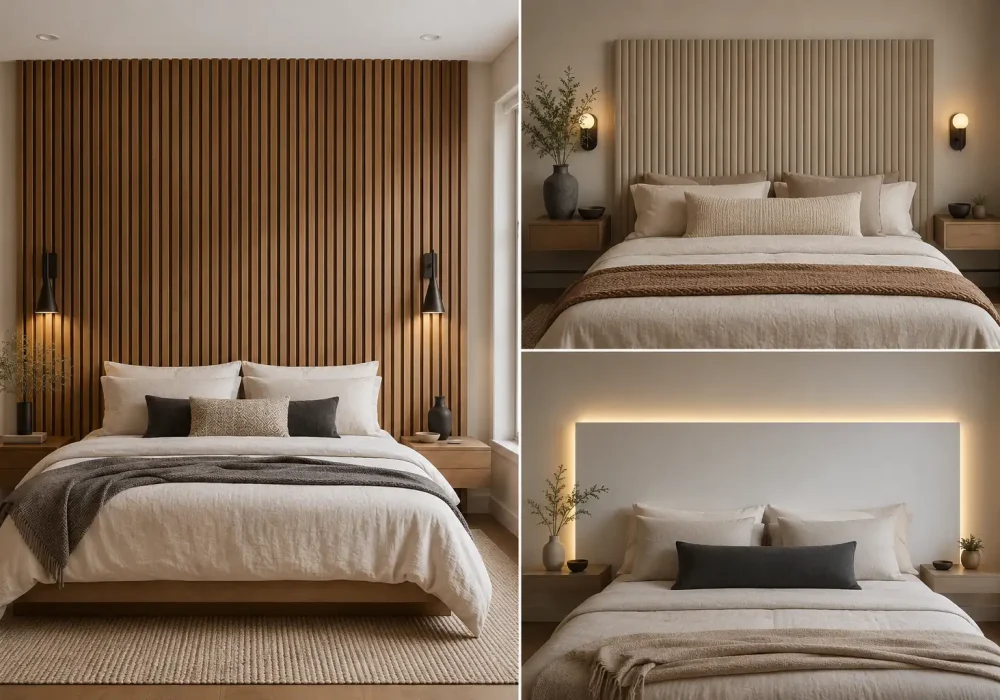
A headboard can completely change the character of a bedroom. It adds height, texture, and a clear focal point, making even a simple bed feel more intentional and finished.
The best part is that you don’t need a custom furniture budget to get that polished look. With the right materials, proportions, colors, and a little creativity, a DIY headboard can look surprisingly high-end.
From upholstered panels and sleek wood slats to fluted surfaces and soft backlighting, these ideas offer plenty of ways to give your bedroom a more refined feel without making the space look overdone.
Modern Headboard Designs That Make a Big Impact
These 11 DIY headboard ideas cover a range of modern approaches, from simple wall treatments to more substantial built-in-looking designs. Each one focuses on clean lines, sophisticated materials, and practical details that can make a bedroom feel more complete while keeping the overall look stylish and achievable.
Also Read: 13 DIY Headboard Ideas for a Stylish Bedroom Makeover
Also Read: 12 Bedroom TV Wall Ideas That Feel Modern, Warm and Refined
1. Build a Full-Wall Vertical Slat Headboard for Instant Impact
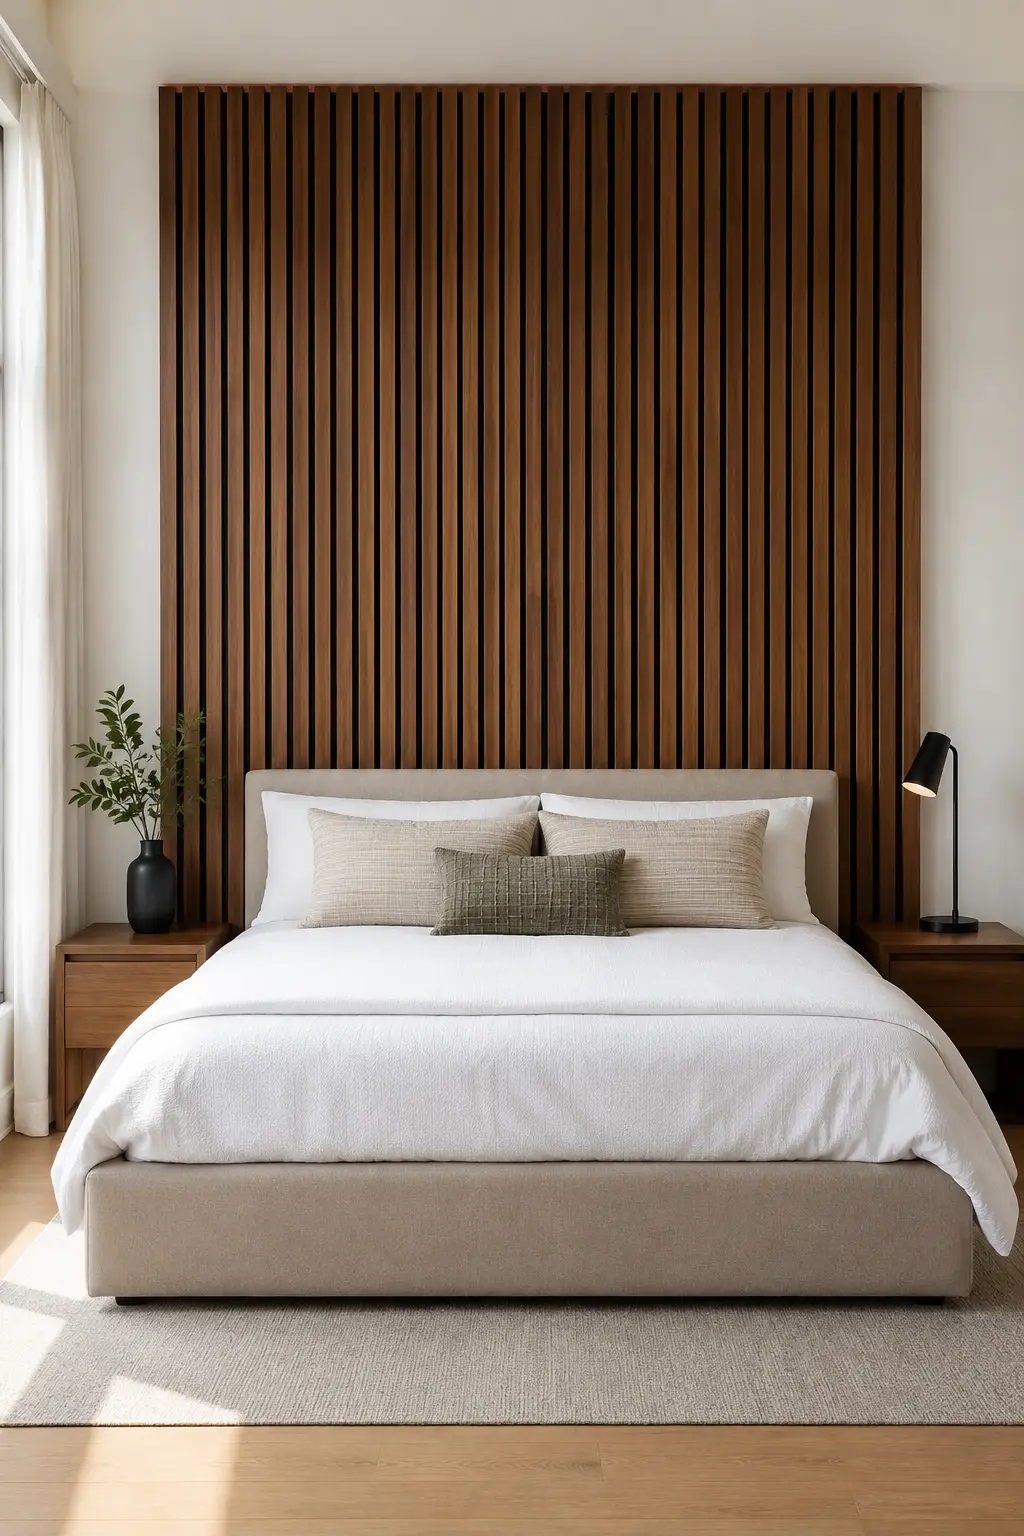
A full-wall slat headboard can turn a simple bedroom into a much more architectural space. This design uses slim vertical wood slats with dark recessed gaps, creating a clean rhythm that draws the eye upward. Extending the treatment beyond the width of the bed makes the entire wall feel intentional rather than simply adding a small headboard behind the pillows.
For a DIY version, mount evenly spaced wood slats over a dark backing panel or painted wall surface. Walnut or medium-brown wood gives the design warmth, while the darker gaps add contrast and depth. Keep the spacing consistent from one end to the other, and make sure the slats are aligned carefully so the finished wall looks professionally installed.
Pair the headboard with simple furniture and light bedding to keep the strong wood feature balanced. A neutral upholstered bed, streamlined nightstands, and minimal lighting work especially well with this approach. Taking the slats nearly to the ceiling also adds height to the room and gives the bed a much more substantial presence.
Pro Tip: Use a dark matte backing behind the slats instead of leaving the wall exposed. The deeper contrast between the wood and gaps makes the vertical pattern look richer and more custom.
2. Add Sculptural Fluted Panels for a Soft Architectural Finish
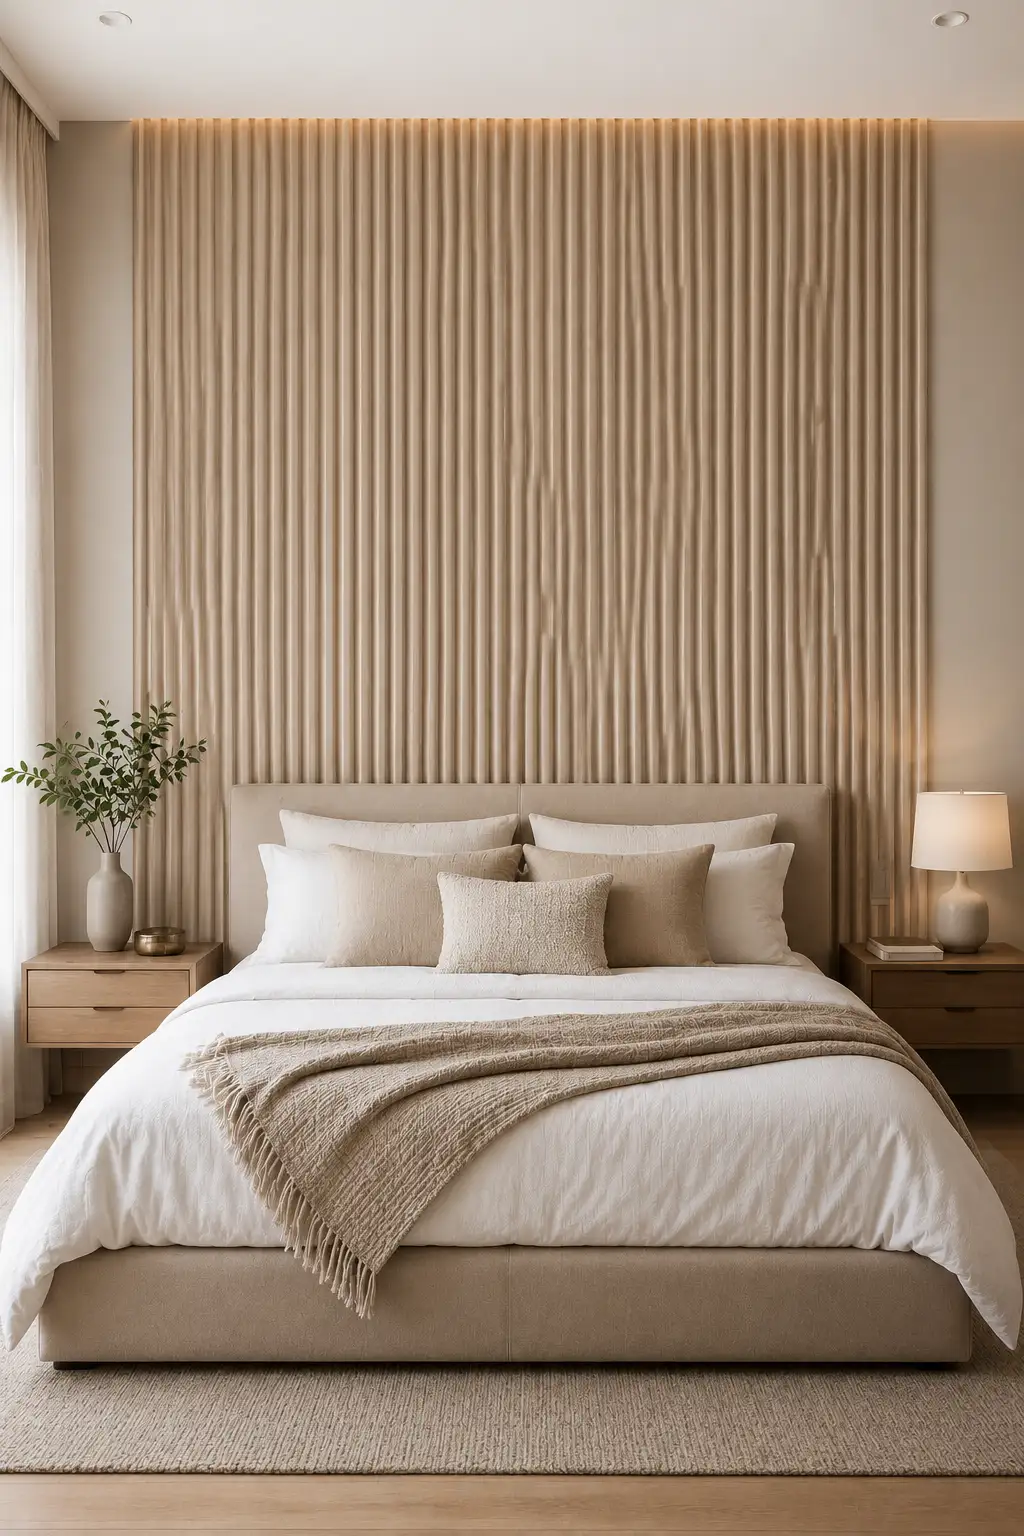
Fluted panels are an easy way to give a bedroom more texture while keeping the overall design clean and contemporary. Their repeated vertical curves create gentle shadows across the wall, making the headboard feel more dimensional without relying on bold colors or complicated decoration.
For a DIY approach, use ready-made fluted MDF or reeded wall panels and install them across a wide section behind the bed. A warm beige, soft greige, or creamy finish works especially well for a refined bedroom. Extend the panels beyond the mattress on both sides and take them high up the wall to create a substantial architectural backdrop.
Keep the rest of the bedroom understated so the texture can do the heavy lifting. Neutral bedding, a simple upholstered bed, streamlined nightstands, and warm bedside lighting complement the panels without competing with them. The result feels custom and sophisticated, even though the installation can be relatively straightforward.
Pro Tip: Add subtle warm lighting near the top of the fluted panels. The light catching the raised texture creates beautiful shadows and gives the headboard a more dimensional, designer finish.
3. Mount a Floating Wood Panel for a Sleek Built-In Effect
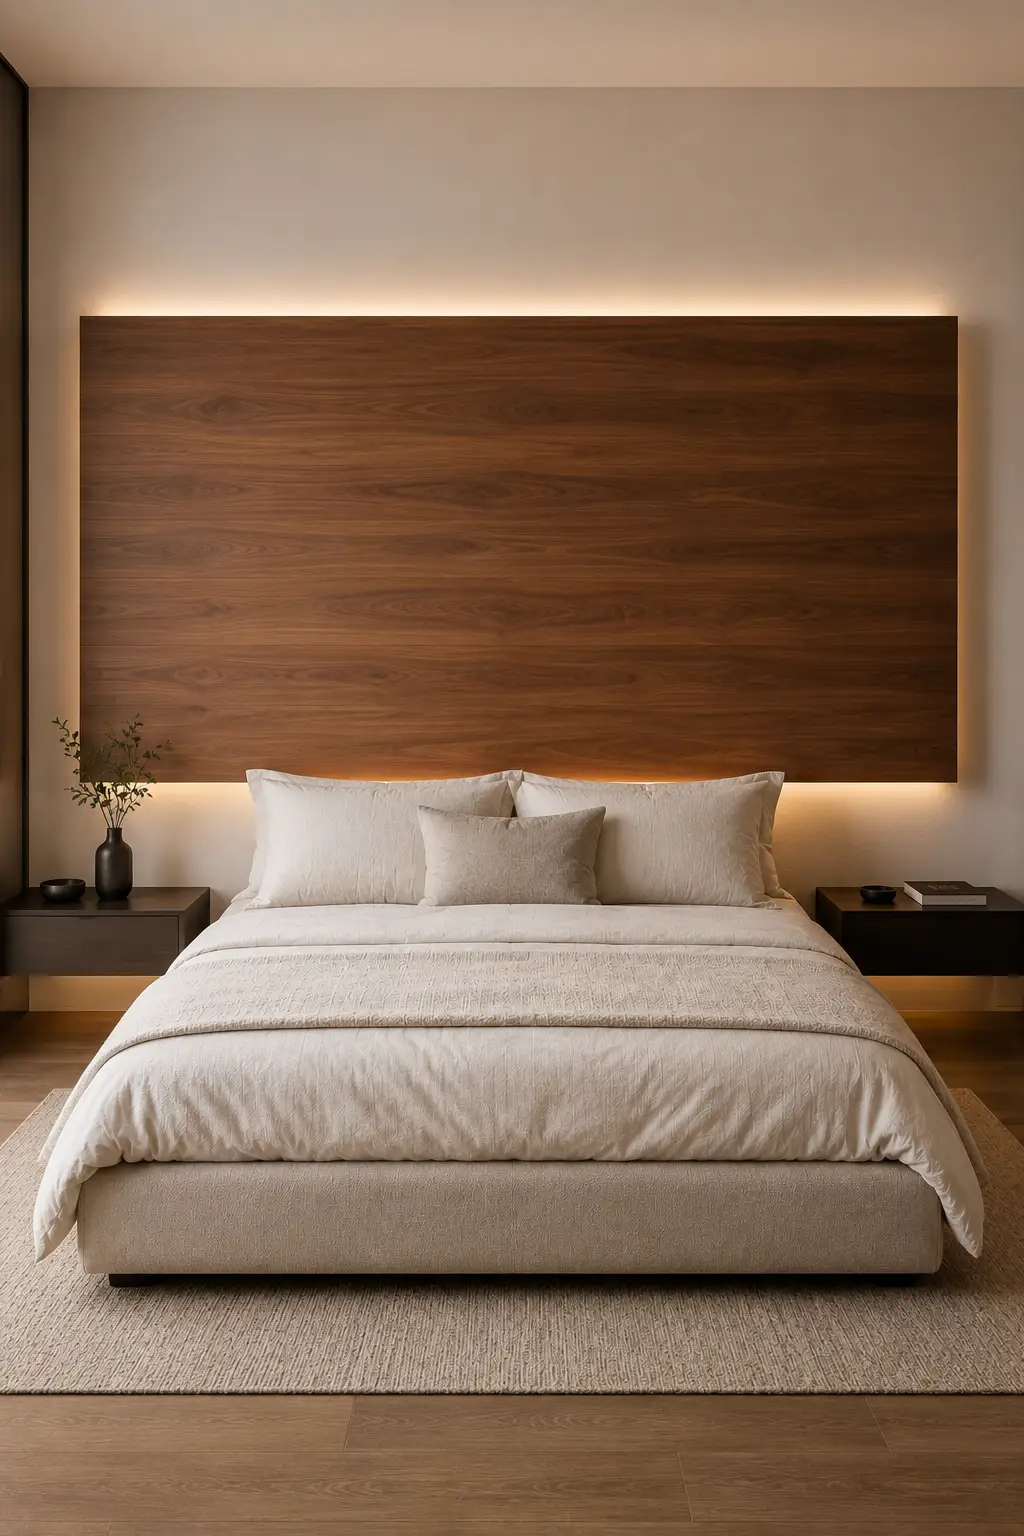
A large floating wood panel can give a bedroom a warm, architectural focal point without the cost of a fully built-in wall. This approach uses a wide rectangular panel mounted behind the bed, with enough space around it to create a clean shadow line. The rich wood finish adds warmth while the simple shape keeps the overall look contemporary.
For a DIY version, choose a smooth plywood or MDF panel and finish it with a quality walnut stain or wood veneer. Mount the panel securely away from the wall so it appears to float, then position it slightly wider than the mattress. The clean horizontal shape works particularly well when paired with a low-profile bed and simple nightstands.
You can take the design a step further by adding concealed LED lighting behind the panel. A soft warm glow around the edges highlights the wood grain and creates depth against the wall, especially in the evening. Keep the bedding and surrounding furniture understated so the floating panel remains the main feature.
Pro Tip: Leave a consistent gap around the entire panel and hide the LED strip behind the upper or side edges. The even shadow line will make the installation look much more like a custom designer feature.
4. Combine Contrasting Panels for a Custom Designer Headboard
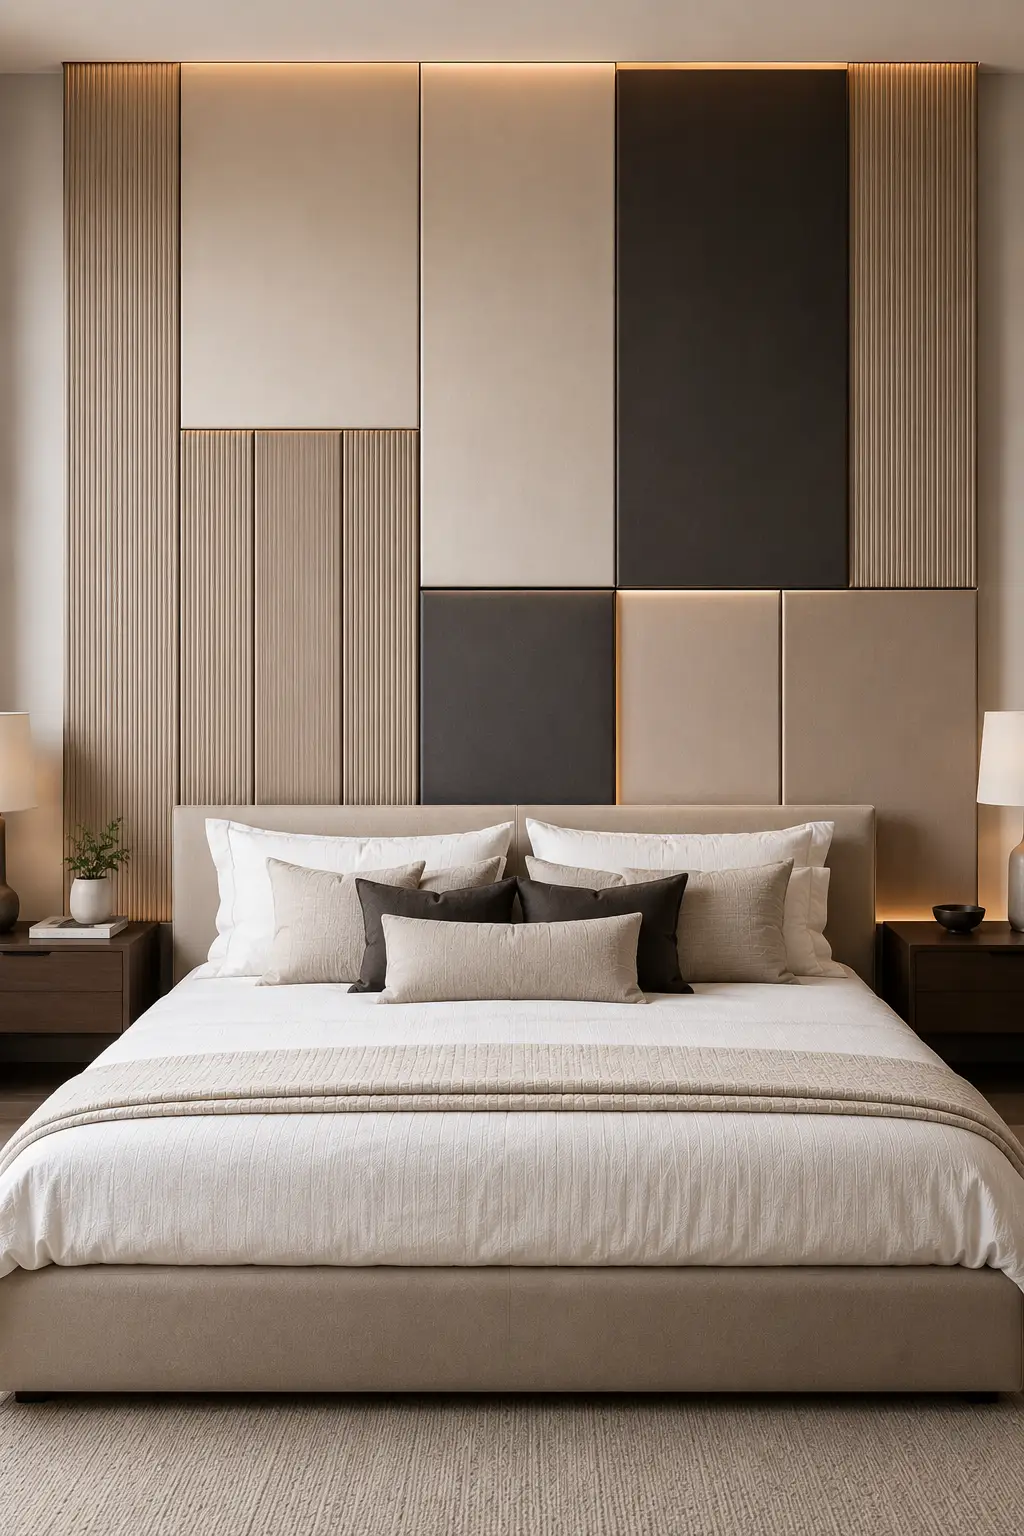
A mixed-panel headboard is a great way to create a statement wall without relying on complicated shapes or ornate details. This design combines different panel finishes, including smooth upholstered sections and finely textured vertical panels, to create a balanced composition. The contrast makes the headboard feel custom and gives a simple bedroom much more architectural character.
For a DIY version, plan the arrangement before cutting or mounting anything. Combine a few larger rectangular MDF panels with narrower fluted sections, then use a restrained palette such as warm beige, taupe, charcoal, and soft brown. Keep the panel edges clean and consistent, with small gaps between sections to emphasize the individual shapes.
The beauty of this approach is that you can adapt the layout to your own wall and budget. Use fabric-covered panels where you want softness and texture, while painted or fluted MDF can fill the remaining sections. Add discreet warm lighting along selected edges to emphasize the different levels and make the finished installation feel more intentional.
Pro Tip: Stick to two or three complementary finishes rather than using too many materials. Repeating the same tones across different panel textures will keep the design sophisticated instead of visually chaotic.
5. Divide the Wall Into Two-Tone Panels for a Tailored Look
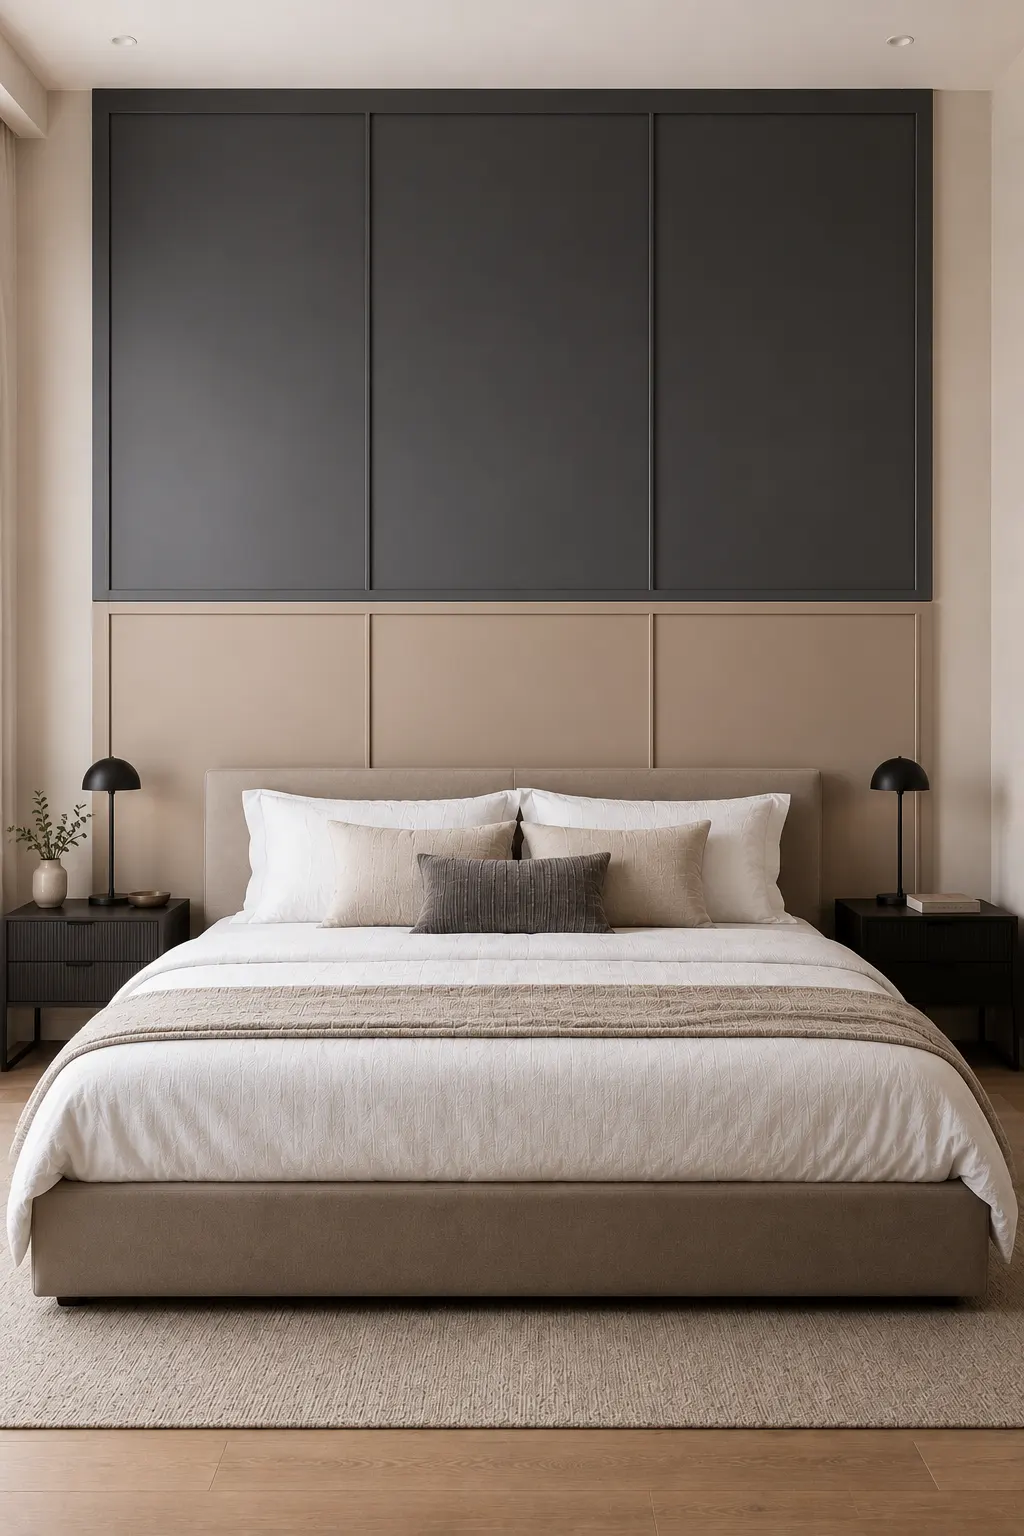
A two-tone panel headboard is a simple way to create a strong architectural feature without covering the entire wall in complicated materials. The design uses clean rectangular panels in two contrasting shades, giving the bed a structured backdrop while keeping the overall bedroom calm and sophisticated. The combination of deep charcoal and warm beige works particularly well for a modern, high-end look.
To recreate this idea, use MDF or plywood to form evenly sized rectangular panels and divide them into two horizontal sections. Paint the upper panels in a deeper shade such as charcoal, espresso, or muted black, while keeping the lower section warm beige or greige. Thin recessed gaps between the panels help define each section and make the installation look more custom.
The key is to keep the geometry precise and the color palette controlled. Center the composition around the bed and extend the panels wider than the mattress so the feature feels substantial. Simple black bedside tables, neutral bedding, and understated lighting can complement the contrast without taking attention away from the headboard.
Pro Tip: Use the darker color on the upper section to create stronger visual depth, but choose a matte finish rather than high gloss. It will give the panels a more refined architectural appearance.
Also Read: 12 Bed Frame Designs That Make the Bedroom Feel Complete
Also Read: 11 Guest Bedroom Ideas That Look Elegant and Feel Cozy
6. Layer Horizontal Upholstered Panels for a Tailored Bedroom
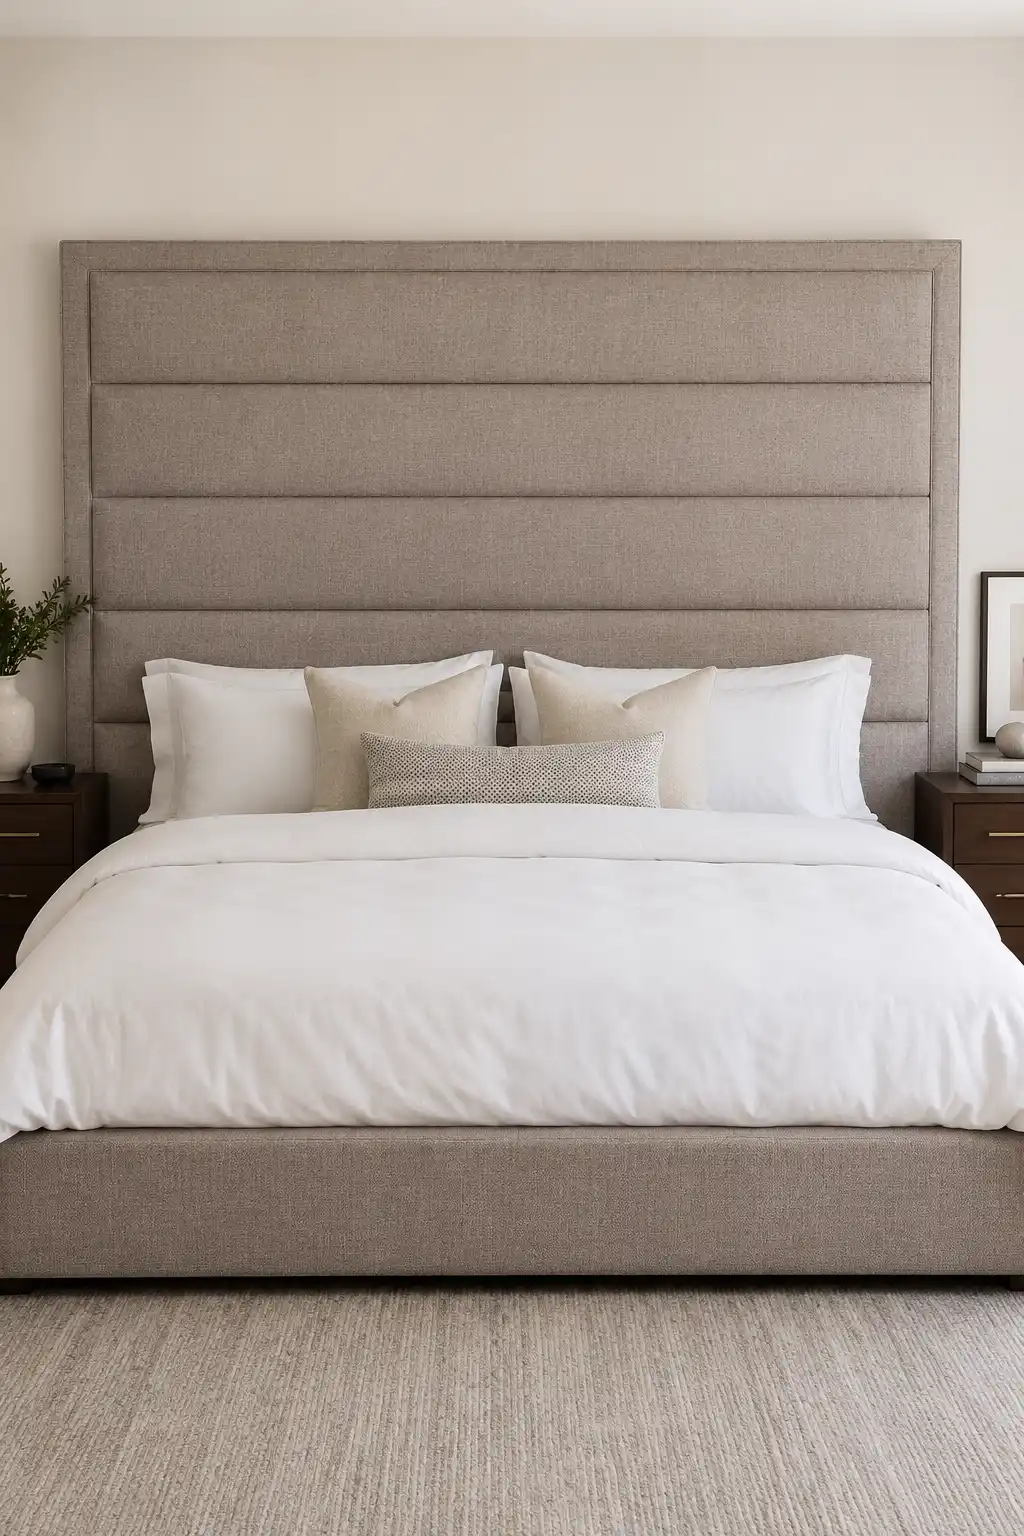
A horizontal panel headboard brings a softer, more structured look to the bedroom while keeping the design beautifully simple. Instead of using one large uninterrupted upholstered surface, this version divides the headboard into several long horizontal sections. The subtle seams create depth and give the piece a custom furniture appearance.
To make this yourself, build a sturdy rectangular frame and divide it into several equal sections before adding foam and upholstery. A textured fabric in taupe, greige, warm gray, or cream works well for this style. Keep each panel evenly aligned and maintain consistent spacing between the sections so the finished headboard has a clean, professional appearance.
This design works particularly well when the headboard is wider than the mattress and positioned behind a low-profile upholstered bed. Simple white bedding and dark or warm wood nightstands provide enough contrast to highlight the soft fabric. Because the horizontal lines naturally draw the eye across the wall, the headboard can also make the bed feel wider and more substantial.
Pro Tip: Choose a fabric with a tight, subtle weave and keep the panel seams crisp. Small variations in alignment are much more noticeable on a geometric headboard, so careful measuring is worth the extra time.
7. Paint an Oversized Arch Behind the Bed for a Modern Focal Point
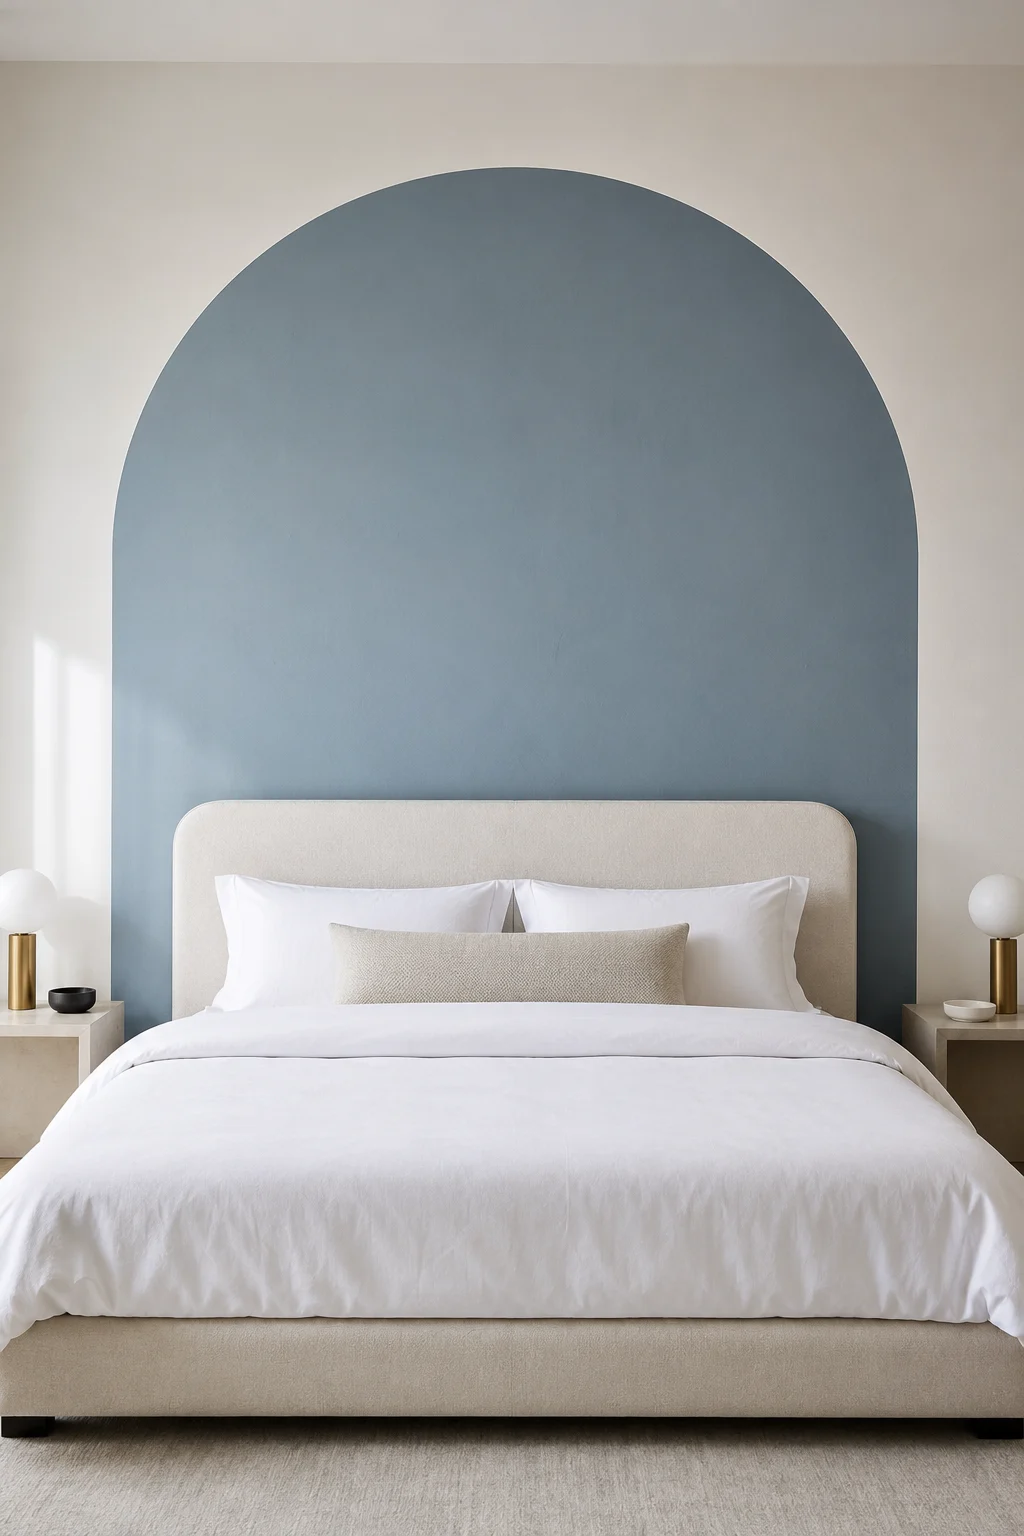
An oversized painted arch is one of the simplest ways to create the look of a custom headboard without building a large structure. By extending the color well above and around the bed, the painted shape becomes a strong architectural feature that instantly gives the wall more character. The soft curve also adds contrast to the straight lines of the bed and furniture.
For a DIY version, mark the center point above the bed and use a simple string-and-pencil method to create an even arch. Choose a sophisticated shade such as dusty blue, muted charcoal, warm taupe, or deep olive, depending on the mood you want. Paint the shape wider than the mattress so it frames the entire sleeping area rather than looking like a small decorative accent.
Keep the physical headboard relatively simple so the painted arch remains the visual focus. A rounded upholstered bed in cream or greige works beautifully with this treatment, while minimal nightstands and simple lighting keep the composition balanced. Because the design relies mainly on paint, it can also be changed later without the commitment of a permanent wall installation.
Pro Tip: Use painter’s tape carefully along the curved edge and apply two thin coats rather than one heavy coat. A perfectly smooth outline will make this inexpensive project look much more professionally finished.
8. Cover a Wide Wall Panel in Textured Fabric for a Luxe Finish
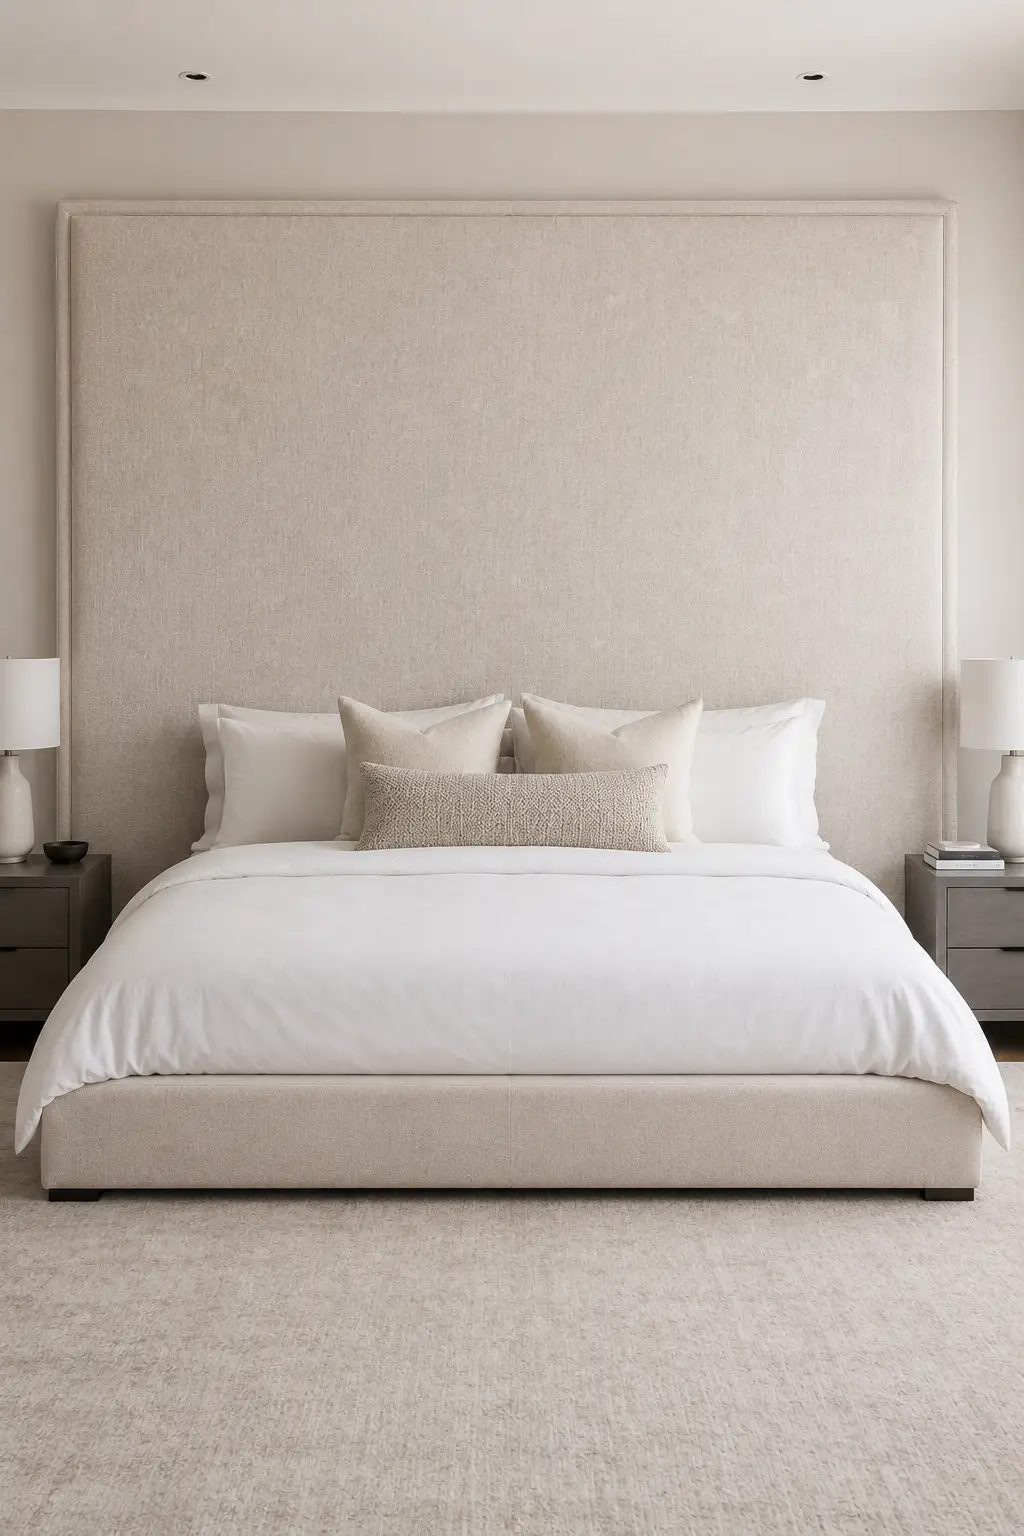
A wide fabric-covered headboard can make a bedroom feel softer, calmer, and far more finished. Instead of stopping at the edges of the mattress, this design stretches beyond the bed to create a broad upholstered backdrop. The generous proportions give the bedroom a tailored look while keeping the overall design simple and timeless.
For a DIY version, build a lightweight rectangular frame from plywood or timber and cover it with upholstery foam before wrapping it in fabric. A warm cream, oatmeal, greige, or light taupe fabric will keep the look refined and versatile. Make the panel substantially wider than the mattress and tall enough to create a strong visual anchor behind the pillows.
The beauty of this approach is its clean, uninterrupted surface. You don’t need complicated patterns, decorative trim, or multiple materials to make an impact. Pair the headboard with crisp white bedding, streamlined nightstands, and simple lamps to let the texture of the fabric and oversized proportions carry the design.
Pro Tip: Choose a durable upholstery fabric with a fine woven texture and use a slightly thicker foam underneath. The added padding gives the panel a softer, more substantial appearance that feels closer to custom furniture.
9. Turn a Full Pegboard Wall Into a Functional Headboard
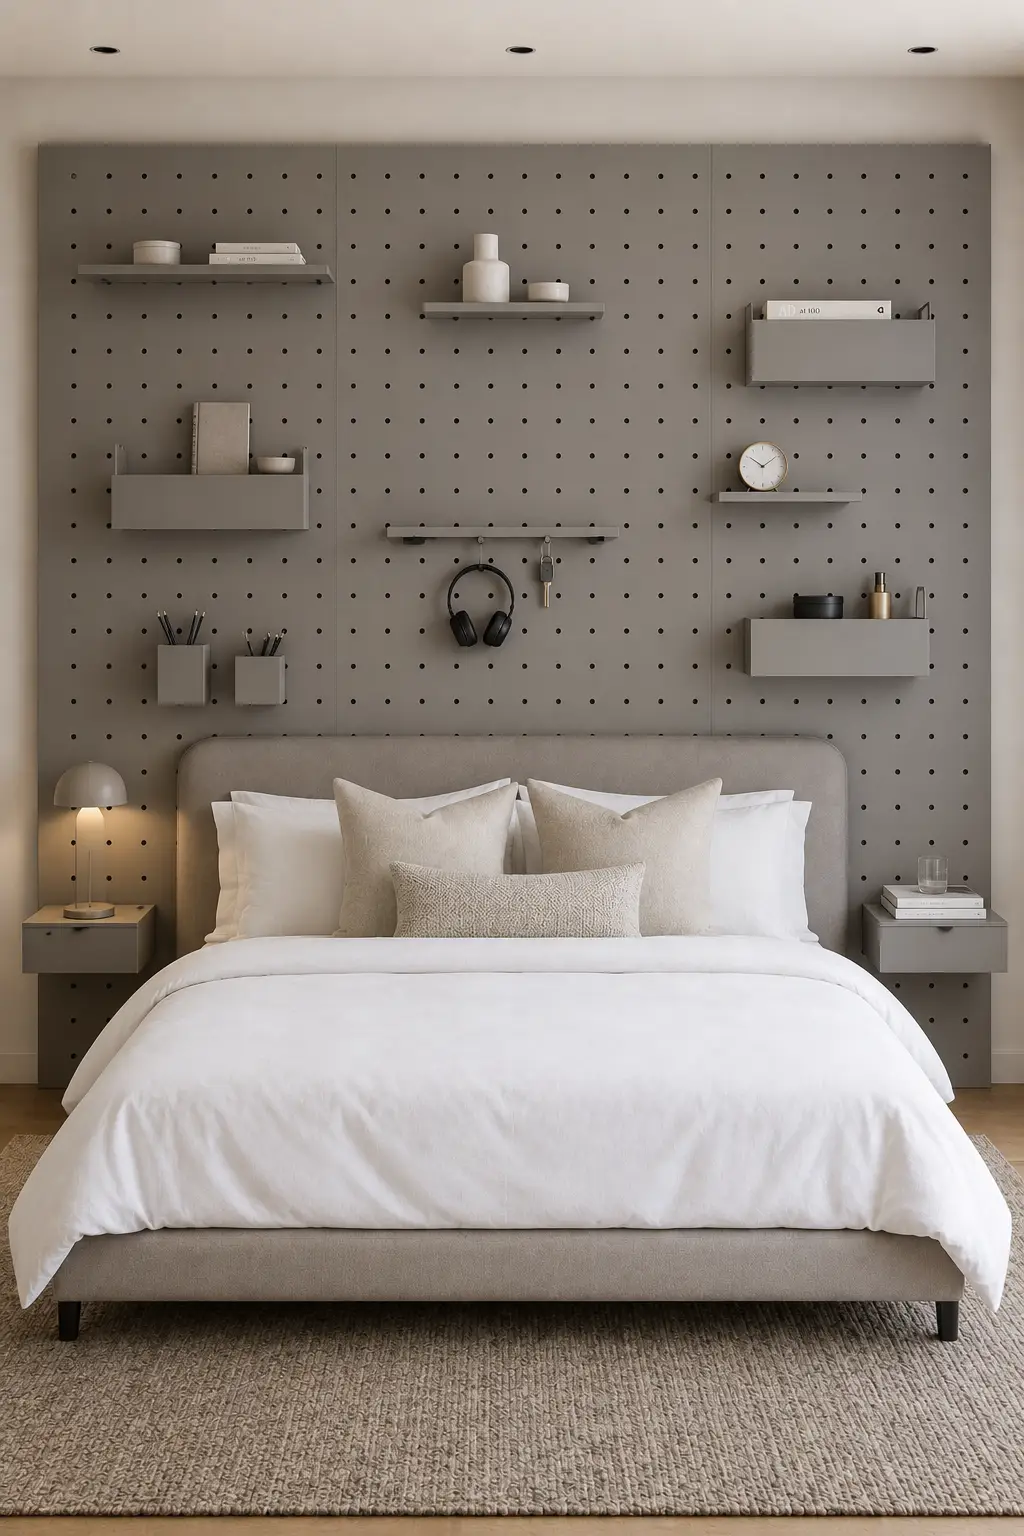
A pegboard headboard brings a practical twist to the traditional bedroom focal wall. Instead of simply adding texture behind the bed, the entire surface can provide flexible storage for books, small accessories, shelves, and everyday essentials. The result feels modern and organized while giving you the freedom to change the arrangement whenever your needs change.
For a DIY version, install large pegboard panels across the wall behind the bed and paint them in a sophisticated neutral such as warm gray, taupe, or charcoal. Add slim shelves, small compartments, and hooks at different heights, but keep the arrangement intentionally balanced. The storage should frame the bed rather than overwhelm it with too many objects.
A simple upholstered bed works particularly well underneath a pegboard installation because its soft texture balances the structured grid above it. Keep the accessories limited to useful pieces and a few decorative objects, such as books, a small clock, or a minimalist lamp. This keeps the headboard functional without making the bedroom look like a workspace.
Pro Tip: Paint the pegboard, shelves, and storage accessories in closely related shades for a built-in appearance. Matching finishes will make the entire wall feel like one cohesive custom headboard.
10. Frame the Bed With a Full-Wall Grid of Modern Mirrors
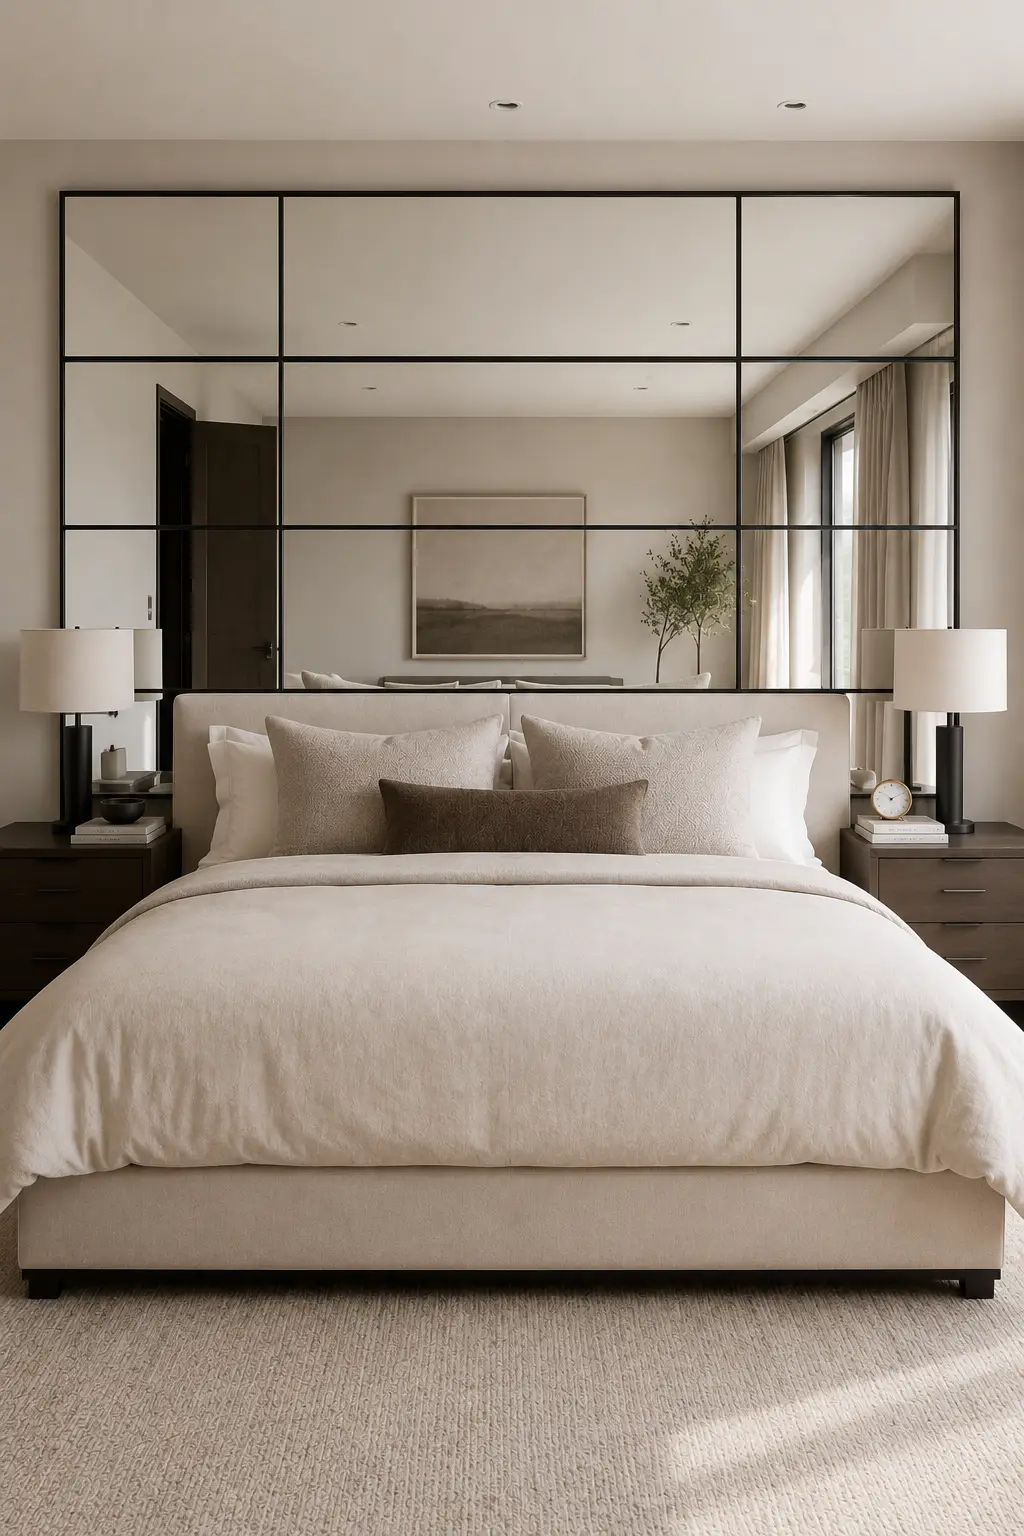
A mirrored headboard wall can make a bedroom feel brighter, wider, and more sophisticated while giving the bed a strong architectural backdrop. Instead of using one oversized mirror, this approach divides the surface into large rectangular sections with slim dark frames. The grid adds structure and keeps the reflective surface from feeling too plain.
For a DIY version, use mirror panels sized to create a balanced grid behind the bed, then frame each section with narrow black or dark bronze trim. Plan the layout carefully so the vertical and horizontal lines remain perfectly aligned. The installation should extend wider than the bed and rise high enough to create a substantial feature wall.
The reflected light and surrounding furniture will naturally add depth to the bedroom, so there’s no need for excessive decoration. Pair the mirrors with neutral bedding, simple bedside tables, and streamlined lamps. If the room receives good daylight, the reflections can make the entire space feel noticeably more open.
Pro Tip: Choose a thin frame profile and keep the grid spacing consistent. Chunky frames can make the wall feel heavy, while narrow, evenly spaced lines create a cleaner designer look.
11. Add Concealed LED Lighting Behind a Floating Headboard
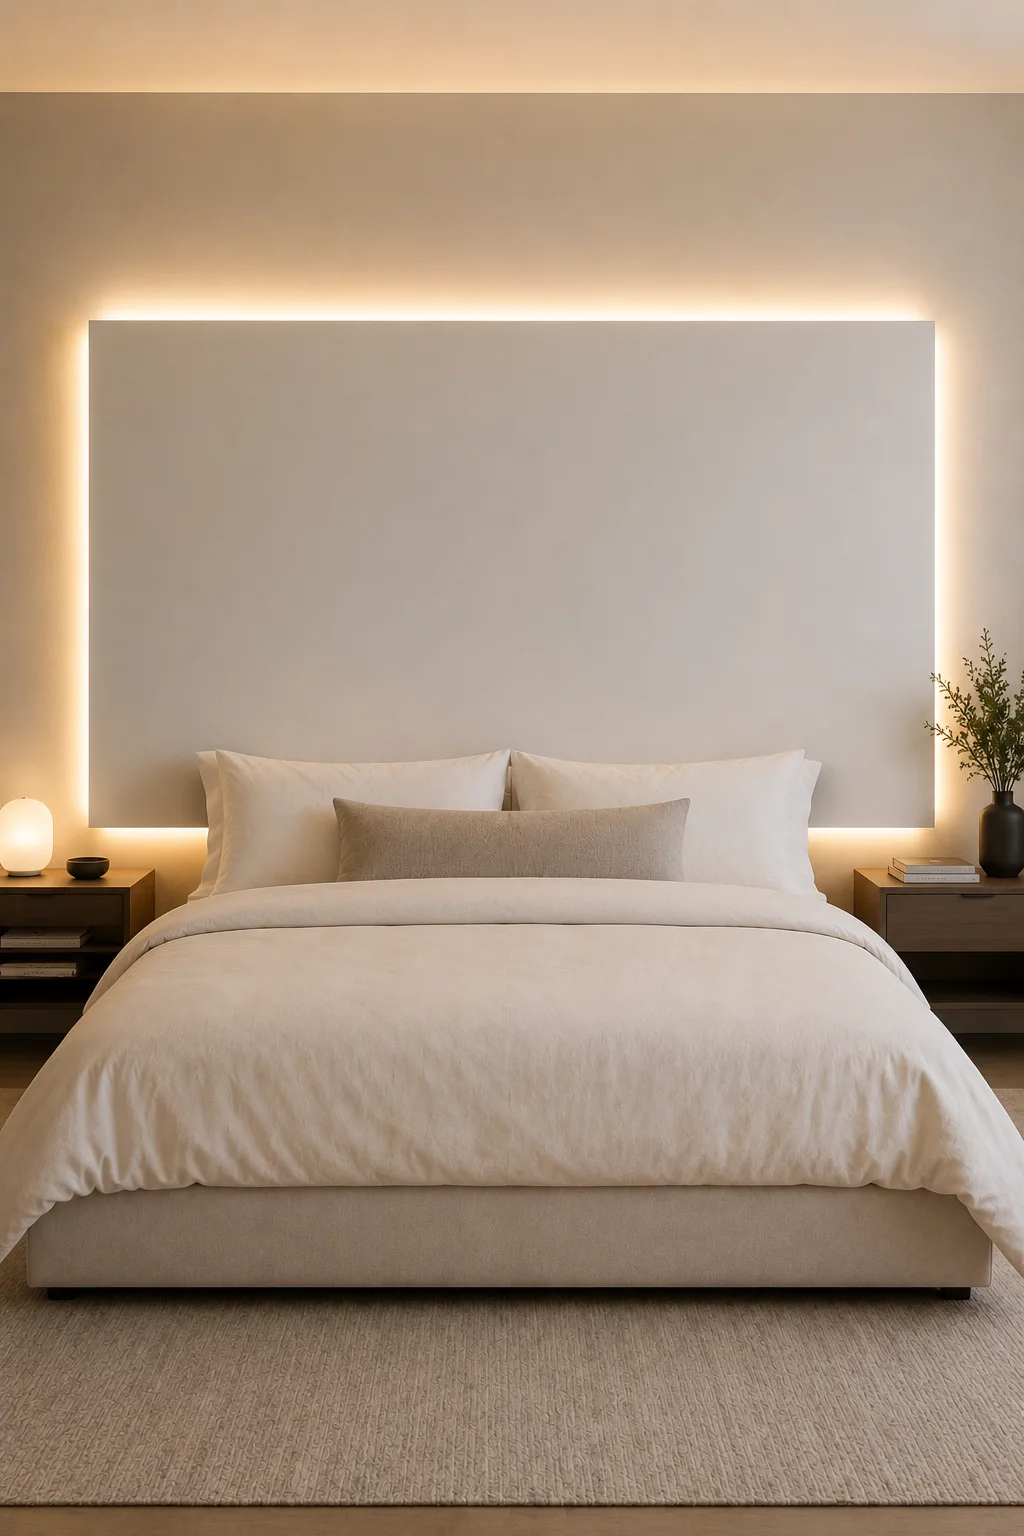
A backlit headboard can give a bedroom an instantly elevated look without adding complicated shapes or excessive decoration. This design uses a large, simple wall panel with concealed warm lighting around the edges, creating a soft glow against the wall. The indirect light adds depth and makes the headboard feel like a custom architectural feature.
For a DIY version, start with a smooth MDF or plywood panel finished in warm white, cream, or soft greige. Mount it slightly away from the wall so there is enough space to hide an LED strip behind the edges. Choose warm-white lighting rather than cool or colored LEDs to create a calm, sophisticated atmosphere that works well with neutral bedding and modern furniture.
The size of the panel is what makes this idea particularly effective. Make it wider than the mattress and tall enough to extend well above the pillows, then keep the surrounding furniture relatively simple. When the lights are switched on in the evening, the soft illumination outlines the panel and gives the entire bed wall a subtle designer feel.
Pro Tip: Use a dimmable warm-white LED strip and hide it completely behind the panel. The goal is to see the soft glow rather than the individual bulbs, which creates a much more refined finish.
Also Read: 12 Modern Boys’ Room Decor Ideas That Redefine Cool Style
Bringing Your DIY Headboard Design Together
A great DIY headboard doesn’t have to be complicated to make an impact. The strongest designs in this collection rely on a few well-chosen elements such as scale, texture, clean geometry, thoughtful lighting, and a controlled color palette. Whether you prefer warm wood, upholstered panels, fluted surfaces, or a painted wall treatment, the right proportions can make a simple project feel surprisingly custom.
Before starting, consider the size of your wall, the width of your bed, and the existing finishes in your bedroom. Choose one clear focal treatment and let the rest of the space support it rather than compete with it. With careful measuring, quality materials, and attention to the small finishing details, you can create a DIY headboard that gives your bedroom the polished, designer-level character you’re after.
