
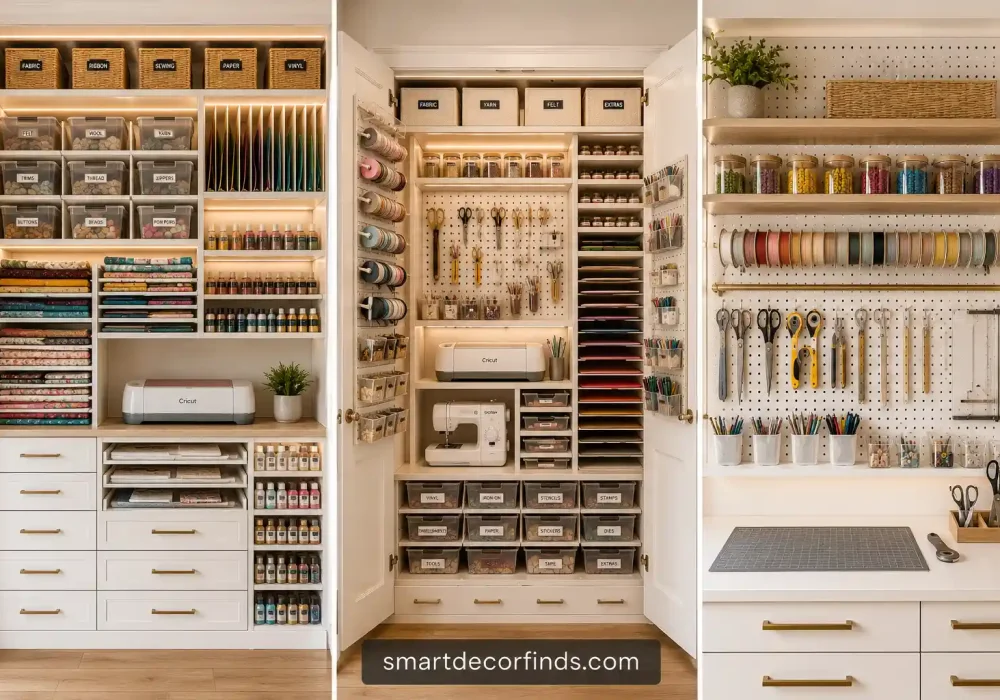
A well organized craft room makes every project more enjoyable. When every tool, material, and supply has a dedicated place, you can spend less time searching and more time creating. Whether your craft space is large or small, smart storage can completely change how it functions.
From custom cabinets to clever drawer systems, the right storage solutions help keep everything tidy while making your workspace look polished and inviting. A thoughtful layout also protects delicate materials and keeps frequently used items within easy reach.
This collection brings together practical storage ideas that combine style with everyday functionality. Whether you enjoy sewing, paper crafting, painting, or using cutting machines, these ideas will help you create a workspace that feels organized, efficient, and inspiring.
Beautiful Craft Room Storage Ideas for an Organized Workspace
Every storage idea below is designed to improve organization while making the most of your available space. You’ll find solutions for organizing paper, fabric, tools, ribbons, paint, machines, and everyday craft supplies in a way that keeps everything easy to access and visually appealing.
Also Read: 18 IKEA Mudroom Ideas That Transform Busy Entryways
Also Read: 14 Small Sewing Room Ideas Designers Swear By Today
1. Install a Floor to Ceiling Storage Wall for a Clutter Free Craft Room
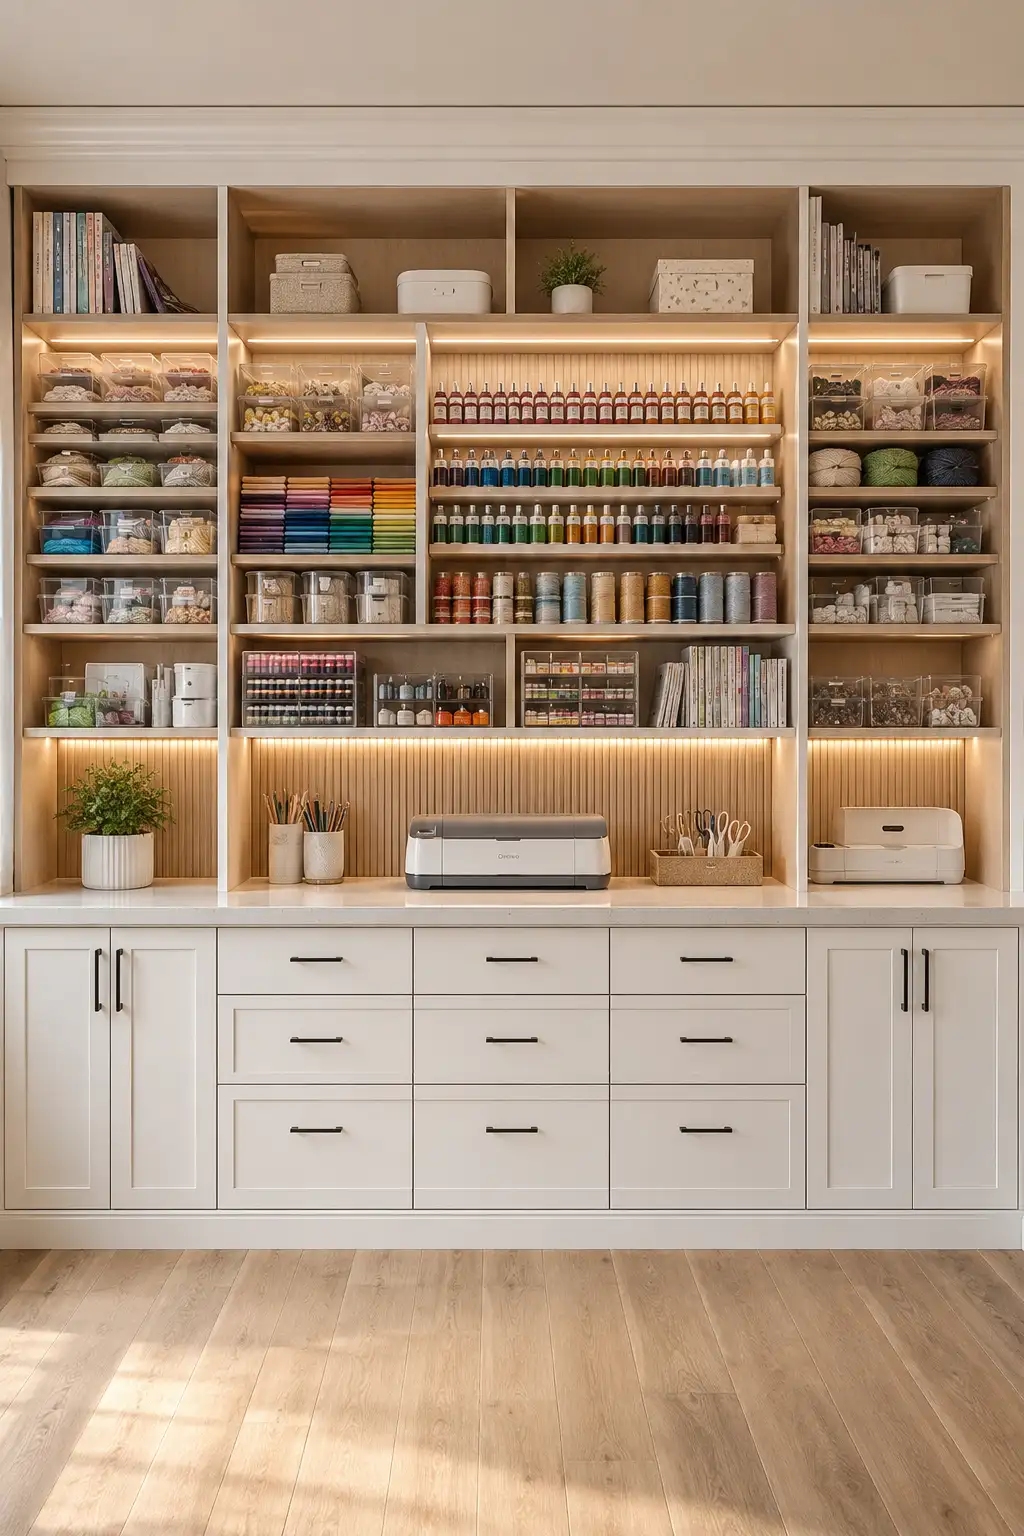
A floor to ceiling storage wall is one of the most effective ways to organize a craft room while making full use of vertical space. Instead of storing supplies in different corners, this design keeps everything together in one dedicated area that feels neat, efficient, and easy to manage. It also creates a polished built in look that instantly elevates the entire workspace.
This design works especially well because it combines several types of storage into one system. Open shelves are perfect for displaying clear bins, colorful cardstock, paint bottles, thread, and frequently used supplies, while the lower drawers and cabinets hide bulkier materials that you do not need every day. Keeping similar items grouped together makes every project faster and more enjoyable.
To complete the setup, add a spacious countertop in the center for cutting, sorting, or assembling projects. Built in LED lighting under each shelf improves visibility and gives the storage wall a premium custom appearance. Matching storage containers and neatly folded materials create a clean visual flow that makes the space feel organized without looking crowded.
Pro Tip: Choose clear labeled containers in matching sizes so you can quickly identify supplies while keeping the entire storage wall looking clean and professionally organized.
2. Organize Every Craft Supply with Custom Pull Out Storage Drawers
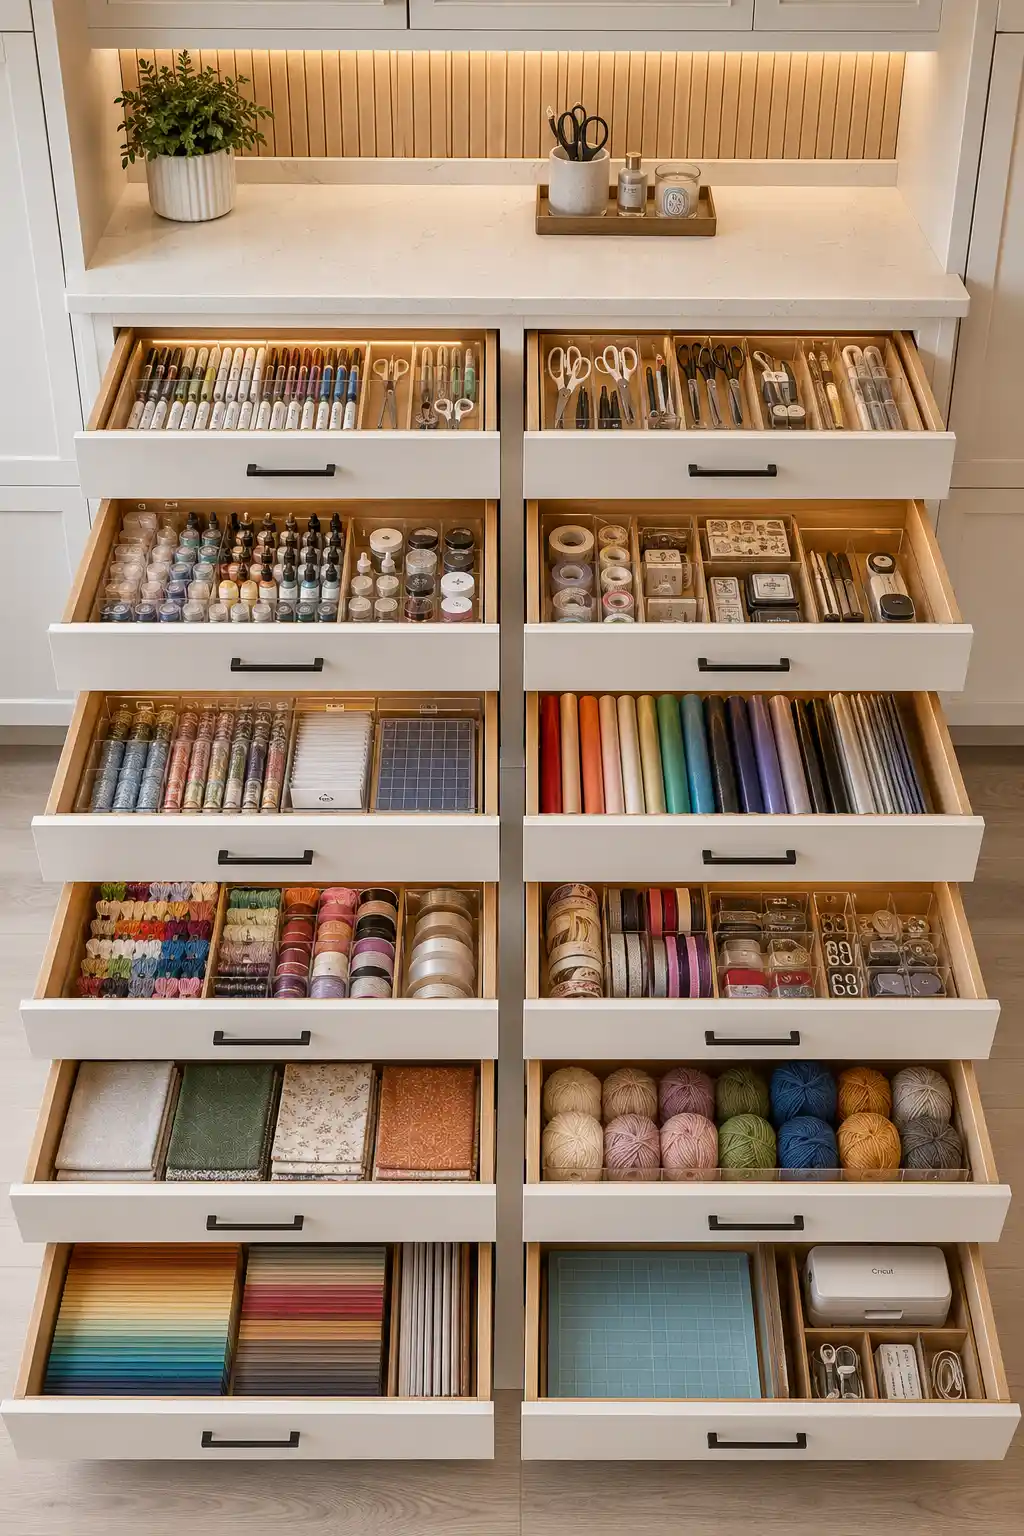
Pull out storage drawers make it much easier to keep craft supplies organized while ensuring nothing gets lost in the back of a cabinet. Instead of stacking containers on shelves, each drawer slides out completely so you can see every item at once. This layout keeps your workspace tidy and saves valuable time during every project.
Create dedicated drawers for different categories of supplies to maintain an efficient organization system. One drawer can hold markers and pens, another can store scissors and hand tools, while deeper drawers work well for vinyl rolls, cardstock, fabric, yarn, ribbons, paints, and Cricut accessories. Adding adjustable dividers or acrylic trays keeps small items neatly separated and prevents everything from shifting around.
A well planned drawer system also gives your craft room a clean custom built appearance while making everyday supplies easier to access. Soft close hardware, matching organizers, and clearly defined sections create a professional setup that looks beautiful and functions effortlessly. With everything stored in its own place, your creative space stays organized even after busy crafting sessions.
Pro Tip: Use adjustable drawer dividers instead of fixed organizers so you can easily reconfigure each drawer as your collection of craft supplies grows.
3. Add a Multi Functional Craft Island with Built In Storage
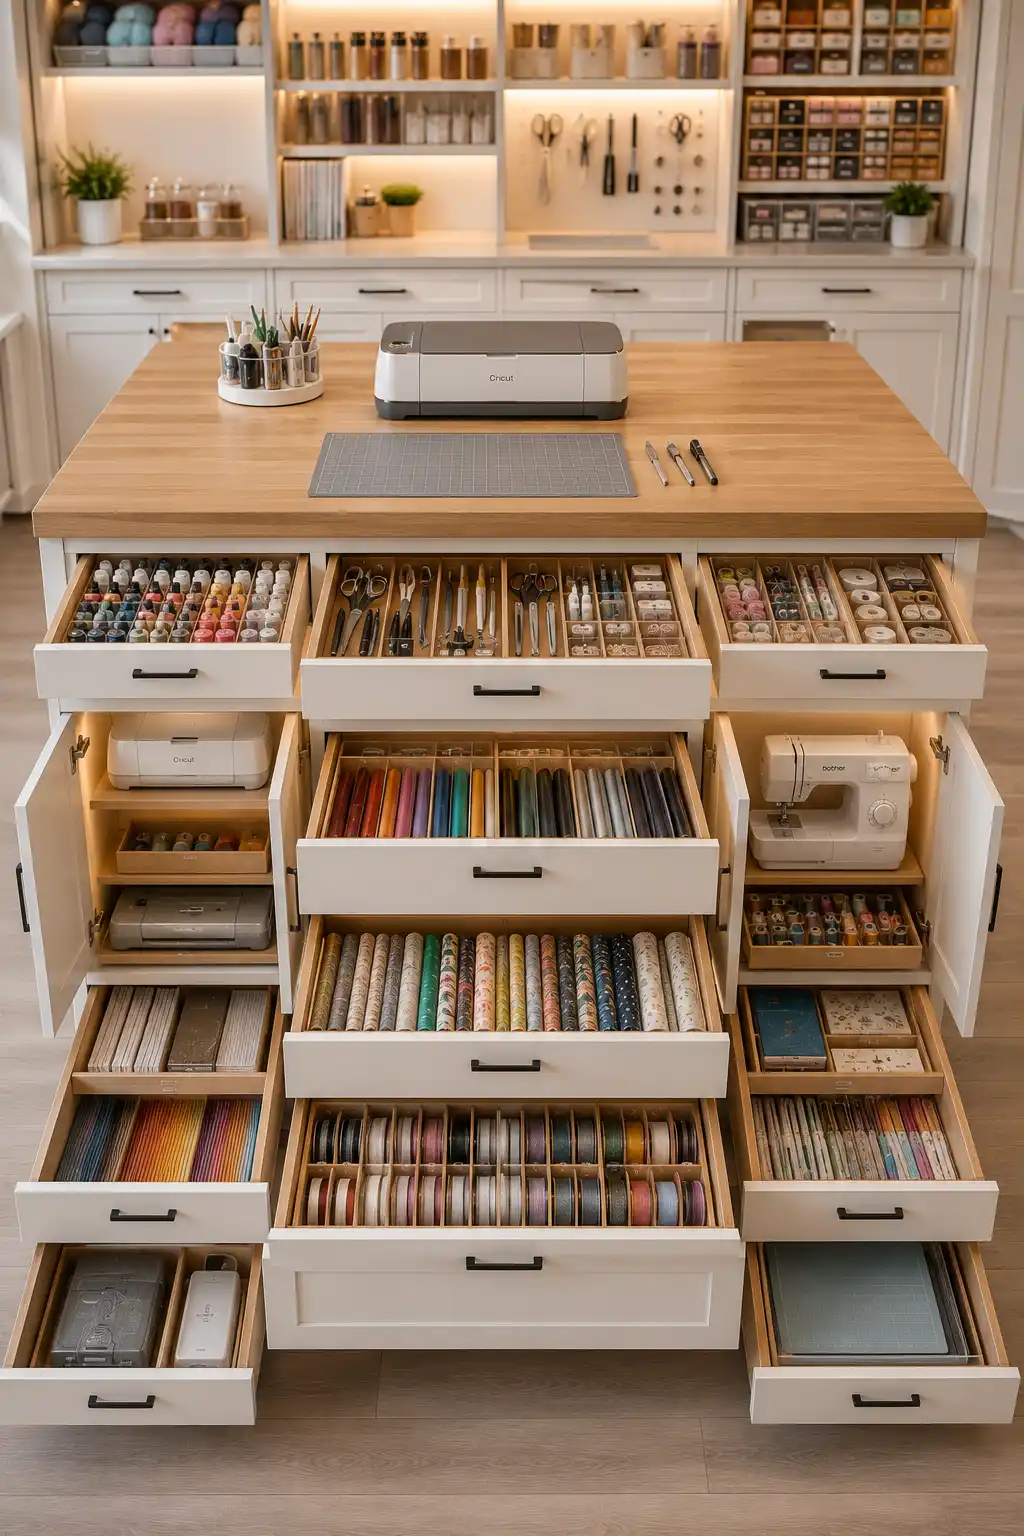
A dedicated craft island does much more than provide extra workspace. It becomes the central hub of your craft room where you can cut materials, assemble projects, and keep your most frequently used supplies within easy reach. By combining a spacious work surface with built in storage, this solution helps maintain a clean and efficient workspace without sacrificing style.
Choose an island with a mix of deep drawers, pull out shelves, and cabinets to organize different types of materials. Shallow drawers are perfect for scissors, pens, adhesives, and hand tools, while larger compartments can store Cricut machines, sewing equipment, vinyl rolls, ribbons, cardstock, fabric, and cutting mats. Keeping everything sorted into dedicated sections makes it much easier to move from one project to the next without creating unnecessary clutter.
A large countertop also gives you plenty of room for measuring, trimming, and crafting while allowing multiple projects to stay organized at the same time. Soft close drawers, custom dividers, and matching storage trays give the island a premium built in appearance that blends beautifully with the rest of the room. It is a practical investment that improves both organization and everyday workflow.
Pro Tip: Leave the countertop mostly clear and store supplies inside the built in drawers so you always have a spacious work surface ready for your next project.
4. Use Mobile Rolling Storage Carts for Flexible Craft Organization
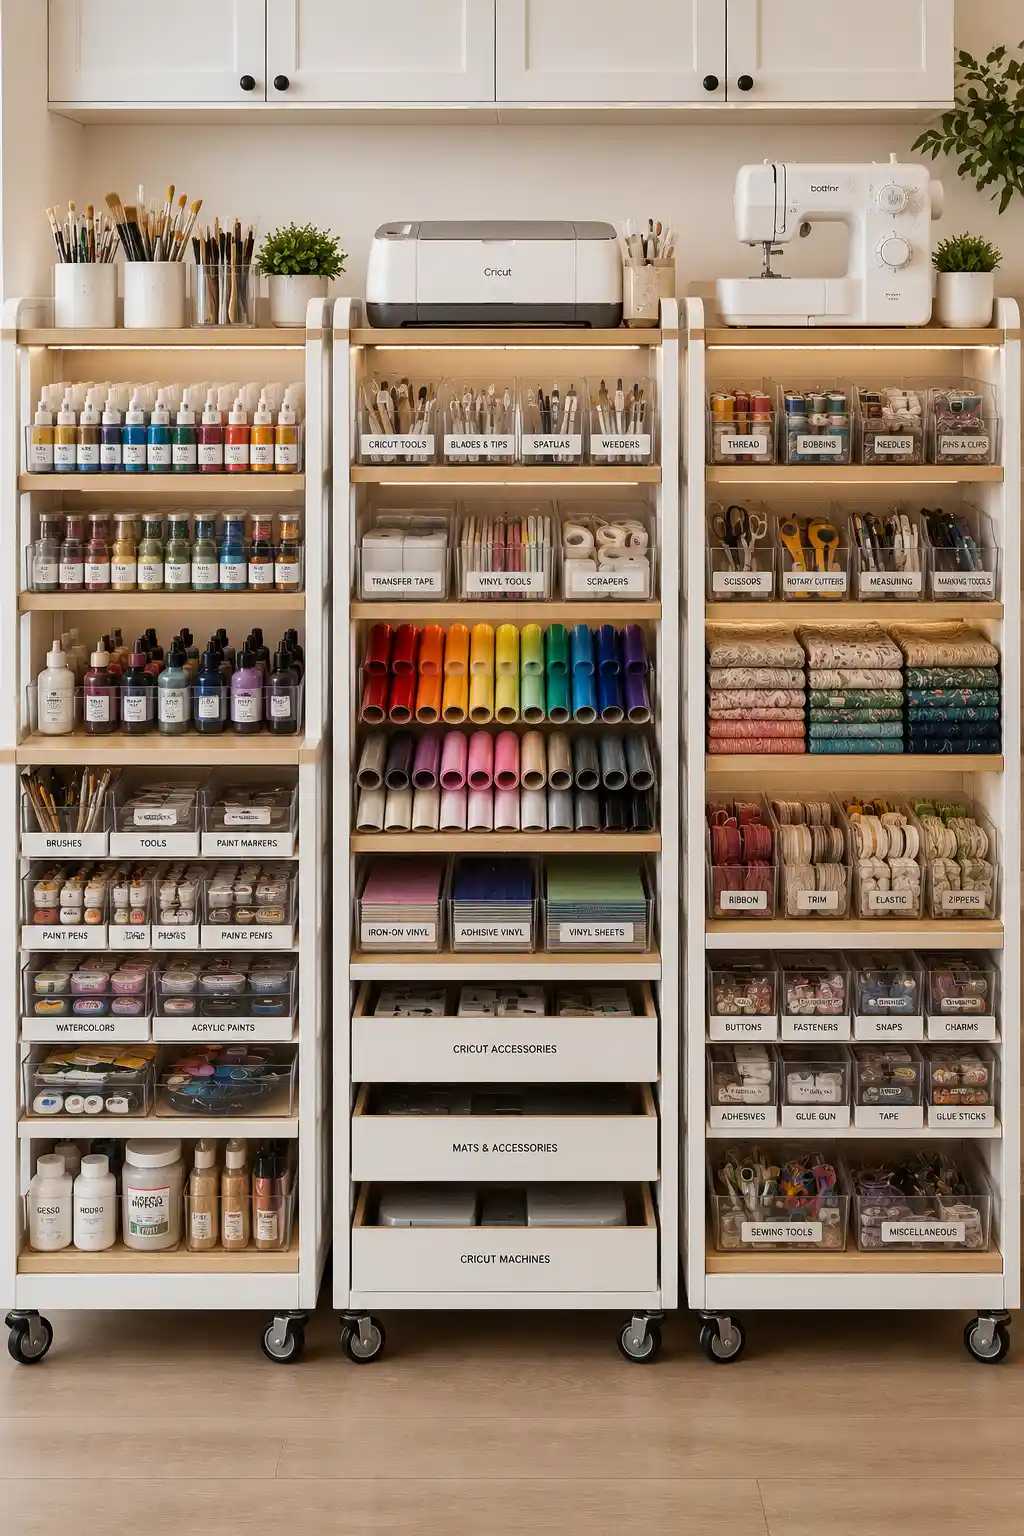
Rolling storage carts are a smart solution for keeping craft supplies organized while giving you the flexibility to move materials exactly where you need them. Instead of carrying multiple containers across the room, you can simply roll the entire storage unit beside your worktable and keep all of your essential tools within easy reach. This makes crafting more efficient and helps maintain a clutter free workspace.
Assign each cart to a specific category of supplies so everything stays organized and easy to locate. One cart can hold paints and brushes, another can store Cricut tools, vinyl rolls, transfer tape, and cutting accessories, while a third can be dedicated to sewing supplies, ribbons, fabric, thread, adhesives, and embellishments. Clear labeled containers and open shelves allow you to see every item without searching through multiple boxes.
The best part about rolling carts is their versatility. They can slide neatly beside cabinets when not in use and move effortlessly around the room during larger projects. Choosing matching carts with built in shelves and storage bins also creates a cohesive custom look that blends beautifully with the rest of your craft room while keeping frequently used supplies organized and accessible.
Pro Tip: Dedicate one rolling cart to each type of craft so you can simply wheel the supplies you need to your workspace without reorganizing everything before every project.
5. Create a Dedicated Ribbon and Vinyl Storage Station
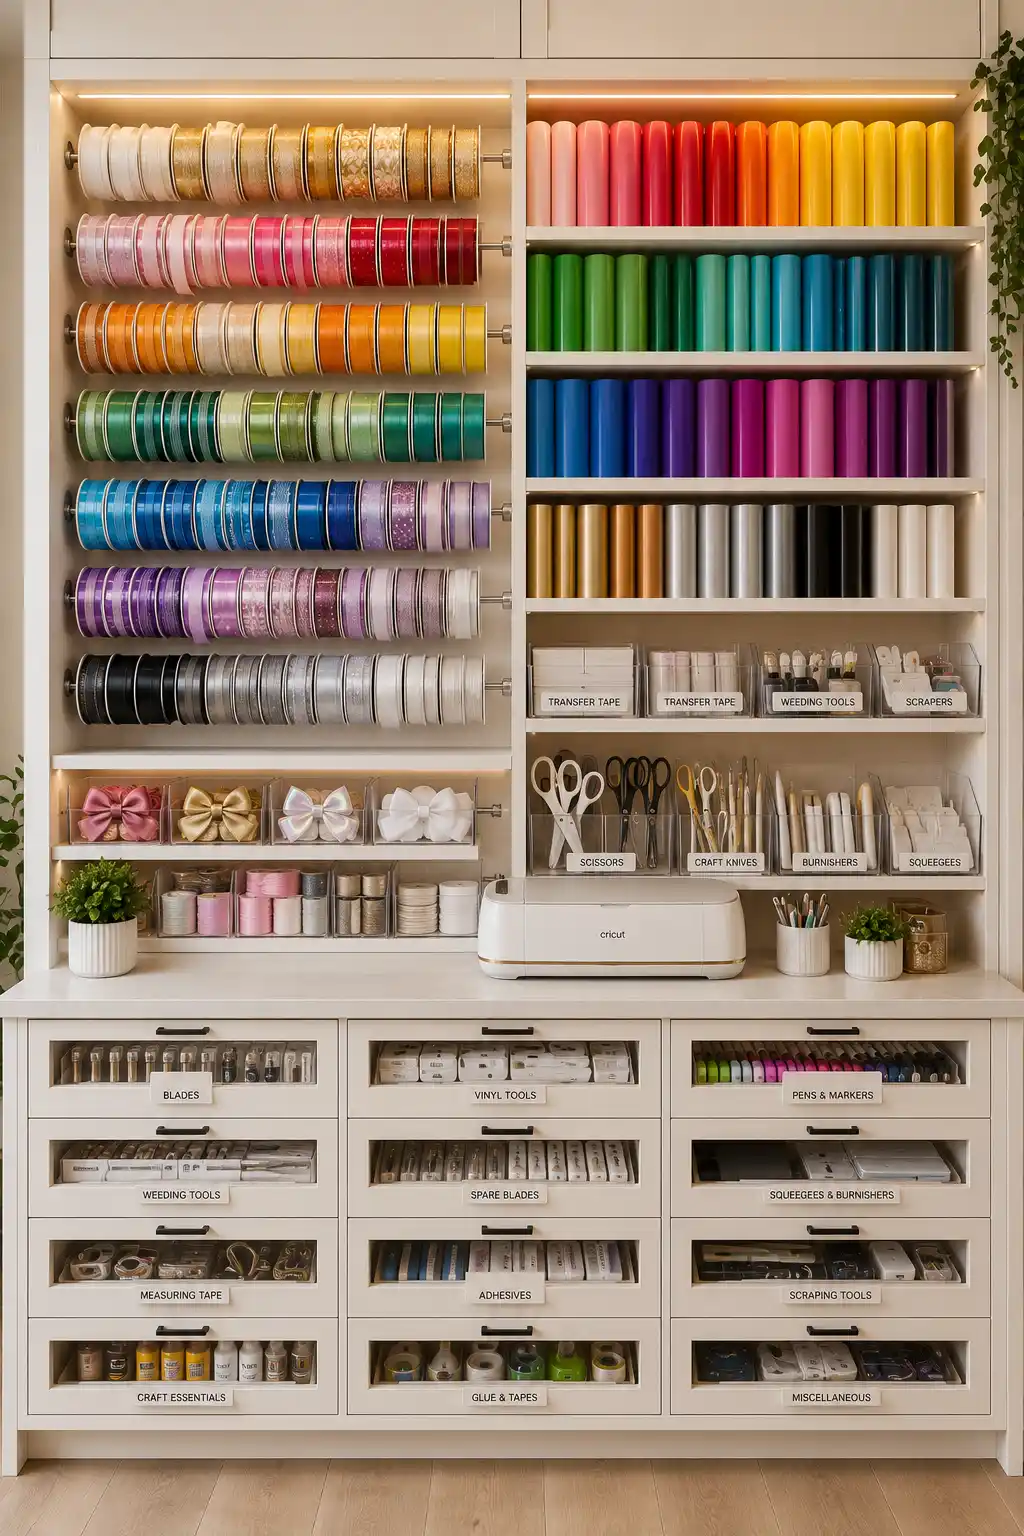
If you regularly use ribbon, vinyl, and other rolled materials, creating a dedicated storage station can make a huge difference in your craft room. Instead of stacking rolls inside bins where they become tangled or difficult to reach, storing them on individual rods or open shelves keeps every color visible and easy to access. It also turns your supplies into an attractive display that adds personality to the space.
Arrange ribbon spools on horizontal metal rods and organize vinyl rolls by color or finish on nearby shelves. Keeping transfer tape, weeding tools, scrapers, scissors, and cutting accessories in labeled acrylic containers directly below creates a complete workstation where everything you need is within arm’s reach. This thoughtful layout speeds up projects and eliminates unnecessary searching.
Complete the storage station with shallow drawers for blades, adhesives, measuring tools, pens, and other small essentials. A nearby countertop provides space for a Cricut machine or other cutting equipment, allowing you to move seamlessly from selecting materials to creating your project. With every supply neatly organized and clearly visible, your workspace stays clean, efficient, and ready for your next creative idea.
Pro Tip: Store ribbon and vinyl in rainbow color order so you can instantly find the perfect shade while creating a visually organized display.
6. Design Open Shelving with Clear Bins for Easy Everyday Access
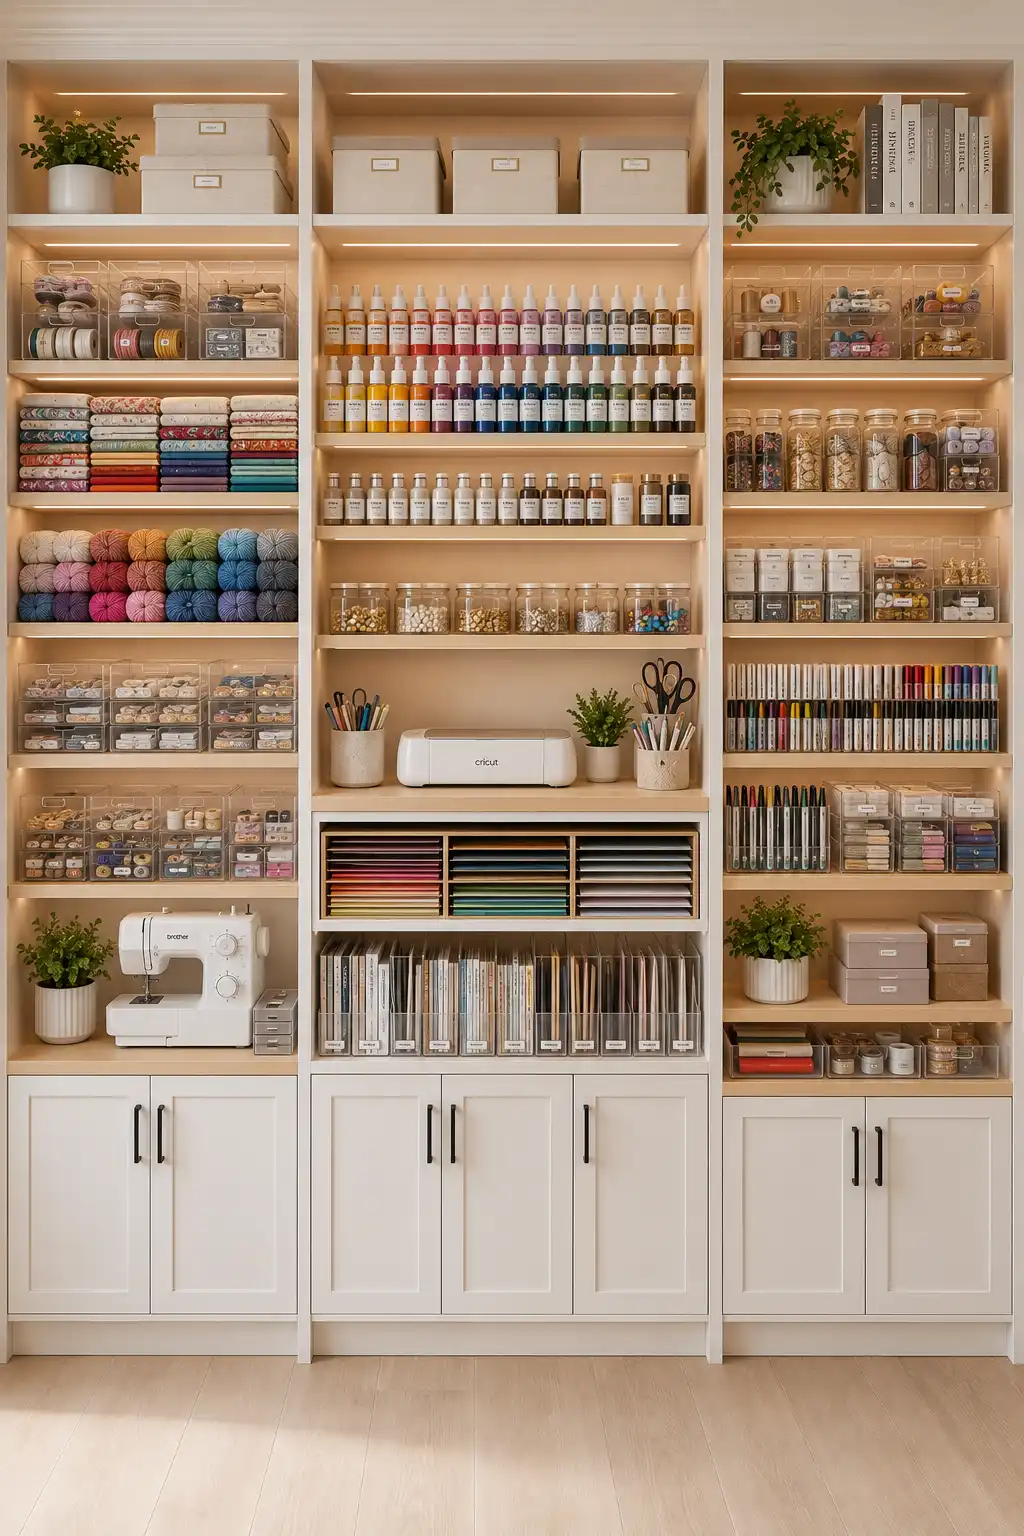
Open shelving is a practical way to organize a craft room while keeping your most frequently used supplies within easy reach. Instead of opening multiple cabinets to find what you need, everything is displayed in a clean and organized layout that makes crafting more efficient. When paired with matching storage containers, open shelves create a bright, custom look that feels both functional and stylish.
Arrange your supplies by category so every shelf has a clear purpose. Store paint bottles together, stack folded fabrics by color, organize yarn in neat rows, and keep markers, scissors, embellishments, beads, and sewing accessories inside clear acrylic bins with printed labels. Vertical paper organizers are perfect for cardstock and scrapbook paper, while decorative jars can neatly hold buttons, clips, and other small craft essentials.
To give the shelving a more polished appearance, add warm LED lighting beneath each shelf and use matching storage boxes for items you want tucked away. A dedicated space for your Cricut machine or sewing machine on the center countertop keeps your workspace organized while making everyday projects faster and more enjoyable. This combination of open display and smart organization creates a craft room that looks as beautiful as it is practical.
Pro Tip: Keep your most frequently used supplies on the middle shelves at eye level so they are always easy to grab without reaching or bending.
7. Hide Craft Machines Inside a Built In Storage Cabinet
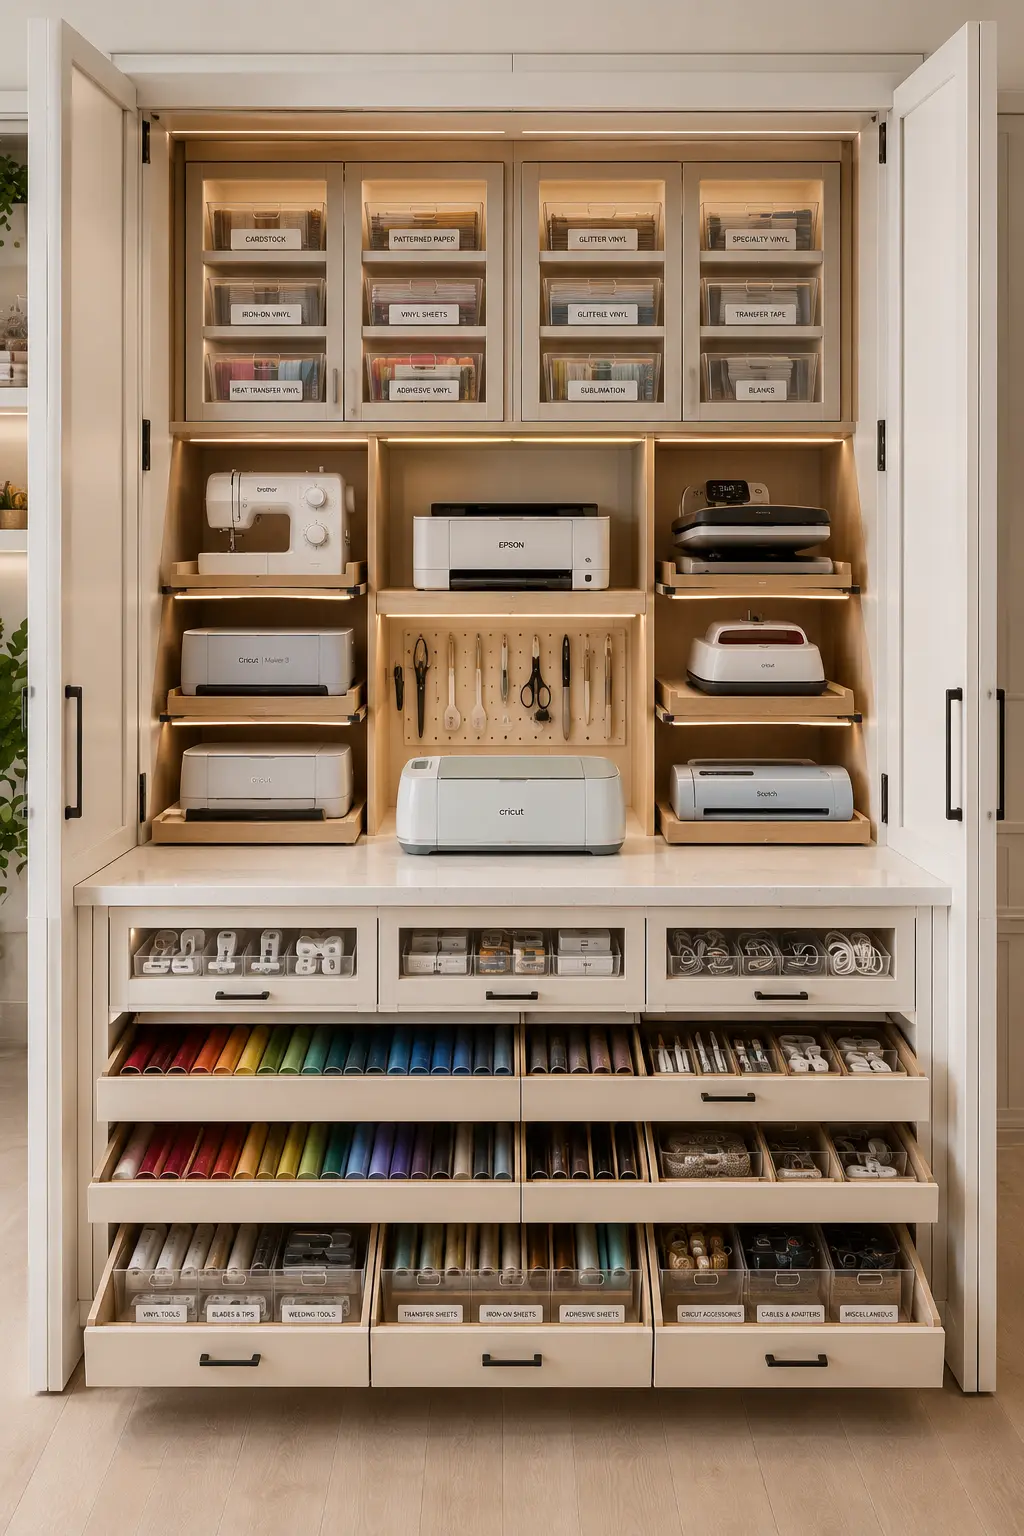
A built in storage cabinet is an excellent way to keep larger crafting machines organized without leaving them on display all the time. Instead of covering your countertops with equipment, you can store everything behind cabinet doors while keeping each machine ready to use whenever inspiration strikes. This creates a cleaner workspace that feels more spacious and professionally designed.
Design the cabinet with dedicated shelves for your Cricut machine, sewing machine, printer, heat press, laminator, and other frequently used equipment. Add pull out shelves so heavier machines can slide forward during use, eliminating the need to lift them in and out of storage. Surround the machines with labeled acrylic bins for vinyl sheets, transfer tape, blades, cables, mats, and accessories so every essential tool stays close by.
Complete the cabinet with deep drawers below for organizing rolls of vinyl, cardstock, adhesives, cutting tools, and replacement supplies. Integrated LED lighting inside the cabinet improves visibility while creating a premium custom appearance. Once your project is finished, simply close the cabinet doors to instantly transform the space back into a neat and clutter free craft room.
Pro Tip: Install electrical outlets inside the cabinet so your crafting machines can remain plugged in and ready to use without messy cords running across your workspace.
8. Turn a Closet into a Fully Organized Craft Storage Station
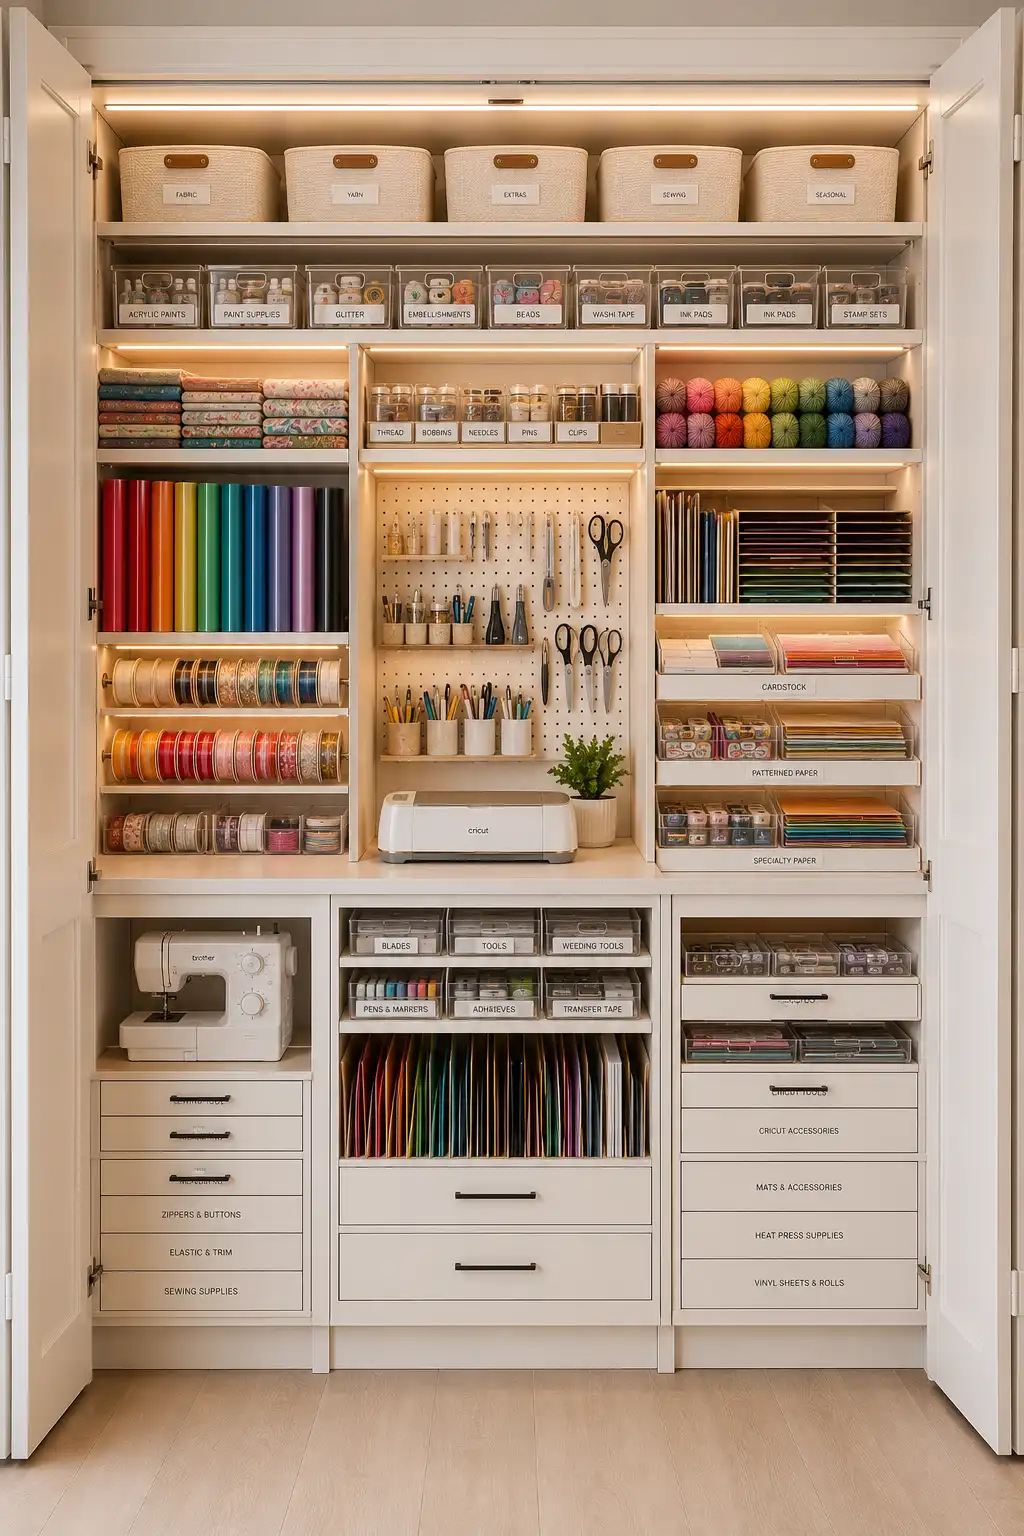
Converting a closet into a dedicated craft storage station is a smart way to maximize space while keeping supplies neatly hidden behind closed doors. Instead of spreading materials throughout the room, everything is organized inside one compact area that functions like a complete crafting hub. When the doors are open, every tool and supply is easy to reach, and when they are closed, the room instantly looks clean and uncluttered.
Make the most of the available space by assigning each section a specific purpose. Install vertical paper organizers for cardstock and scrapbook paper, use shelves for vinyl rolls and folded fabric, and add clear labeled bins for beads, paints, adhesives, thread, ribbons, and embellishments. A pegboard above the work surface keeps scissors, rulers, and frequently used tools within easy reach, while lower drawers provide storage for Cricut accessories, cutting mats, sewing supplies, and larger crafting materials.
Adding a small countertop inside the closet creates a convenient workspace for your Cricut machine or other crafting equipment without taking up valuable room elsewhere. Warm LED lighting, matching storage containers, and clearly labeled drawers give the entire closet a custom built appearance while making it simple to keep every supply organized. This all in one solution is ideal for creating a functional craft room, even in a smaller home.
Pro Tip: Organize the closet by activity rather than by item type so everything you need for sewing, paper crafting, or vinyl projects is stored together in one easy to access section.
9. Build a Custom Pegboard Wall to Keep Essential Tools Within Reach
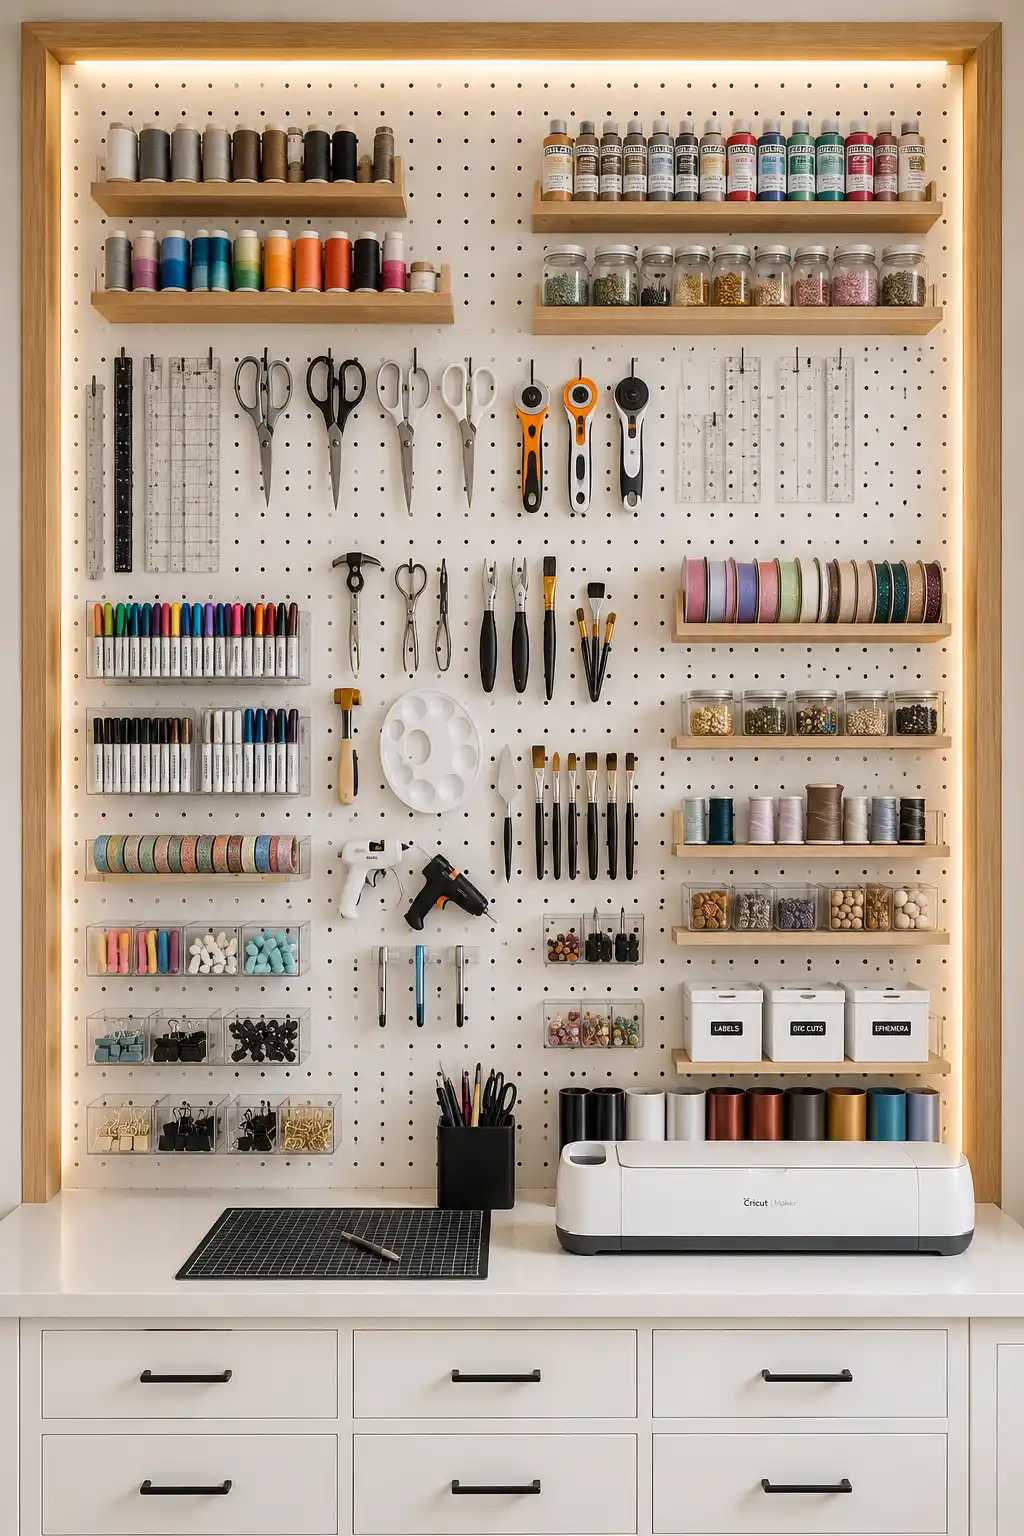
A custom pegboard wall is one of the easiest ways to keep everyday crafting tools organized while freeing up valuable countertop space. Instead of storing scissors, rulers, brushes, and cutting tools inside drawers, everything is displayed in plain sight where it can be reached in seconds. This setup not only improves efficiency but also creates a clean, professional workspace that feels organized and inviting.
Customize the pegboard with a combination of hooks, floating shelves, and clear storage cups to suit your crafting needs. Hang scissors, rotary cutters, rulers, paint brushes, glue guns, and measuring tools on sturdy hooks, while small shelves can hold paint bottles, ribbon spools, thread, jars of beads, and decorative containers. Acrylic bins are perfect for markers, pens, clips, and other small accessories, making every item easy to see and grab during a project.
For an even more polished appearance, frame the pegboard with wood trim and install warm LED lighting around the edges to highlight your organization system. Pair it with a spacious work surface below for your Cricut machine or cutting mat, creating a complete crafting station where tools, supplies, and workspace come together in one convenient area.
Pro Tip: Arrange your most frequently used tools at eye level and group similar items together so you can complete projects faster without constantly searching for supplies.
10. Organize Craft Supplies with Clear Acrylic Storage Bins
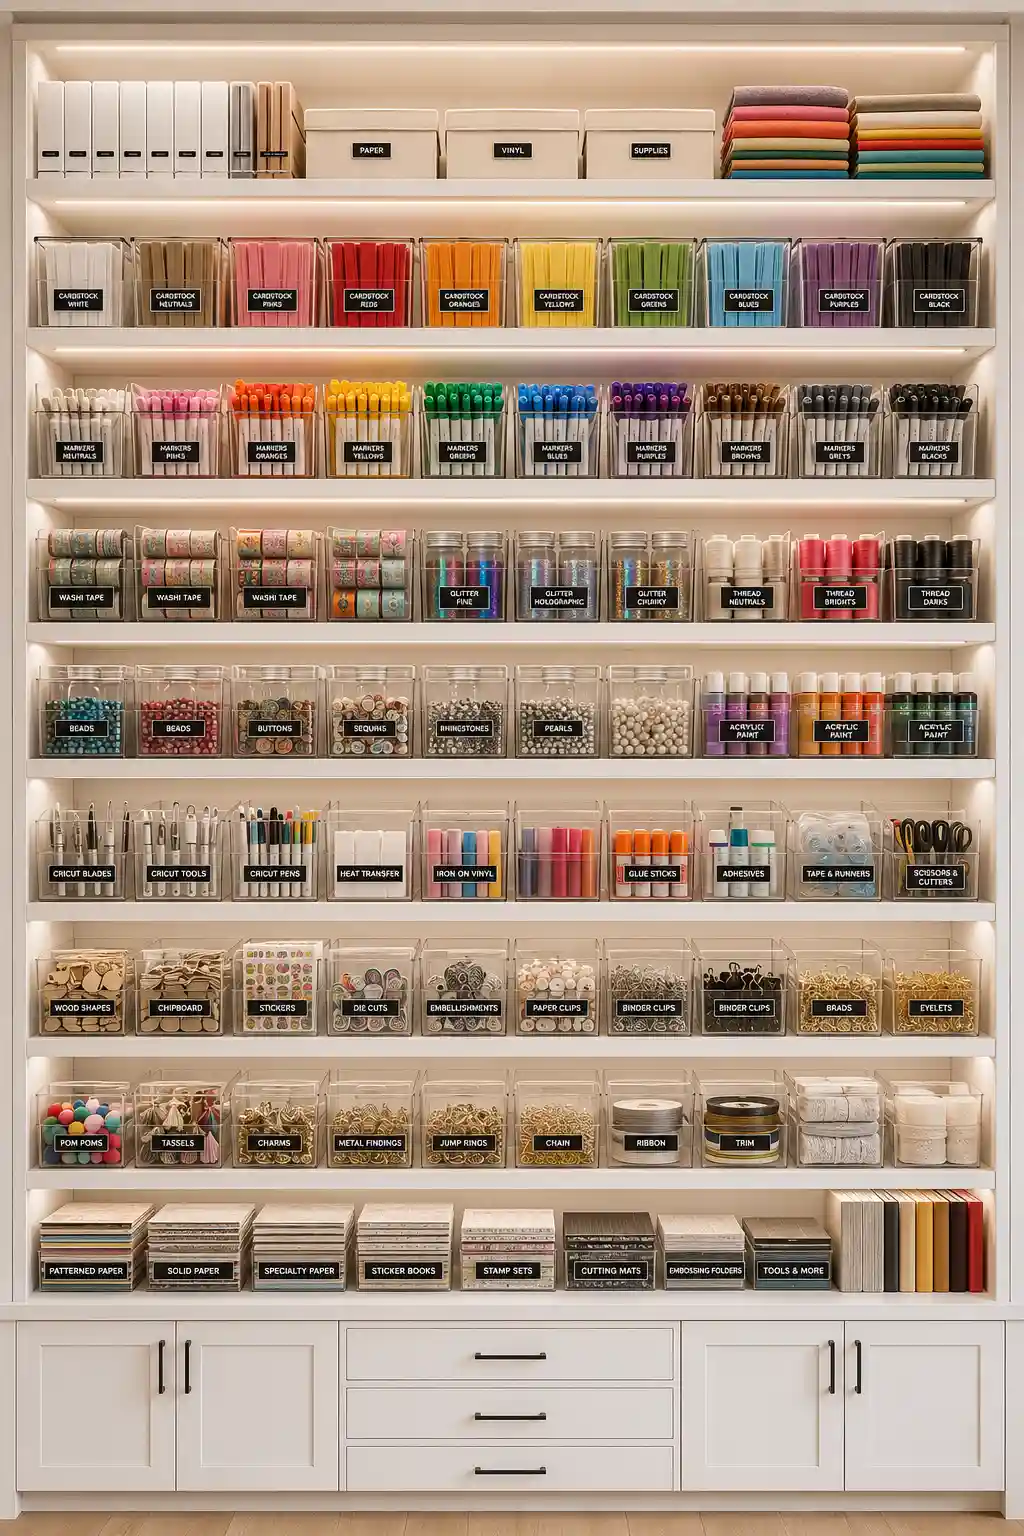
Clear acrylic storage bins are one of the simplest ways to keep a craft room neat while making every supply easy to find. Because each container is transparent, you can instantly see what is inside without opening multiple boxes or digging through drawers. This system keeps your workspace looking tidy while helping you spend more time creating and less time searching for materials.
Group similar supplies into individual labeled bins to create an organization system that is both practical and visually appealing. Store cardstock by color, arrange markers and pens in separate containers, keep beads, buttons, sequins, and embellishments in small divided bins, and organize paints, adhesives, ribbons, washi tape, and Cricut accessories into clearly marked sections. Matching containers and consistent labels create a clean, professional appearance that is easy to maintain.
Install open shelving with integrated LED lighting to showcase your storage while keeping everything within reach. Place frequently used supplies at eye level and reserve the upper and lower shelves for seasonal items or extra inventory. With every container neatly arranged and clearly labeled, your craft room feels organized, spacious, and ready for any creative project.
Pro Tip: Use identical acrylic bins with waterproof printed labels to create a uniform storage system that stays organized and makes every supply easy to locate at a glance.
11. Install Vertical Paper Storage to Keep Every Sheet Perfectly Organized
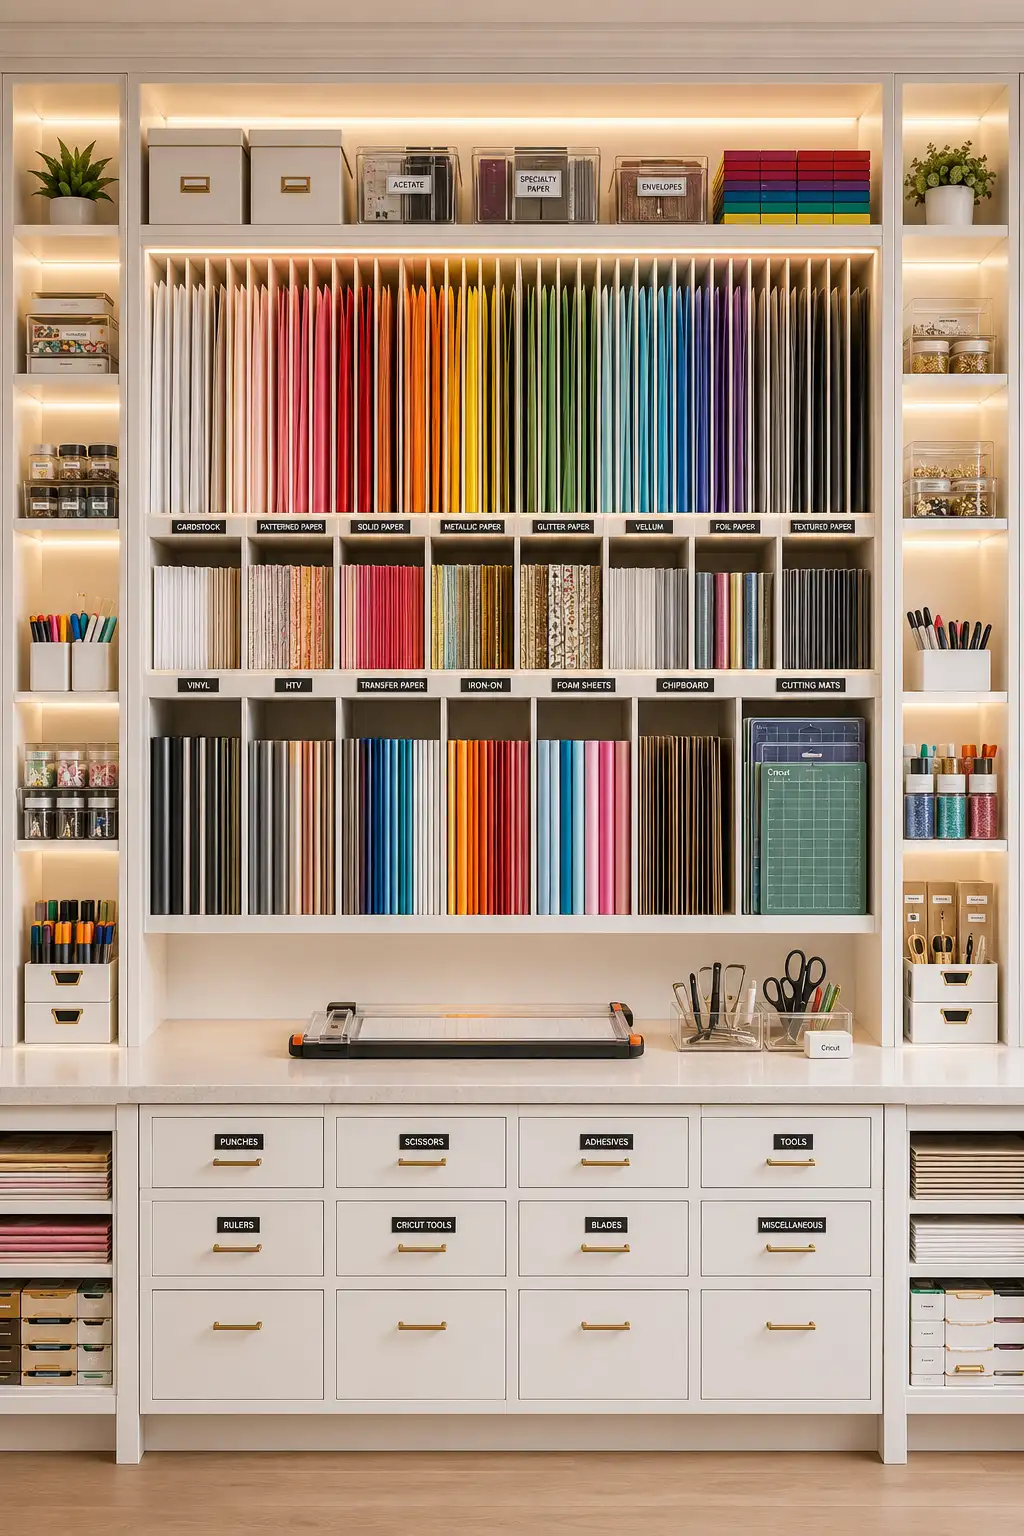
If you work with cardstock, scrapbook paper, vinyl sheets, or specialty paper, a dedicated vertical paper storage system can completely transform your craft room. Storing paper upright instead of stacking it prevents bent corners, creases, and damaged edges while making every color and finish easy to browse. It also saves time because you can quickly flip through your collection without moving heavy piles from one shelf to another.
Divide the organizer into labeled compartments for different materials and categories. Keep cardstock sorted by color, store patterned paper in separate sections, and reserve individual slots for glitter paper, metallic paper, vellum, chipboard, transfer sheets, and cutting mats. Surround the paper organizer with small shelves for scissors, pens, adhesives, punches, and other frequently used tools so everything needed for paper crafting stays within easy reach.
Complete the storage wall with lower drawers for extra supplies and a spacious countertop for trimming, measuring, and assembling projects. Adding warm LED lighting above the organizer highlights every section while giving the entire storage system a clean custom built appearance. This thoughtful layout keeps your paper collection protected, beautifully displayed, and ready whenever creativity strikes.
Pro Tip: Label every paper slot by material and color instead of brand so you can quickly find the exact sheet you need without searching through multiple stacks.
12. Combine Open Shelving and Closed Cabinets for a Balanced Storage System
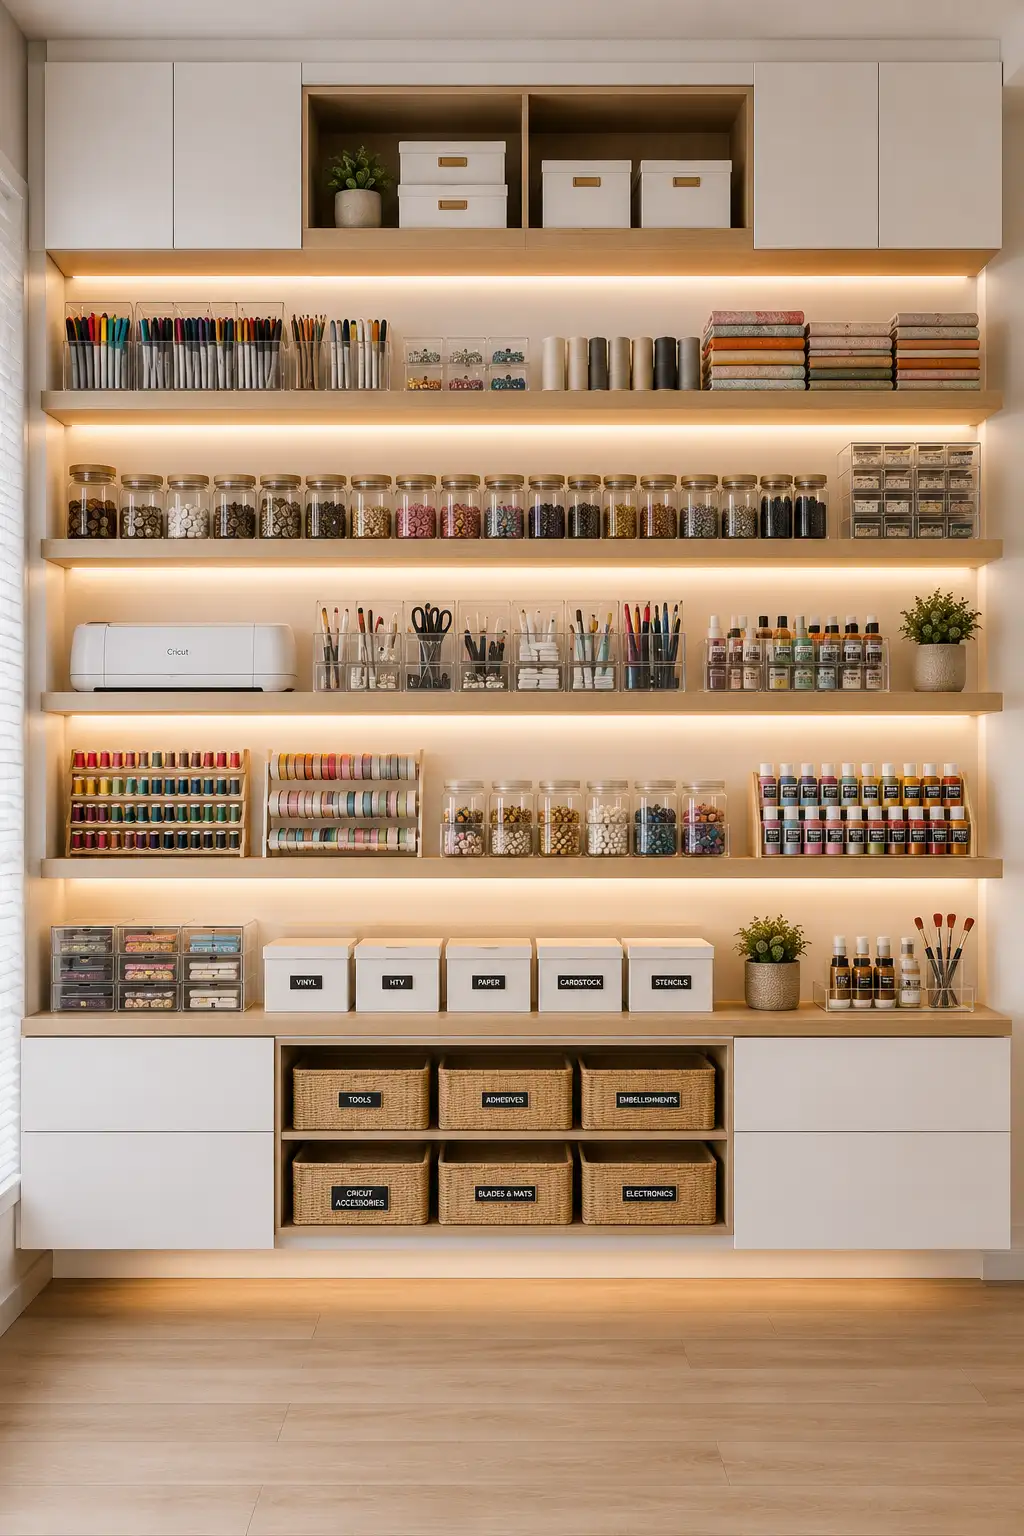
A combination of open shelving and closed cabinets creates a craft room that is both beautiful and practical. Open shelves keep your favorite supplies visible and easy to reach, while closed cabinets hide extra inventory, seasonal materials, and larger items that can make the space feel cluttered. This balanced approach helps your craft room stay organized without sacrificing a clean, modern appearance.
Use the open shelves to display neatly arranged jars, clear acrylic organizers, labeled storage boxes, paint bottles, markers, thread, ribbons, and other everyday essentials. Reserve the upper cabinets for supplies you use less often, such as bulk paper, fabric, replacement tools, and additional crafting materials. Lower cabinets and baskets can hold larger equipment, cutting mats, Cricut accessories, and project supplies while keeping them out of sight but still easy to access.
To bring the entire storage wall together, install warm LED lighting beneath each shelf and choose matching containers throughout the space. Consistent labels, coordinated storage boxes, and grouped supplies create a polished custom look that feels organized from top to bottom. The result is a workspace that is visually appealing, highly functional, and ready for any creative project.
Pro Tip: Follow the rule of display and conceal by keeping your most frequently used supplies on open shelves and storing backup items inside closed cabinets to maintain a clean, clutter free workspace.
13. Maximize Small Supply Storage with a Wall of Labeled Drawers
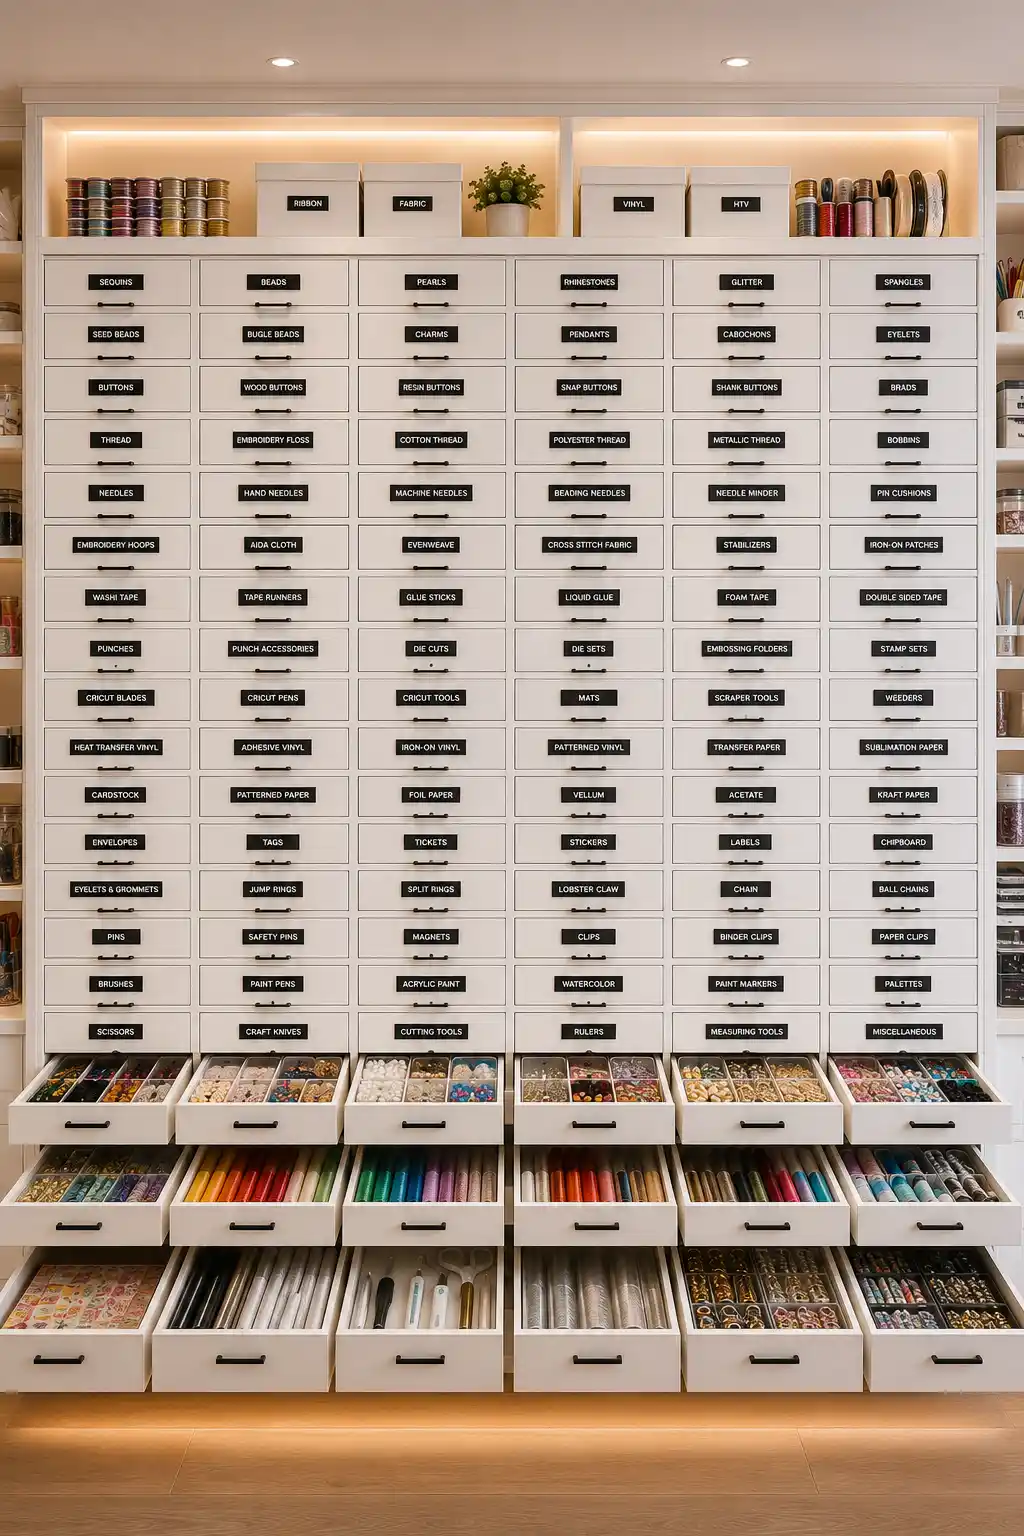
A wall of labeled drawers is one of the most efficient ways to organize hundreds of small craft supplies without creating visual clutter. Instead of mixing different items together in large containers, every bead, button, ribbon, tool, and embellishment has its own dedicated drawer. This system keeps your collection easy to manage while making it simple to find exactly what you need in just a few seconds.
Assign each drawer to a specific category and use clear labels that are easy to read at a glance. Separate buttons, sequins, rhinestones, beads, needles, embroidery floss, Cricut blades, adhesives, vinyl tools, stamps, paper clips, cutting accessories, and other small materials into individual compartments. Keeping supplies grouped by type prevents clutter from building up and makes restocking much more organized as your collection continues to grow.
To make the storage wall even more functional, combine the labeled drawers with open pull out trays for frequently used materials and install warm LED lighting above the cabinet. Store larger items such as fabric, vinyl rolls, and storage boxes on the upper shelves while reserving the drawers for smaller essentials. The result is a clean, custom built organization system that looks professional and allows every craft supply to have a permanent home.
Pro Tip: Use consistent label styles and arrange similar drawers together so you can quickly locate supplies without opening multiple compartments during a project.
14. Transform an Unused Corner into a High Capacity Pull Out Storage Cabinet
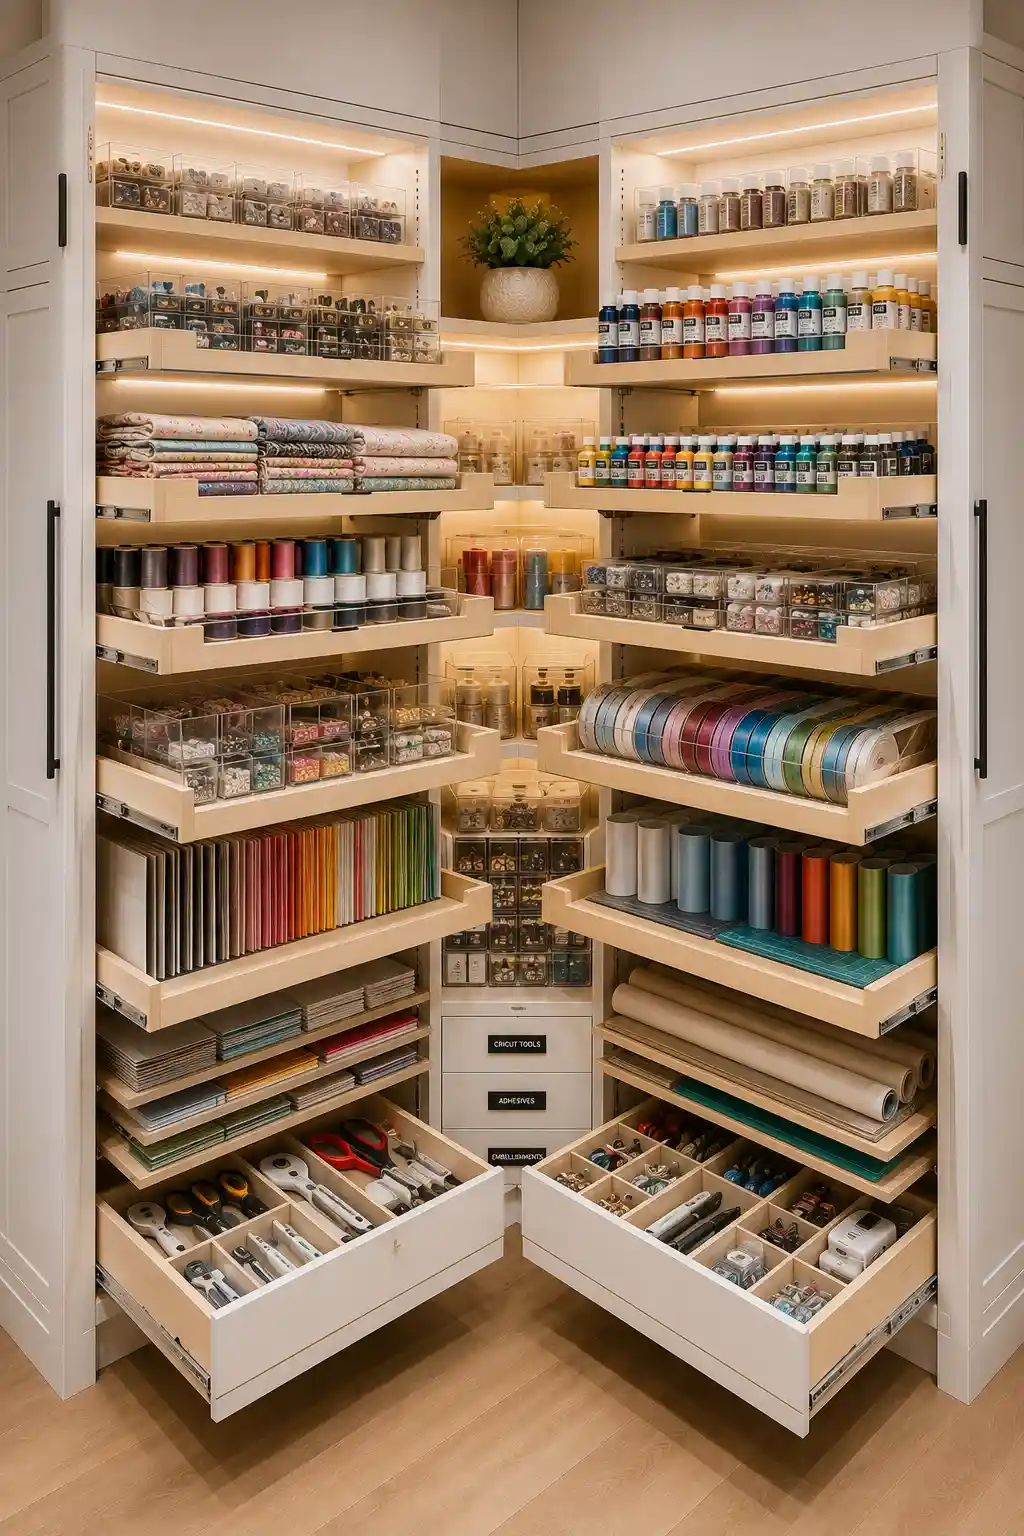
Corner cabinets are often the most overlooked part of a craft room, yet they can provide an incredible amount of storage when designed with pull out shelves and custom organizers. Instead of letting valuable corner space go unused, this solution turns it into a highly efficient storage zone where every supply is easy to reach. Full extension pull out shelves eliminate wasted space and ensure nothing gets hidden in the back of the cabinet.
Organize each shelf by category to create a workflow that supports your favorite crafting projects. Store vinyl rolls, cardstock, fabric bundles, ribbon spools, paints, adhesives, beads, embellishments, and clear acrylic containers on individual pull out shelves so everything remains visible at a glance. Lower drawers with adjustable dividers are ideal for scissors, rotary cutters, Cricut tools, measuring equipment, and other small accessories that need to stay neatly separated.
Complete the cabinet with integrated LED lighting and matching labeled storage containers to give the entire corner a premium custom built appearance. Soft close pull out shelves and deep drawers make accessing supplies effortless while keeping the room looking clean and organized. By transforming an underused corner into a dedicated storage station, you gain valuable space without making the craft room feel crowded.
Pro Tip: Place the supplies you use most often on the middle pull out shelves and reserve the highest and lowest sections for seasonal materials or backup inventory to keep your everyday workflow fast and efficient.
Conclusion
A thoughtfully organized craft room does more than improve the appearance of your space. It creates a more enjoyable and productive environment where every tool and material is easy to find, helping you spend more time creating and less time searching for supplies. Whether you choose custom cabinetry, open shelving, rolling carts, labeled drawers, or a dedicated craft closet, the right storage solutions can make any room feel more functional and inspiring.
The best organization system is one that matches the way you craft every day. Start with the ideas that fit your available space, then build on them as your collection grows. With smart planning, consistent storage, and clearly defined zones for every supply, you can create a beautiful craft room that stays organized, supports your creativity, and makes every project easier from start to finish.
