
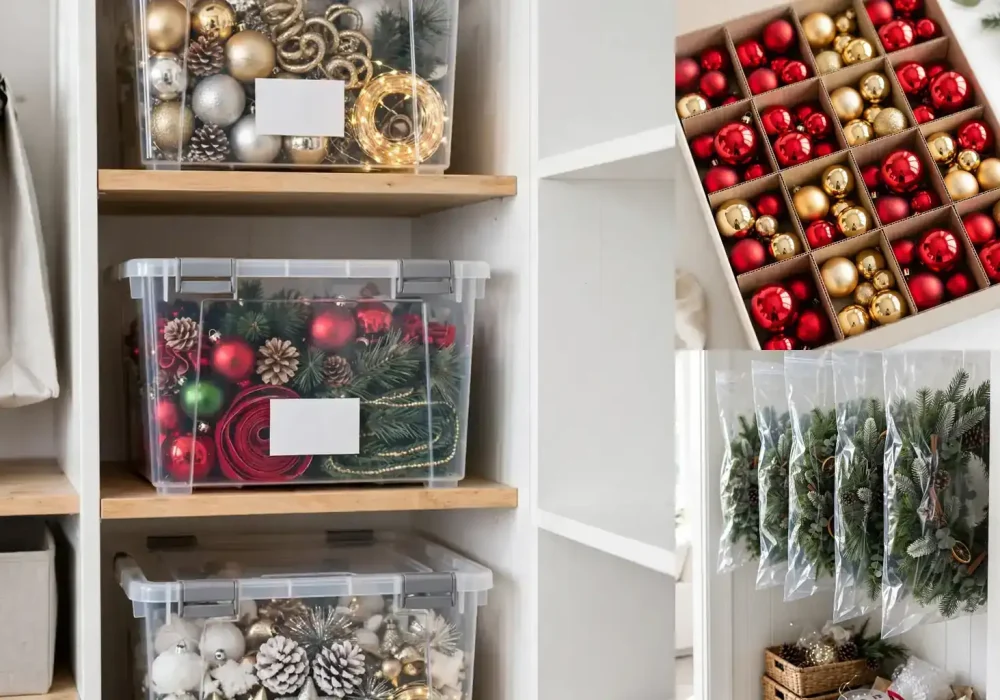
January arrives, the tree comes down, and suddenly you are staring at a living room full of fragile ornaments, tangled light strands, crushed wreaths, and a garland that will not fit back in its box. Most holiday decor storage ideas get ignored until the damage is already done, which is exactly why so many ornaments crack, lights burn out, and wreaths come back flattened the following December. A good storage system turns the dreaded post-holiday pack-up into a fast, almost satisfying job.
The payoff of doing this right is huge. Protected ornaments last decades instead of seasons. Lights that are wrapped properly untangle in minutes instead of hours. Labeled bins mean next year’s decorating day starts with everything findable instead of a scavenger hunt through mystery boxes. Below you will find 12 clever holiday decor storage ideas for every budget and space, plus a planning guide with a storage-method comparison table and a packing timeline, and the mistakes that ruin decorations in storage. Whether you own a single box of ornaments or a full holiday warehouse, this guide has a system for you.
A well-planned system also saves real money. Replacing broken heirloom ornaments, rebuying crushed wreaths, and untangling ruined light strands adds up year after year. The solutions below use affordable, reusable supplies like clear stackable bins, acid-free tissue paper, silica gel packs, and simple labels, and most of them pay for themselves by the second season. Let’s build your storage system before a single ornament goes in a box.
How to Plan Your Holiday Storage System
Before you pack a single ornament, take stock of what you own. Walk through every decorated spot in your home, the tree, the mantel, the wreaths, the garlands, the outdoor lights, and list the categories. Most households end up with the same five groups: fragile ornaments, light strands, wreaths and garlands, soft decor like tree skirts and stockings, and the artificial tree itself. Each group has a different enemy: ornaments fear impact, lights fear tangling, wreaths fear compression, fabrics fear moisture and moths, and the tree fears getting crushed under other boxes.
Not every storage method suits every category. The comparison table below shows which method wins for each group, what it costs, and how reusable it is, so you can buy supplies once and use them for a decade. Once you know your method, use the packing timeline to spread the work over a few days instead of cramming it all into one exhausting January afternoon. If you want general organizing principles beyond the holidays, these small pantry organization ideas show the same zone-and-label thinking applied to a completely different space.
Holiday Decor Storage Method Comparison
| Storage Method | Best For | Typical Cost | Reusability |
|---|---|---|---|
| Divided ornament boxes | Glass and heirloom ornaments | $20–$35 per box | 10+ seasons |
| Tissue paper + regular bins | Budget ornament protection | $10–$15 total | Tissue: 2–3 seasons |
| Clear stackable bins | Non-fragile decor, ribbons, picks | $8–$18 per bin | 10+ seasons |
| Wreath storage bags | Wreaths up to 30 inches | $12–$25 each | 10+ seasons |
| Cardboard light wraps | Light strands of any length | Free (recycled cardboard) | 3–5 seasons |
| Rolling tree storage bag | Artificial trees up to 9 feet | $40–$70 | 10+ seasons |
| Egg cartons | Small ornaments and baubles | Free | 2–3 seasons |
| Garment bags | Garlands and long swags | $5–$12 for a pack | 5+ seasons |
The method comparison covers what to buy, but timing matters just as much. Decor packed in a rush gets shoved into oversized bins, unlabeled, and stacked under heavier boxes, which is how heirlooms break. The packing timeline below spreads the work across four days so every category gets packed properly. Day one handles the fragile pieces while you still have energy and patience, and the heavy lifting comes last. For a nostalgic look at what is worth protecting most, browse these nostalgic vintage Christmas decor ideas and picture your oldest ornaments surviving another twenty seasons.
The 4-Day Holiday Pack-Up Timeline
| Day | What to Pack | Time Needed | Key Rule |
|---|---|---|---|
| Day 1 | Glass ornaments and heirlooms | 60–90 minutes | Pack fragile items first, while you are fresh |
| Day 2 | Light strands and electrical decor | 45–60 minutes | Test every strand before wrapping it |
| Day 3 | Wreaths, garlands, and the tree | 60 minutes | Never stack anything on top of wreaths |
| Day 4 | Soft decor, photos, and labeling | 45 minutes | Photograph and label every bin before stacking |
Once the plan is set, gather your supplies in one spot: the bins, tissue, labels, tape, silica gel packs, and a marker. Packing goes twice as fast when you are not hunting for supplies mid-job. Then work through the twelve holiday decor storage ideas below, starting with the ornaments.
1. Divided Ornament Storage Boxes

Divided ornament storage boxes are the single best investment in holiday decor storage ideas, full stop. Each ornament gets its own padded cell, so nothing touches, nothing rolls, and nothing shatters when the box shifts in the closet. A standard box holds 64 ornaments in cardboard or plastic dividers, and the rigid sides survive being stacked under lighter bins without crushing.
Choose boxes with a sturdy latching lid and carry handles; the cheap flimsy versions crack after two seasons. Place the heaviest ornaments in the bottom tray and the most delicate in the top tray, and slip acid-free tissue into any compartment that feels loose. If your collection includes vintage ornaments with sentimental value, these boxes are non-negotiable, and these Christmas star decor ideas remind you exactly which treasures deserve the best protection.
Styling tips:
- Use 64-count boxes for standard baubles and 24-count boxes for oversized ornaments.
- Line each compartment with acid-free tissue so metallics never touch plastic.
- Label the box lid with the ornament theme inside, like “gold tree set” or “kids handmade”.
- Store boxes upright and never stack anything heavier than tissue on top.
2. Wrap Each Ornament in Tissue Paper

If divided boxes are not in the budget this year, wrapping each ornament in tissue paper is the best free-ish upgrade over tossing them loose in a bin. The tissue creates a soft barrier that absorbs shocks and stops ornaments from knocking against each other, which is the number one cause of cracked glass in storage. Acid-free tissue matters for metallics and painted finishes because regular paper can react with the coating over a long, hot summer.
Work ornament by ornament: lay a sheet of tissue flat, set the ornament in the center, fold the corners up and twist gently at the top. Place wrapped ornaments in a single layer inside a clear bin, and use crumpled tissue as padding between layers. One bag of tissue costs a few dollars and protects an entire tree’s worth of ornaments. Reuse the tissue for two or three seasons, replacing only the sheets that tear.
Styling tips:
- Buy acid-free tissue in bulk packs; it costs pennies per ornament.
- Wrap each ornament individually, never nestle two bare ornaments together.
- Pad the bin bottom and top with crumpled tissue for extra shock absorption.
- Replace torn tissue each season; flattened sheets protect nothing.
3. Clear Stackable Bins With Bold Labels
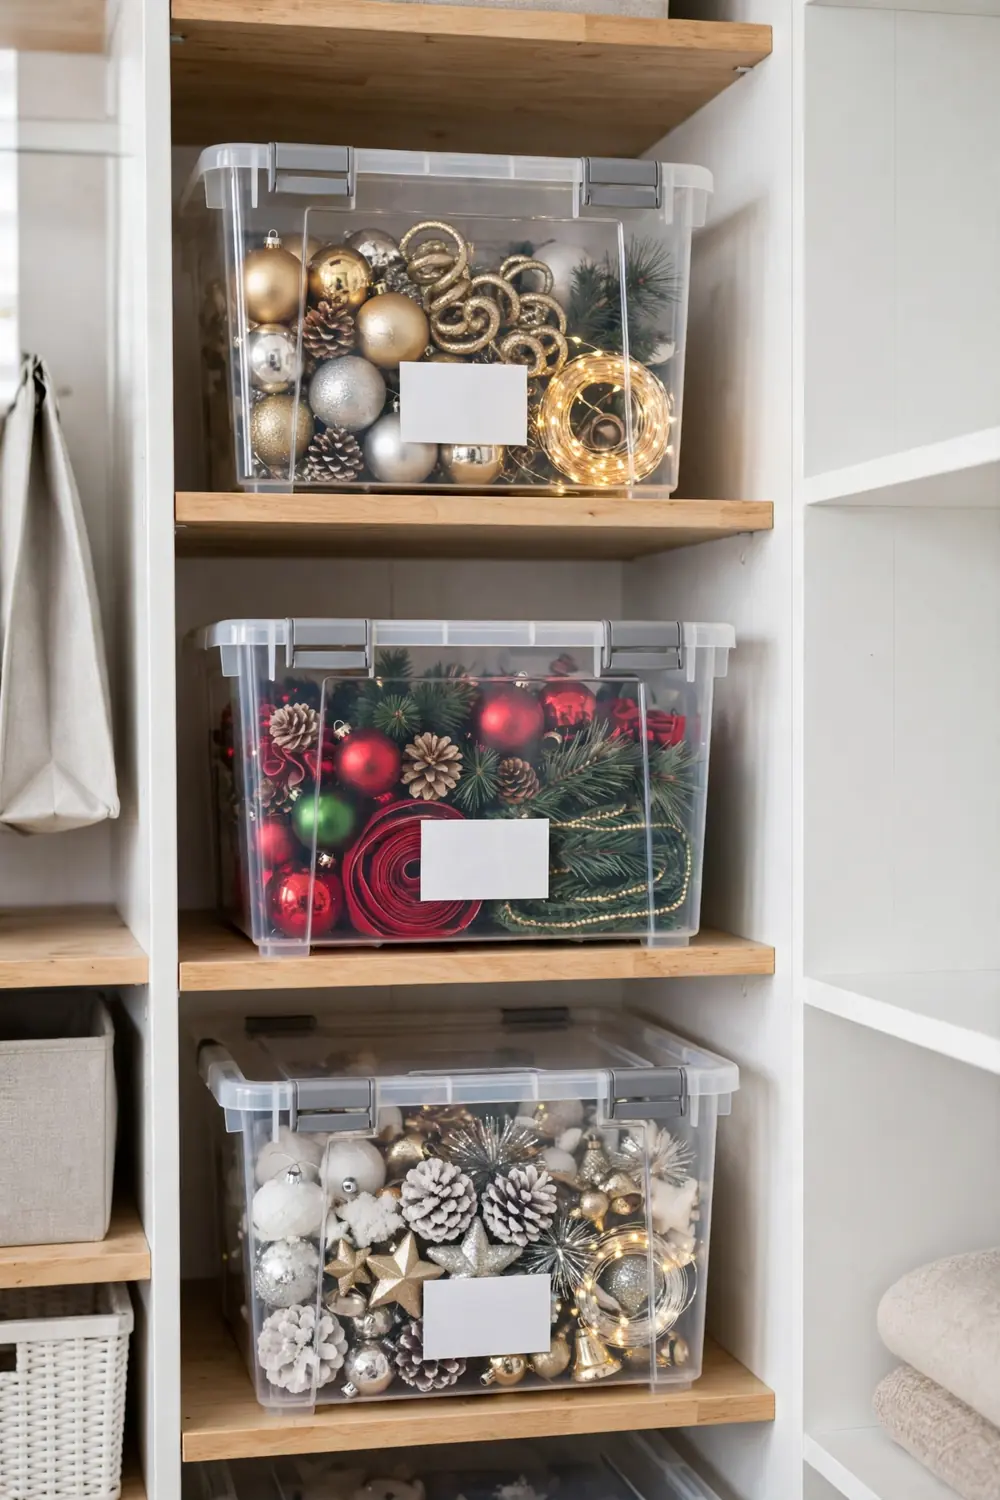
Clear bins are the backbone of every good holiday decor storage system because you can see what is inside without opening anything. Stackable designs with locking lids protect against dust, moisture, and the occasional closet flood far better than cardboard boxes, which sag and invite pests. Buy them all in one size if you can, because uniform bins stack safely and look tidy on shelves.
The labels are what turn bins into a system. Write big, specific labels like “Living room tree ornaments” or “Mantel garlands and stockings” rather than vague “Christmas stuff”. Use a label maker or print adhesive labels so they survive years of handling. Face every label outward on the shelf so next December’s decorating starts with a glance instead of a dig. Add a number to each bin and keep a master list on your phone for the truly organized.
Styling tips:
- Choose clear, stackable bins with locking lids in one uniform size.
- Label both the front and top of every bin so they read from any angle.
- Write specific labels like “tree lights and timers” instead of “Christmas misc”.
- Number bins and keep a phone list of contents for large collections.
4. Wreath Storage Bags on Closet Hooks
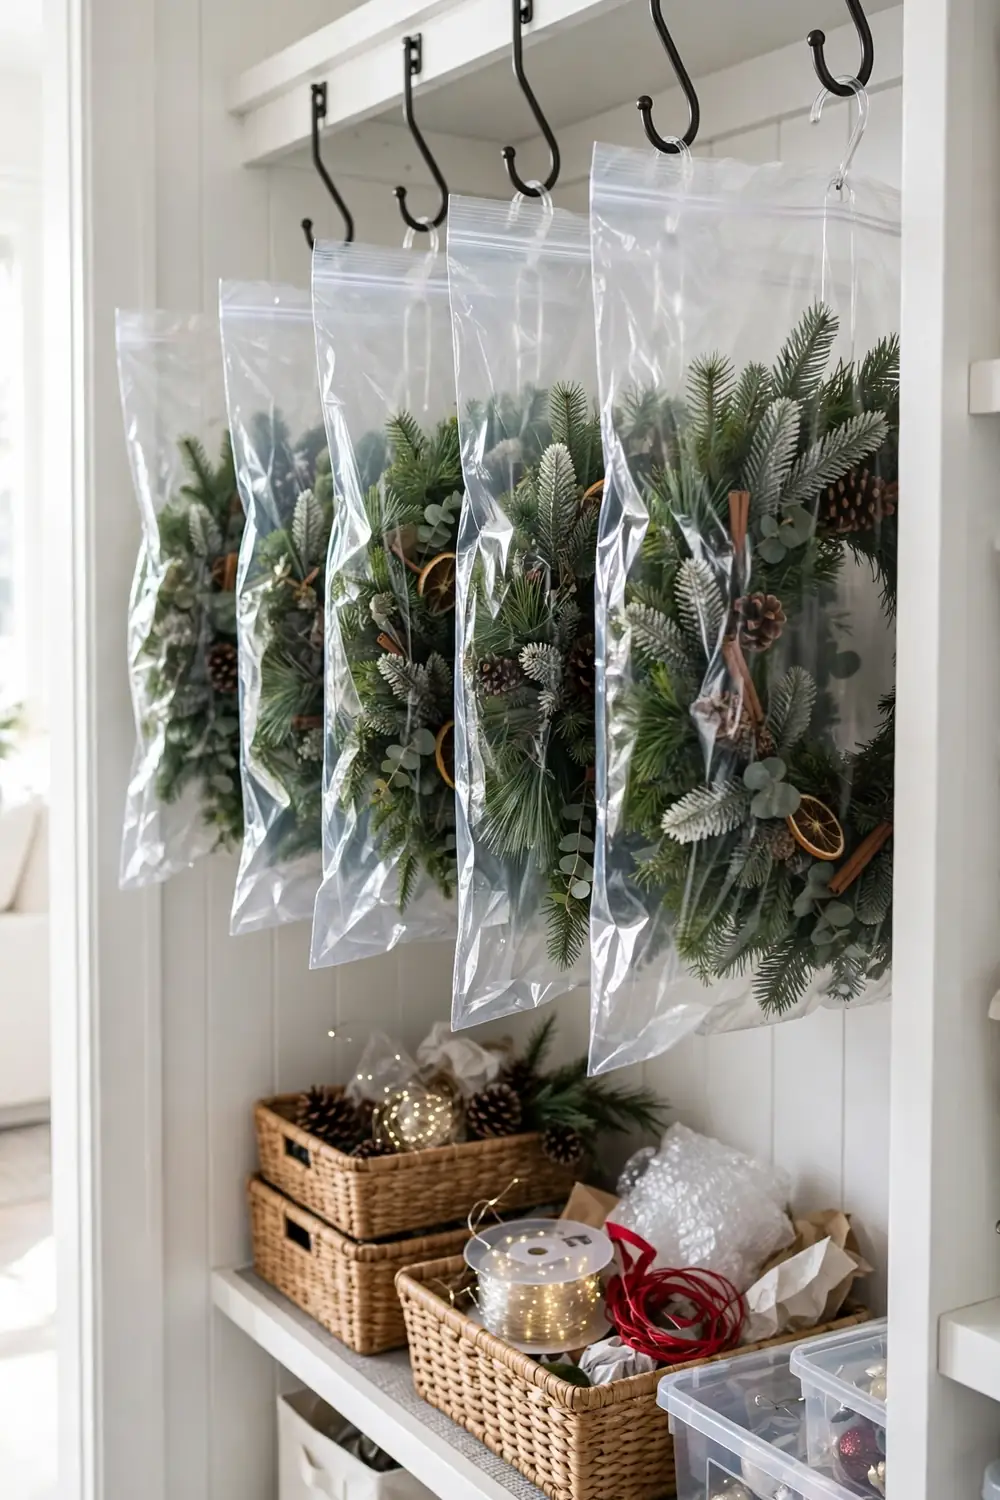
Wreaths are the casualties of bad storage more than anything else. Shoved into boxes or stacked under bins, they come back flattened, shed, and misshapen. A round wreath storage bag with a rigid structure solves the problem: the wreath slides in, the bag zips shut, and you hang it on a closet hook where nothing can sit on it. Nothing crushes it for eleven months.
Measure your wreath’s diameter before buying; bags come in 24, 30, and 36-inch sizes, and a bag that is too small will bend the branches. Hang the bag on a sturdy closet hook or over-the-door hook, never on the floor. If your wreath has lights, fluff and test the strand before storing, and tuck the plug into the center so it does not snag. These oversized Christmas bow decor ideas show off wreaths worth protecting properly.
Styling tips:
- Buy the bag one size up from your wreath so branches never bend.
- Hang bags on hooks, never stack them or lay them flat.
- Fluff artificial branches before storing so they hold their shape.
- Tuck light plugs into the wreath center to prevent snagging.
5. Wrap Light Strands Around Cardboard
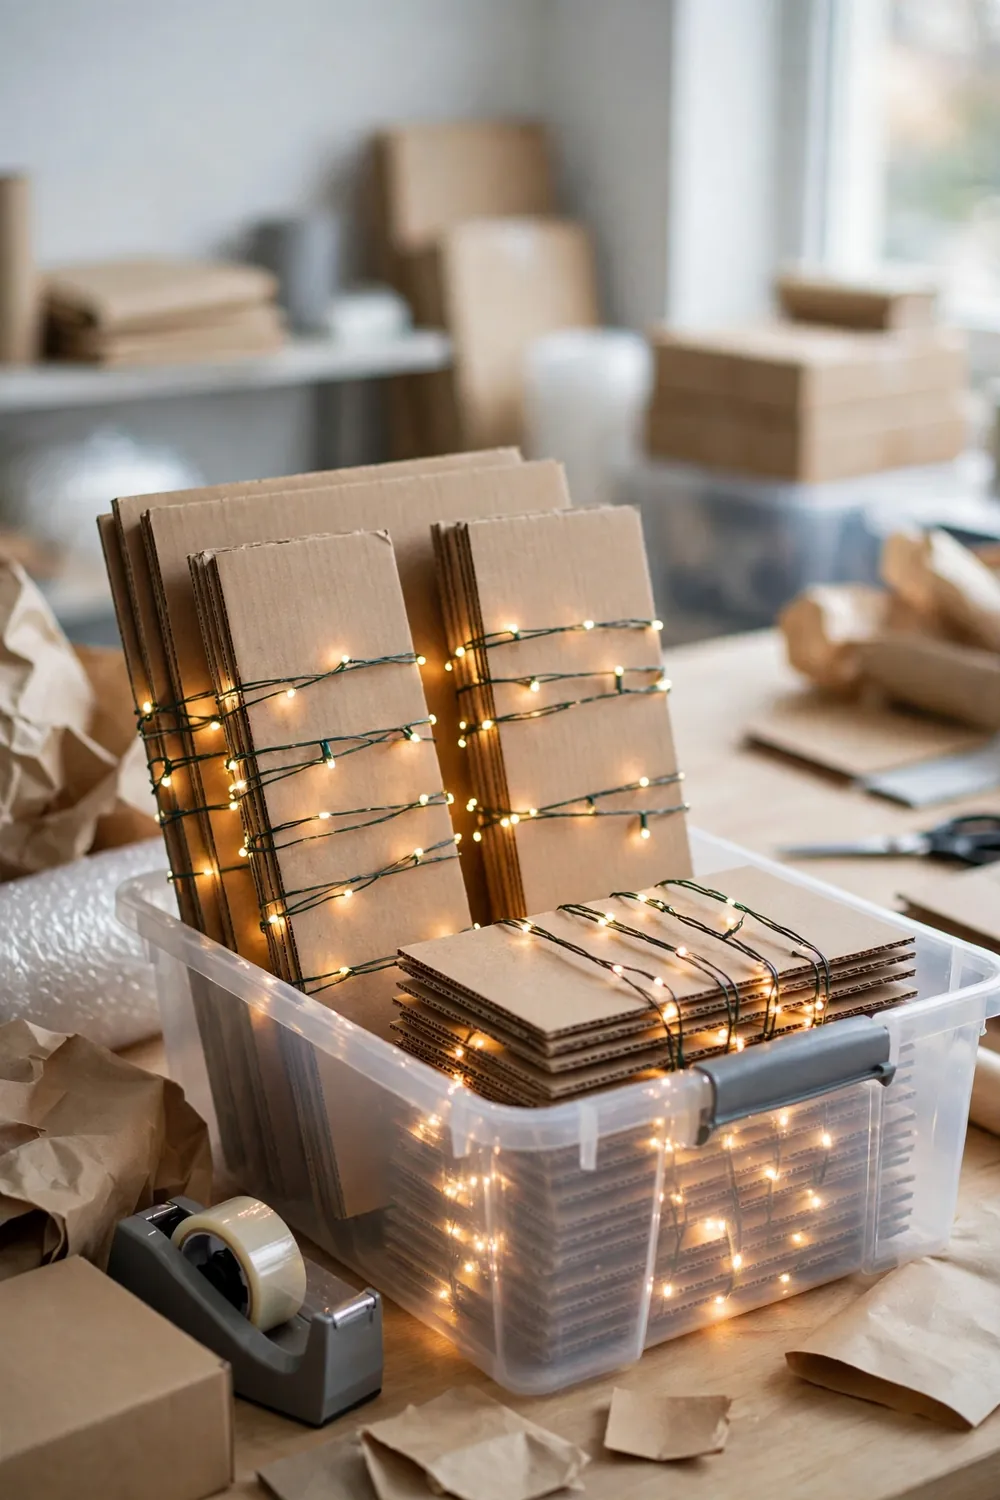
Tangled light strands are the January nightmare everyone knows: a hopeless knot that takes an hour to undo and often snaps bulbs in the process. Wrapping each strand around a flat piece of cardboard before storage prevents the problem entirely. The strand unwinds cleanly next season, every bulb intact, with zero detangling time.
Cut rectangles of sturdy cardboard about 12 by 8 inches, cut a small notch at one end, and anchor the strand’s plug in the notch. Wrap the strand snugly but not drum-tight, tape the far end down, and slide the card into a labeled bin or zip bag. Test every strand before wrapping; packing a dead strand means unpacking and re-testing it next year. For the outdoor lights that take the most abuse, follow expert winter prep guidance like The Spruce’s Christmas light storage guide before they go in the bin.
Styling tips:
- Test every strand before wrapping; never pack a dead strand.
- Cut cardboard to 12 by 8 inches and notch one end to anchor the plug.
- Wrap snug but not tight; over-tension cracks bulb sockets.
- Store each wrapped strand in its own zip bag labeled with its length.
6. A Rolling Storage Bag for the Artificial Tree
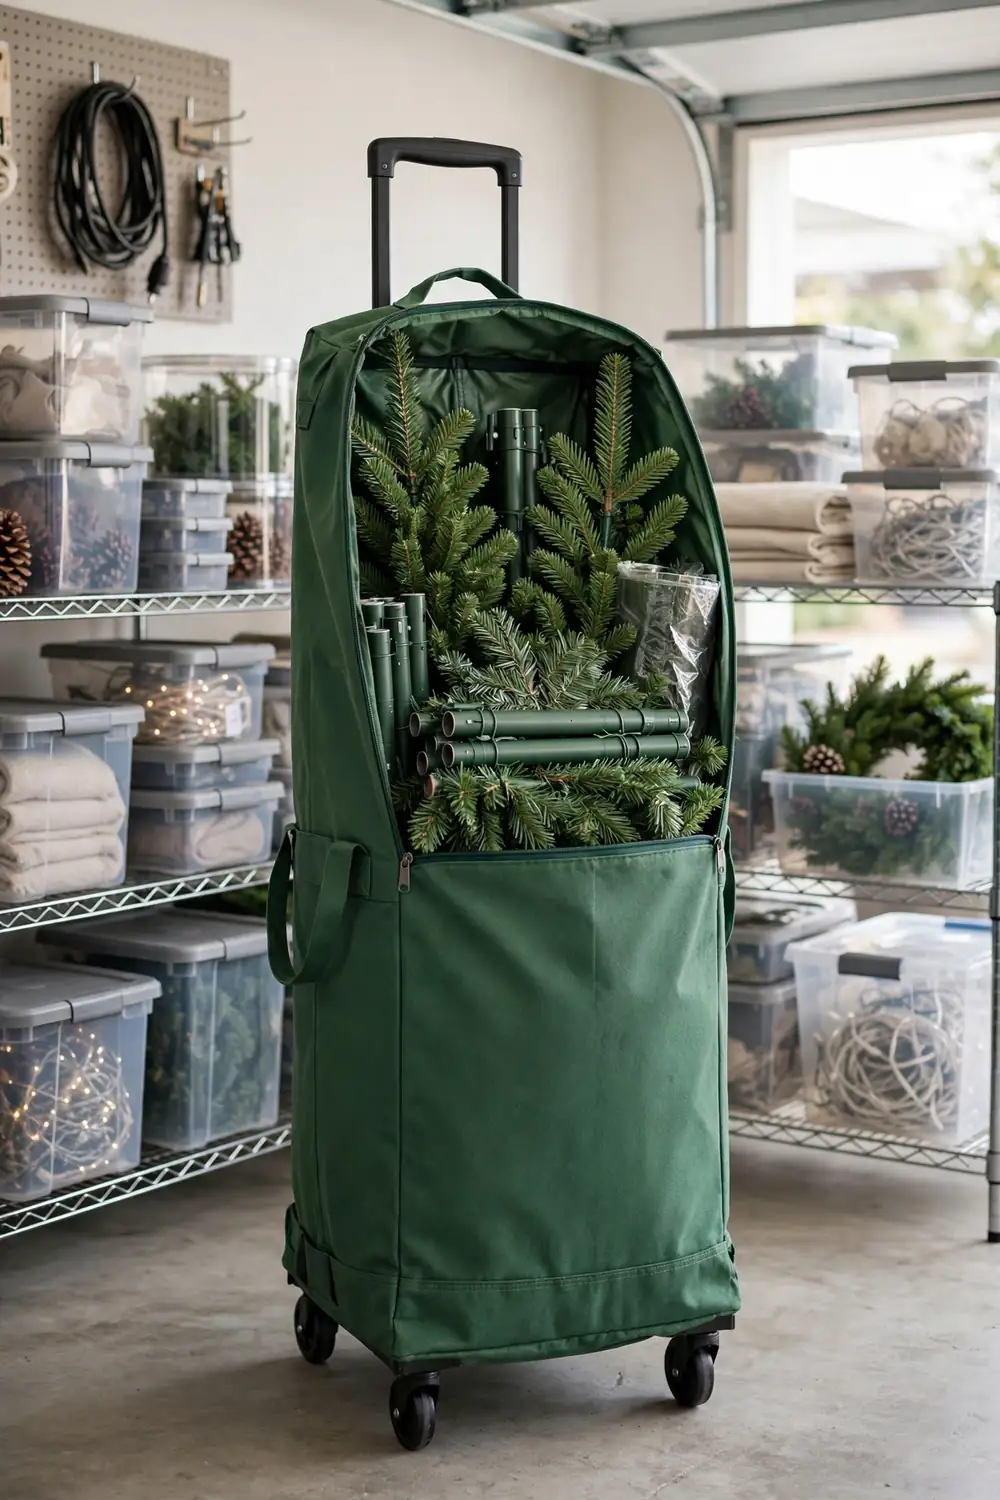
Artificial trees stuffed back into their original cardboard box never fit the same way twice, and the box disintegrates within a few years. A rolling tree storage bag is the upgrade: the tree’s sections slide in vertically, the bag zips closed, and the wheels mean you roll it to the closet instead of wrestling a bulky, floppy mess. Handles on the ends help with lifting into the car or up the stairs.
Disassemble the tree by section, compress the branches gently upward, and slide each section in biggest first. Toss a couple of silica gel packs inside before zipping to control moisture, especially if the storage closet runs humid. Measure your tree’s height before buying; bags are sized for trees up to 7.5 or 9 feet, and a bag that is too short leaves the top section exposed.
Styling tips:
- Buy the bag sized for your tree’s full height plus a few inches.
- Compress branches upward, never force them sideways or they snap.
- Add silica gel packs inside to fight closet humidity.
- Use the wheels; dragging the bag tears the bottom seam.
7. Egg Cartons for Small Ornaments
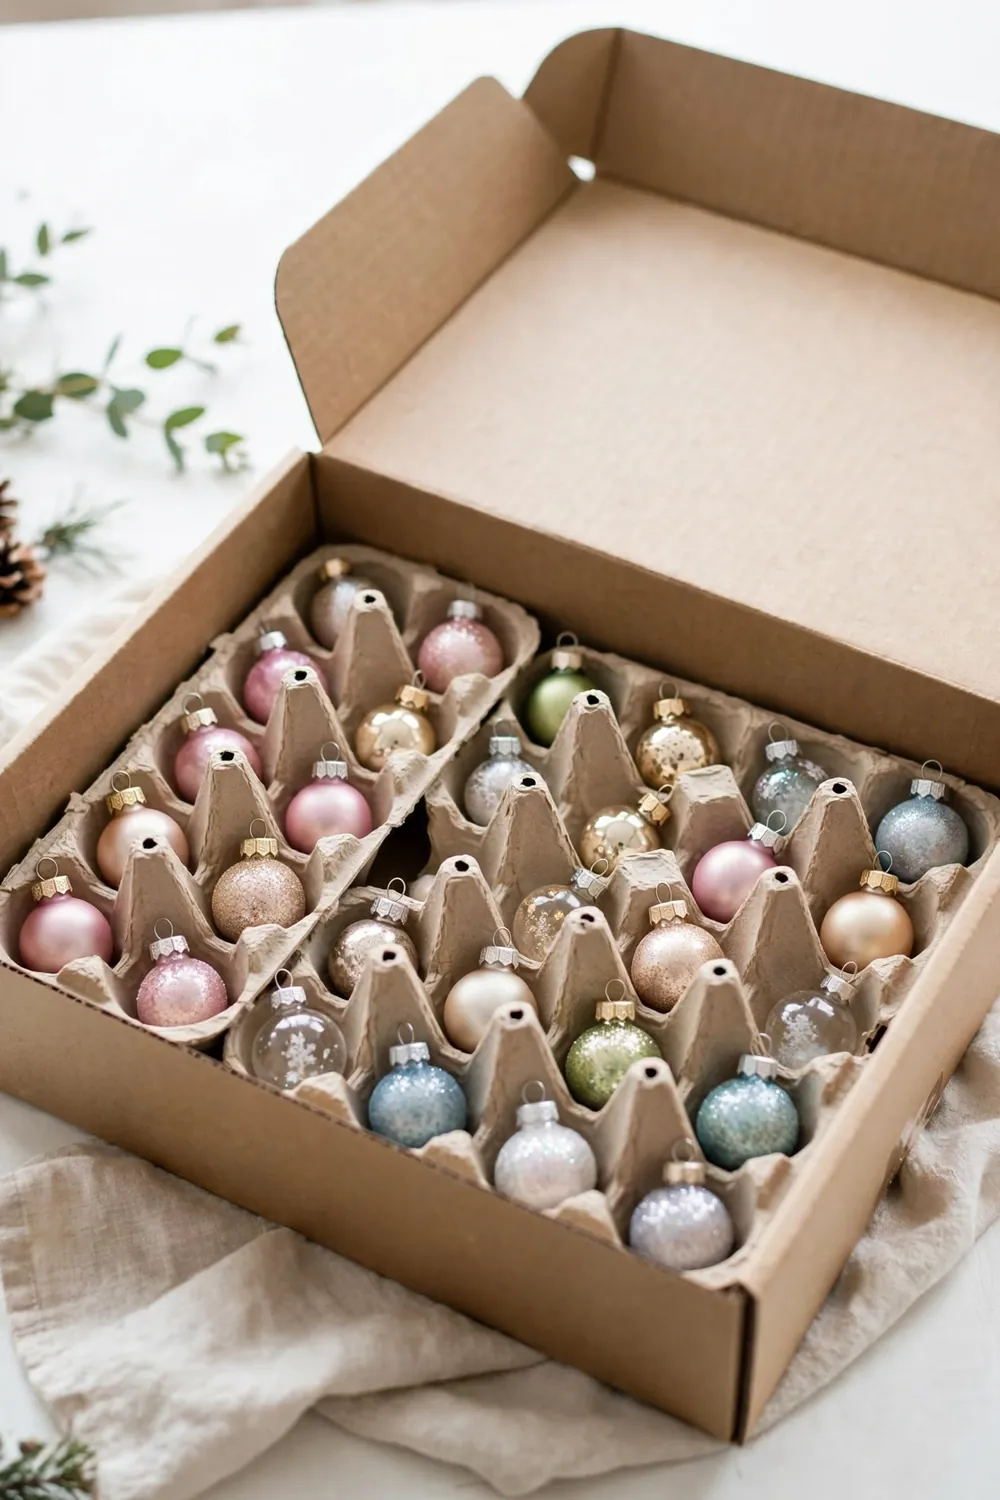
Egg cartons are the free version of divided ornament boxes, and they work surprisingly well for small baubles, miniature ornaments, and delicate picks. Each cup cradles one ornament, keeping pieces separated and cushioned, and the carton itself stacks neatly inside a larger bin. It is the best zero-cost storage trick in this entire guide.
Use clean, dry cardboard cartons rather than styrofoam; cardboard breathes and will not stick to ornament finishes in heat. Place one small ornament per cup, close the lid, and stack the cartons no more than three high inside a bin. Label the bin “small ornaments” so you know exactly where the tree’s finishing touches live.
Styling tips:
- Use cardboard cartons, not styrofoam, which can stick to finishes in heat.
- One ornament per cup; doubling up defeats the purpose.
- Stack cartons no more than three high to avoid crushing the bottom layer.
- Replace cartons every two or three seasons as they soften.
8. Photograph Everything Before You Pack

The best holiday decor storage ideas are not all physical; this one is digital. Before you pack a single box, photograph your decorated tree, mantel, wreaths, and tables exactly as they looked at their best. Next December, those photos become your setup cheat sheet: you will know which ornaments went where, how the mantel was layered, and where each light strand started.
Go further and photograph the contents of each bin as you pack it, then tape a printed copy or a QR link to the bin’s label. This photo inventory saves the annual “which bin has the tree skirt” hunt and makes it easy for anyone in the family to help unpack. Store the photos in a dedicated “Holiday” album on your phone so they do not get buried in the camera roll.
Styling tips:
- Photograph every decorated spot at its peak before touching anything.
- Snap the contents of each bin as you pack it, top layer only is enough.
- Tape a printed photo or QR code to the outside of each bin.
- Save everything in a dedicated phone album named for the year.
9. Store Indoors, Not in a Hot Attic

Where you store matters as much as how you store. A hot attic can hit 150 degrees in summer, which melts candle wax decor, warps plastic ornaments, dries out adhesives, and fades fabrics. A damp garage grows mold on wreaths and tree skirts. The ideal storage spot is climate-stable: a spare closet, under-bed space, or a basement corner that stays dry.
If the attic or garage is your only option, upgrade your defenses: sealed bins instead of cardboard, silica gel packs in every bin, and the most temperature-sensitive items, candles, adhesives, and heirloom ornaments, kept inside the house. Organization experts like Better Homes & Gardens consistently rank climate-stable indoor spots as the safest place for anything fragile or sentimental.
Styling tips:
- Keep candles, heirlooms, and glued items inside the house, never in the attic.
- Use sealed bins, not cardboard, in garages and basements.
- Check storage spots for leaks and pests before the boxes go in.
- Rotate: bring the most sensitive bins indoors each spring.
10. Garment Bags for Garlands

Garlands suffer the same fate as wreaths when folded into bins: bent branches, shed needles, and a flat spot that never fluffs back out. Hanging them in garment bags keeps every branch straight and dust-free. Drape the garland over a padded hanger, zip the bag, and hang it in the closet with your coats.
Clear garment bags let you see which garland is which, and breathable fabric bags prevent moisture buildup on artificial greenery. For lighted garlands, test the strand first and coil the plug into the center. Long banister garlands can hang from two hangers joined with a zip tie so the full length stays supported.
Styling tips:
- Drape garlands over padded hangers so the full length stays straight.
- Use clear or breathable garment bags to prevent dust and moisture.
- Support long garlands with two hangers joined by a zip tie.
- Test lighted garlands before storing and coil the plug in the center.
11. Silica Gel and Cedar Against Moisture and Moths
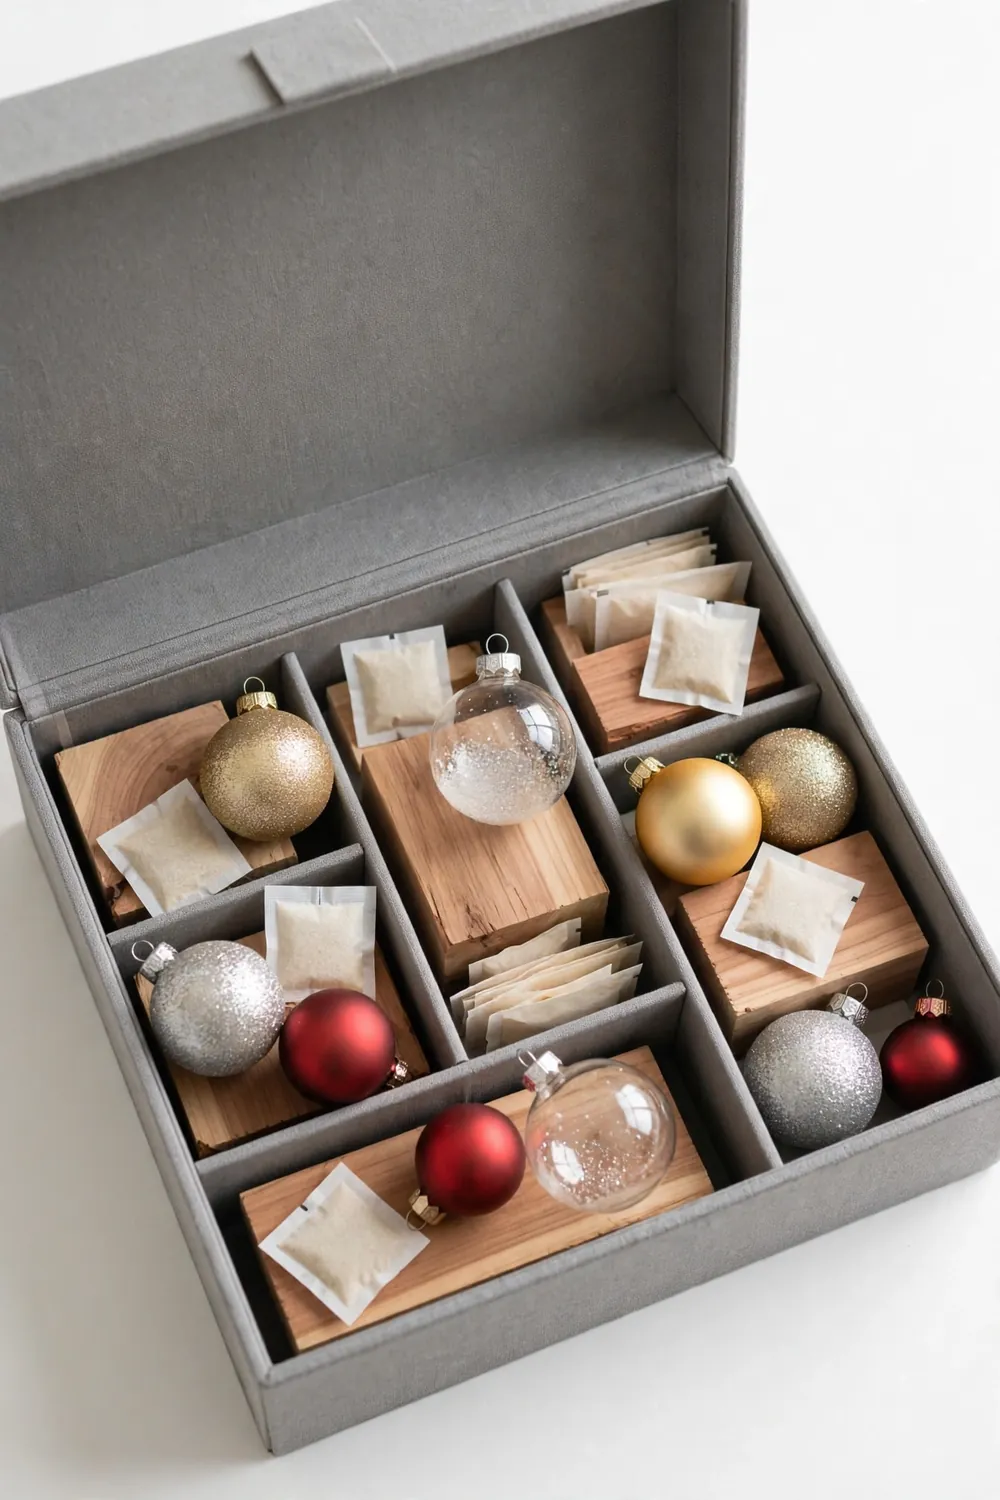
Moisture is the silent killer of stored holiday decor: it rusts metal ornament hooks, mildews tree skirts, and warps paper decorations. Moths go after the natural fibers in stockings and felt garlands. Two cheap defenses handle both. Silica gel packets in every bin absorb ambient humidity for months, and cedar blocks or rings repel moths without the chemical smell of mothballs.
Drop two or three silica gel packets into each sealed bin, more in large tree bags, and place cedar blocks on top of any bin holding fabrics. Replace silica gel each season; the rechargeable kind can be dried in the oven and reused. Keep mothballs far away from your decor; the smell embeds in fabric and never fully leaves.
Styling tips:
- Put 2 to 3 silica gel packets in every sealed bin, more in tree bags.
- Place cedar blocks on top of bins holding stockings and fabric decor.
- Recharge silica gel in a low oven or replace it each season.
- Never use mothballs; the chemical smell permanently invades fabrics.
12. Build One Holiday Storage Hub
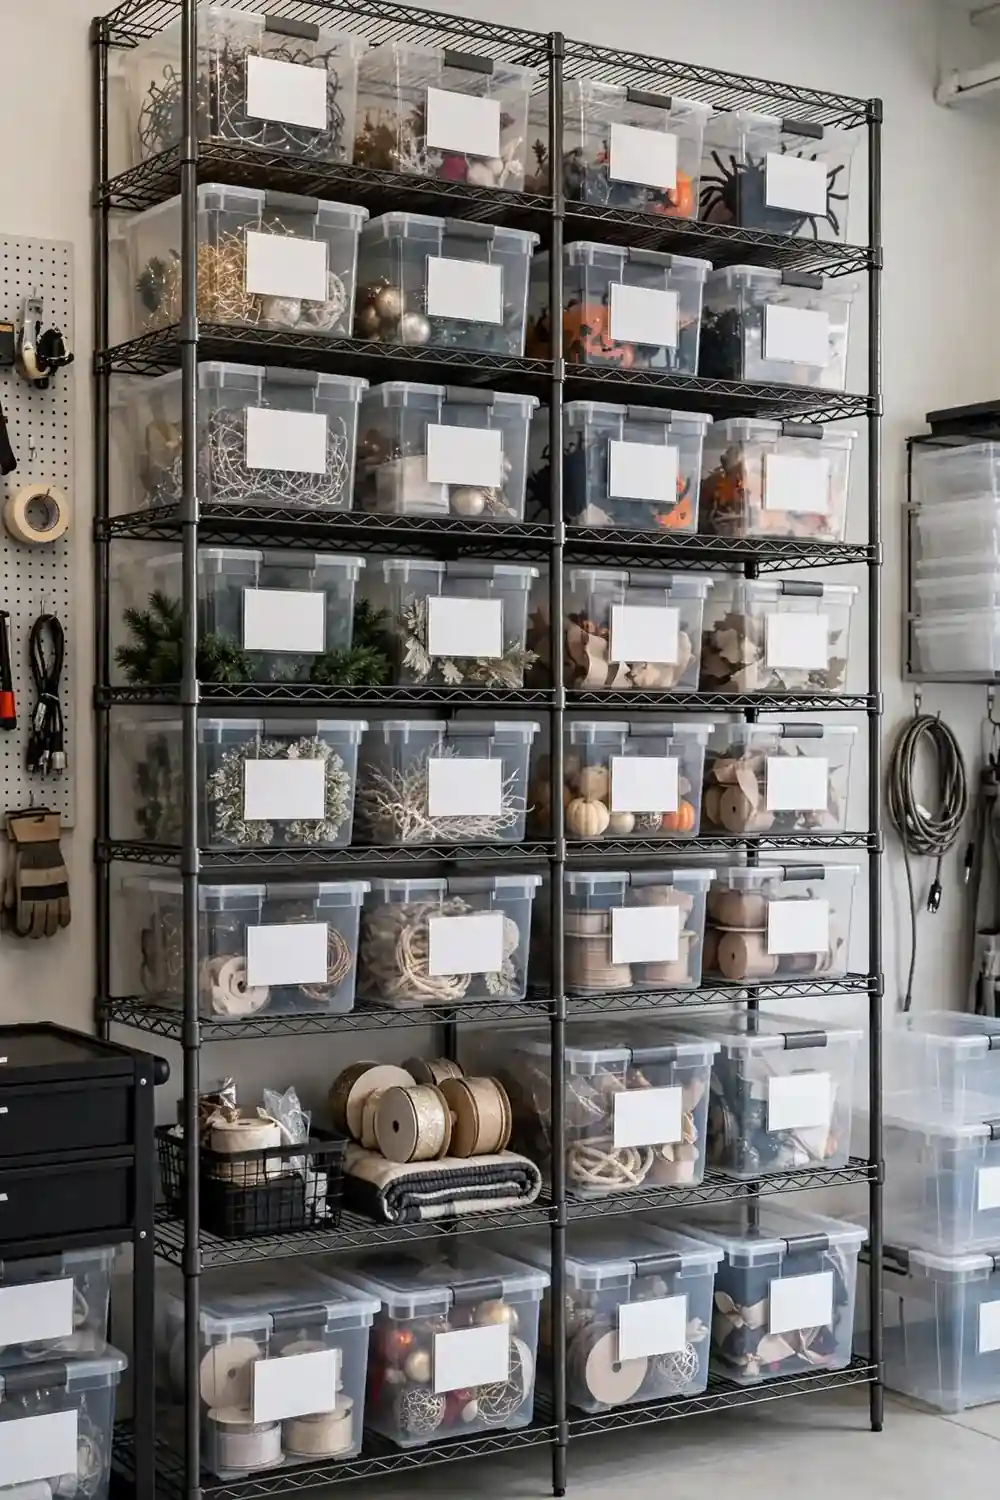
The final holiday decor storage idea ties everything together: one dedicated storage hub where every bin, bag, and box lives year-round. A corner of the garage with freestanding shelves, a section of the basement, or even a spare closet becomes holiday headquarters. When everything has one home, nothing gets lost behind the paint cans or buried under luggage.
Set up sturdy shelving rated for the weight; holiday bins are heavier than they look. Put the heaviest bins (tree bag, ornament boxes) on the bottom shelves and the light wreath bags hanging on the side. Keep a step stool nearby so the top shelf stays usable. Photograph the hub layout once it is perfect so you can recreate it exactly after next December’s decorating spree.
Styling tips:
- Dedicate one shelving unit or closet corner as the permanent holiday hub.
- Put heavy bins low and light wreath bags high or on side hooks.
- Keep a step stool at the hub so every shelf stays reachable.
- Photograph the final layout to recreate it perfectly next January.
Holiday Decor Storage: Mistakes to Avoid
| Mistake | Why It Fails | Do This Instead |
|---|---|---|
| Tossing ornaments loose in a bin | Glass pieces collide and shatter with every move | Use divided boxes or wrap each piece in tissue |
| Storing decor in a hot attic | Heat melts wax, warps plastic, and fades fabrics | Keep fragile and sentimental items indoors |
| Stacking heavy boxes on wreaths | Branches flatten permanently and never fluff back | Hang wreaths in bags on hooks, nothing on top |
| Skipping labels | Next December starts with a mystery-box scavenger hunt | Label every bin front and top with specific contents |
| Winding lights into a ball | The tangle snaps bulbs and wastes an hour to undo | Wrap each strand around a notched cardboard piece |
| Packing damp or dusty decor | Moisture grows mold and dust embeds in fabric over months | Wipe and fully dry everything before it goes in a bin |
Good holiday decor storage ideas are really about one thing: protecting the investment you already made in your decorations. Every ornament that survives, every light strand that untangles in minutes, and every wreath that comes back full is money and time saved. Start with the ornaments, work through the timeline, label everything, and give your decor one dedicated hub. Next December, you will thank January-you for doing it right. Happy packing, and here is to a flawless setup next season.
