

Christmas decorating gets expensive fast, but some of the most charming holiday decor starts at just $1.25 a piece. These dollar tree christmas decor diys prove that a small budget and a hot glue gun can deck every hall just as beautifully as the big box stores, with handmade touches that look thoughtful instead of mass produced.
The trick to Dollar Tree Christmas crafts that look expensive is all in the finishing: a coat of spray paint, good ribbon, and warm lighting elevate $1.25 supplies into decor guests will swear came from a boutique. Each project below lists the core supplies, the approximate cost, and the time it takes, so you can plan a whole crafting afternoon.
Below you will find 12 Dollar Tree Christmas decor DIYs for every room, starting with a supply planning guide that covers what to buy and what each project really costs, then 12 step by step style ideas from ornament wreaths to snow globes to a luxe looking centerpiece. Grab your glue gun and let us make the holidays handmade.
How to Plan Your Dollar Tree Christmas DIY Haul
Shop with a project list, not a wandering eye. Dollar Tree aisles are designed for impulse buys, so decide your projects first and buy only the supplies each one needs, plus one spare of anything breakable. The supply table below covers every project in this guide with core supplies, approximate cost, and time needed.
Dollar Tree Christmas Decor DIYs: Supply Planning Guide
| Project | Core Supplies | Approx Cost | Time Needed |
|---|---|---|---|
| Ornament wreath | 2 packs ball ornaments, foam wreath form, ribbon | $8 to $12 | 1 hour |
| Mason jar snow globes | 3 mason jars, mini trees, glitter, glycerin | $6 to $10 | 45 minutes |
| Painted candle holders | 3 glass vases, frost spray paint, tea lights | $7 to $11 | 30 min plus drying |
| Bottle brush tree forest | 6 bottle brush trees, wood slices, faux snow | $8 to $12 | 30 minutes |
| Ribbon stair garland | 3 ribbon rolls, pine picks, ornament pack | $9 to $14 | 1 hour |
| Framed gift wrap art | 3 frames, wrapping paper roll | $5 to $8 | 20 minutes |
| Pinecone centerpiece | Wood tray, pinecones, berries, fairy lights | $8 to $12 | 40 minutes |
| Village houses | 3 wood houses, white paint, glitter | $7 to $11 | 1 hour plus drying |
| Farmhouse sign | Wood plank sign, acrylic paint, brushes | $5 to $9 | 1 hour plus drying |
| Stocking display | 4 stockings, twine, clothespins, mini garland | $8 to $12 | 30 minutes |
| Tabletop mini tree | 2 ft tree, mini ornament pack, ribbon | $9 to $14 | 45 minutes |
| Luxe centerpiece | 2 candlesticks, vases, florals, ornaments | $12 to $18 | 1 hour |
If you love a big bow moment, these oversized christmas bow decor ideas pair beautifully with the wreath and garland projects below. And if you are already crafting for the holidays, these dollar tree thanksgiving decor diys use the same supplies for a November head start.
Dollar Tree Christmas Decor: Budget Planning Table
| Budget Tier | Spend Range | What to Focus On | Best First Buy |
|---|---|---|---|
| Single project | $5 to $15 | One statement piece like the wreath | Ornament wreath supplies |
| Room refresh | $20 to $40 | 3 to 4 coordinated projects | Snow globes plus candle holders plus garland |
| Whole home handmade | $50 to $90 | Whole home handmade | Full supply haul with spare ribbon and paint |
For more budget holiday inspiration, the craft ideas at Better Homes and Gardens and the DIY guides at The Spruce are full of techniques that adapt perfectly to dollar store supplies.
1. DIY Ornament Wreath: The Dollar Tree Christmas Decor DIY Everyone Asks About
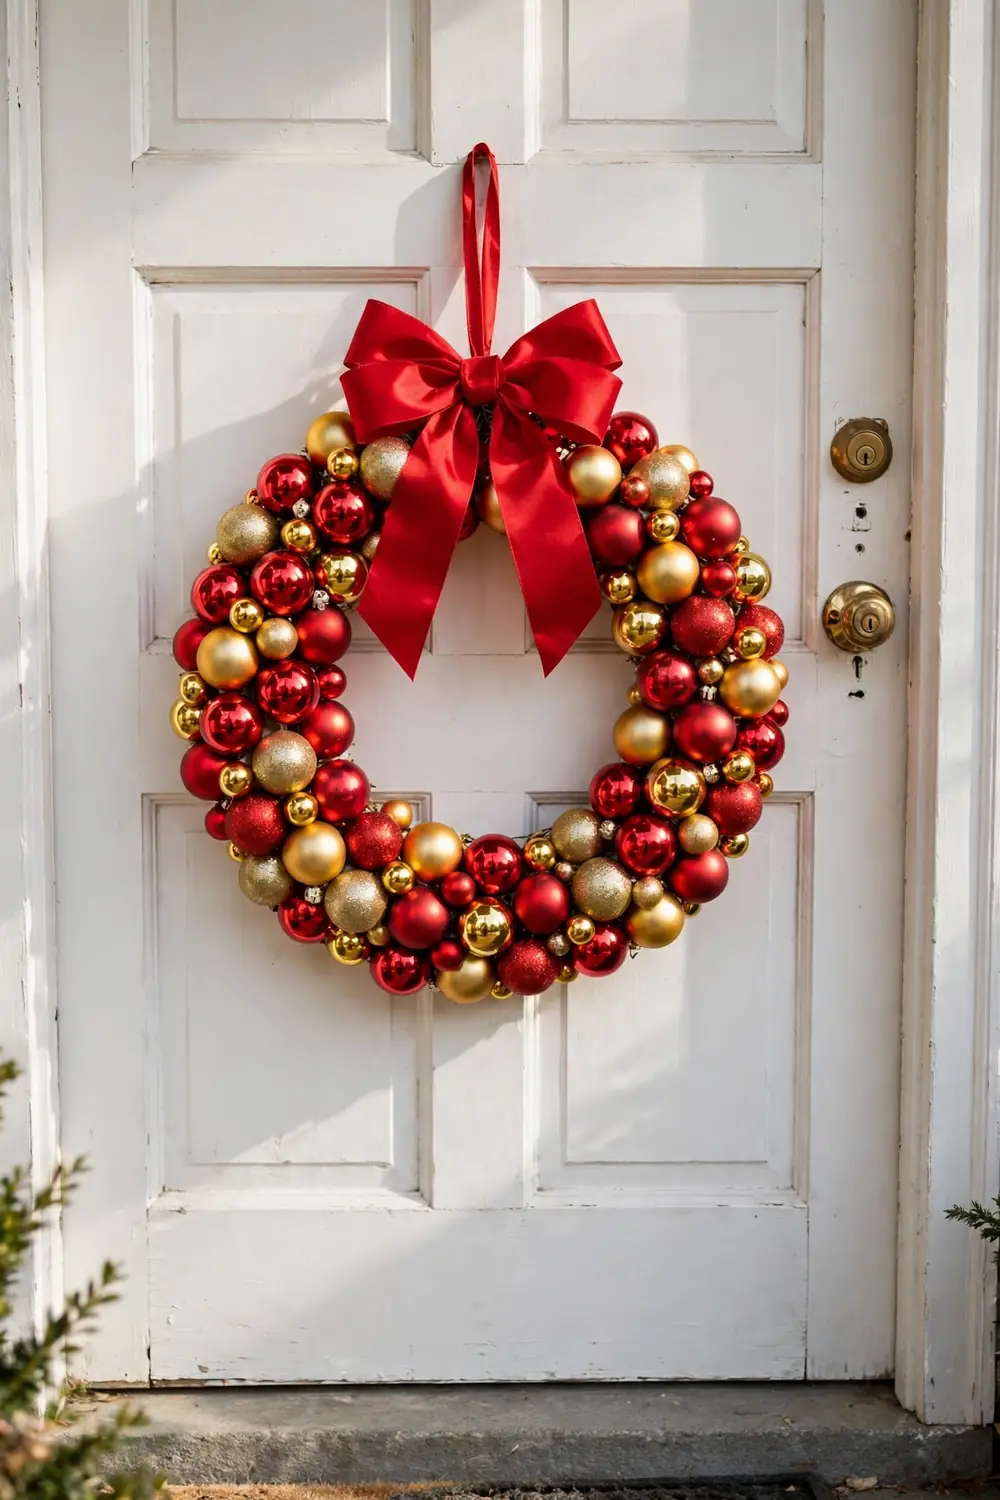
This ornament wreath looks like a $60 boutique find and costs under $12 to make. Glue shiny ball ornaments in tight rows around a foam wreath form, mixing red and gold for a classic look or silver and champagne for something modern. The dense, glossy finish reads luxurious from across the room.
You will need two to three 6 packs of ball ornaments and one 12 inch foam wreath form. Hot glue each ornament by its cap, working in sections and varying the sizes so no foam peeks through. Finish with a wide wired ribbon bow at the top and a loop for hanging. Let the glue cool fully, about 20 minutes, before hanging.
Styling tips:
- Glue ornaments by the cap so they sit at jaunty angles.
- Mix two ornament sizes for a full, professional look.
- Work in sections so glue does not cool before placing.
- Add the bow last to hide the hanging loop.
2. Mason Jar Snow Globes

Mason jar snow globes are pure Christmas nostalgia in a jar, and they cost about $2 each to make. Glue a miniature bottle brush tree and a tiny house to the inside of the lid, fill the jar with distilled water, a teaspoon of glycerin, and a tablespoon of glitter, then seal it tight. Flip it over and watch it snow.
Use wide mouth quart jars so little hands can see inside clearly. A drop of glycerin makes the glitter fall slowly like real snow; skip it and the glitter drops too fast. Seal the lid with a thin line of waterproof glue or silicone so curious kids cannot open it. Paint the lids red or gold for a finished look.
Styling tips:
- Use distilled water so the globe stays crystal clear.
- Add glycerin for slow, realistic snowfall.
- Seal lids with silicone for kid proof globes.
- Paint lids red or gold to finish the look.
3. Painted Glass Candle Holders
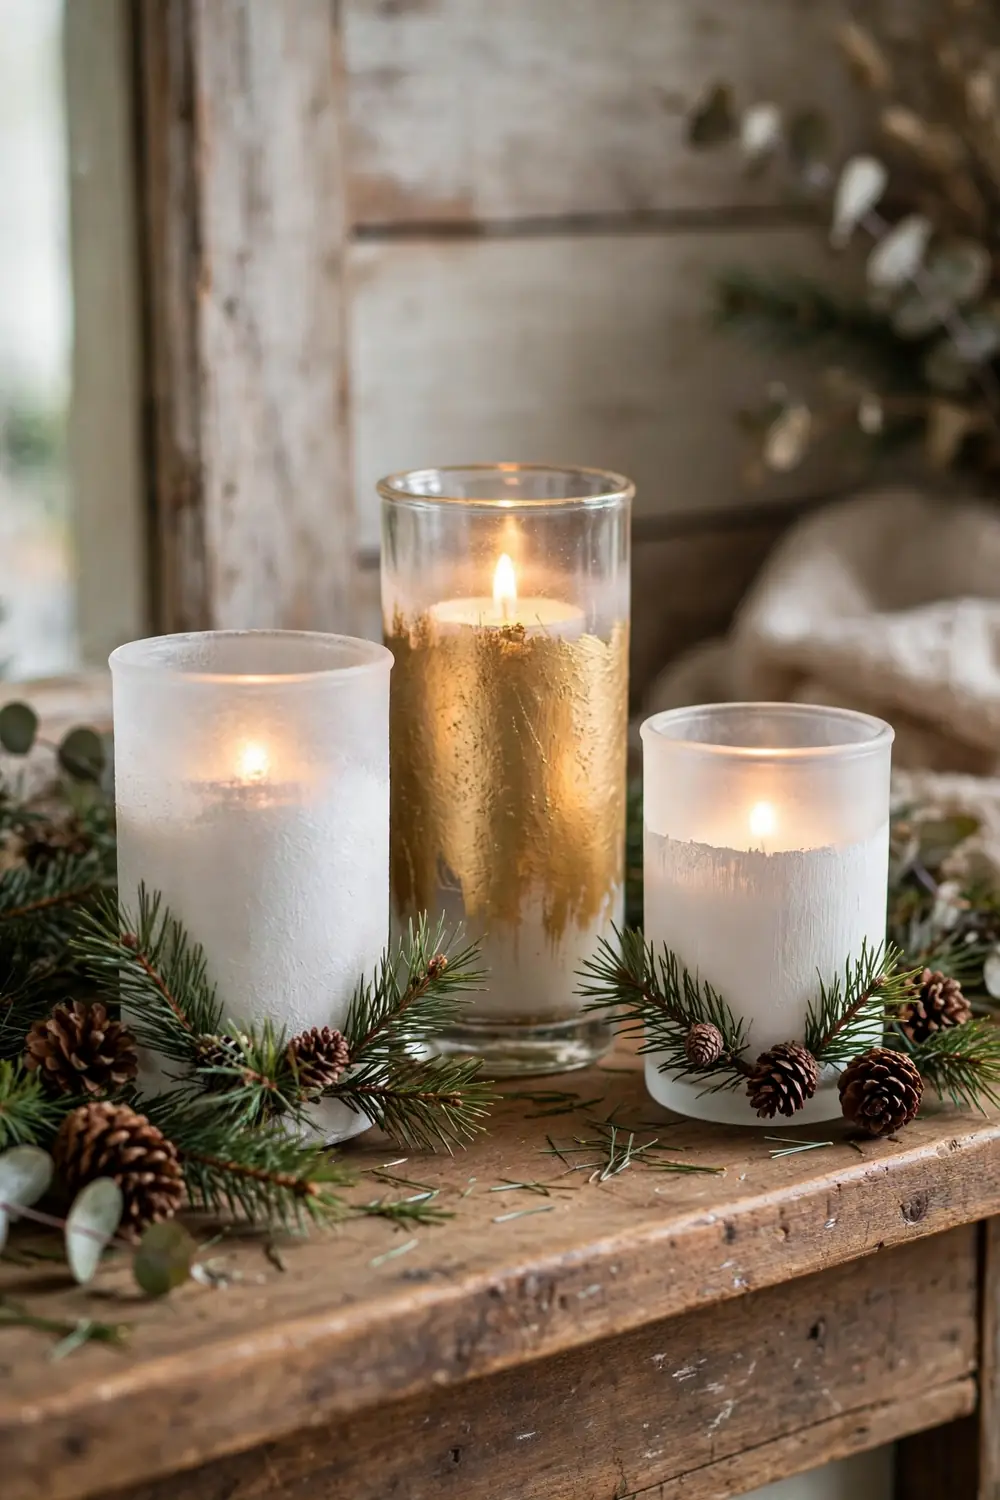
Plain dollar store vases become frosted, mercury glass style candle holders with one can of spray paint. A light coat of frosted glass spray, or metallic gold for glam, transforms $1.25 cylinders into candle holders that look straight out of a home decor catalog. Group three in varying heights on the mantel.
Spray in light, even coats from 8 to 10 inches away, letting each coat dry 15 minutes. Two to three coats give the perfect frosted effect without drips. Drop in LED tea lights, never real flames in painted glass, and tuck pine sprigs around the bases. For tree side styling that matches, these christmas tree ideas show mantel pairings for every tree style.
Styling tips:
- Spray light coats from 8 to 10 inches away.
- Let each coat dry 15 minutes to avoid drips.
- Use LED tea lights only in painted glass.
- Group three heights for a styled mantel look.
4. Mini Bottle Brush Tree Forest

A forest of mini bottle brush trees is the cutest $10 you will spend this Christmas. Mount the little trees on wood slice bases, dust them with faux snow, and cluster them on a shelf, mantel, or windowsill. The mix of green, white, and blush pink trees looks straight out of a Scandinavian holiday catalog.
Hot glue each tree to a 2 to 3 inch wood slice for a natural base, then sprinkle faux snow over the branches. Arrange five to seven trees in a cluster, varying heights from 4 to 8 inches, and weave a short string of battery fairy lights through them. They also make adorable place card holders with a tiny tag tied on.
Styling tips:
- Glue trees to wood slices for a finished base.
- Cluster 5 to 7 trees in varied heights.
- Weave battery fairy lights through the cluster.
- Add tiny gift tags to double as place cards.
5. DIY Ribbon Garland: A Dollar Tree Christmas Decor DIY for the Staircase
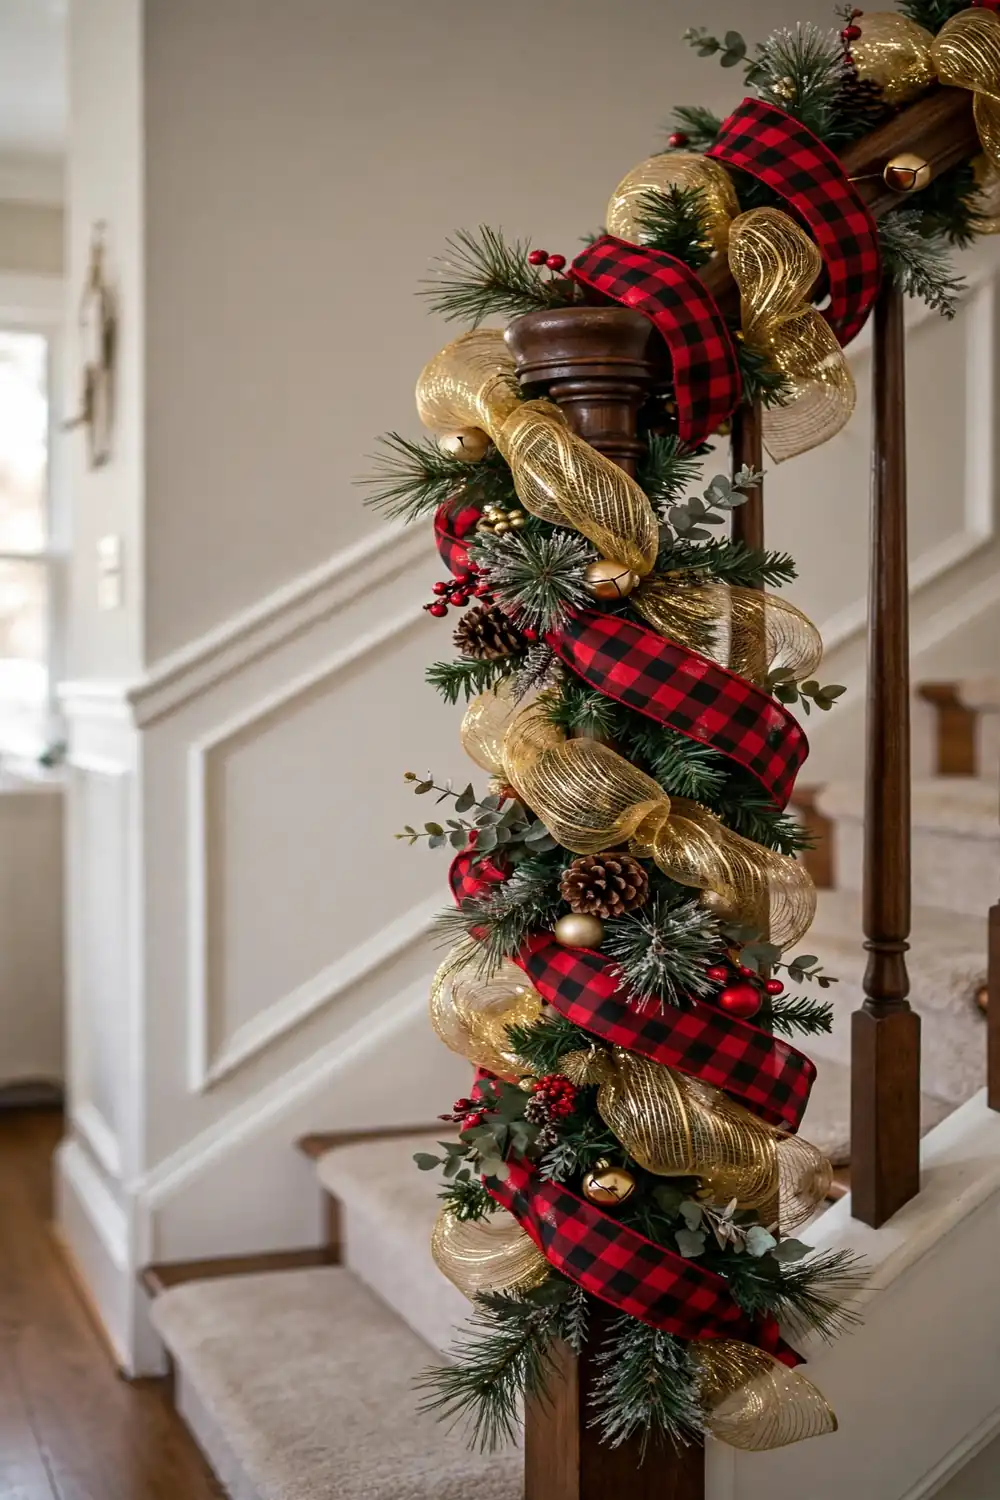
Ribbon garland is the fastest way to dress a staircase for Christmas, and dollar store ribbon makes it practically free. Twist wired ribbon in loose loops around the banister, tucking in pine picks and small ornaments as you go. The mix of red buffalo check and gold mesh looks rich and layered.
You will need three rolls of 2.5 inch wired ribbon for a standard 10 foot banister. Secure the ribbon every 18 inches with a small piece of floral wire, letting it billow between anchor points rather than wrapping tight. Tuck pine picks and ornaments into the loops last, and add a big bow at the newel post to finish.
Styling tips:
- Use wired ribbon so loops hold their shape.
- Anchor every 18 inches; let ribbon billow between.
- Tuck greenery and ornaments in last.
- Finish the newel post with an oversized bow.
6. Framed Gift Wrap Wall Art
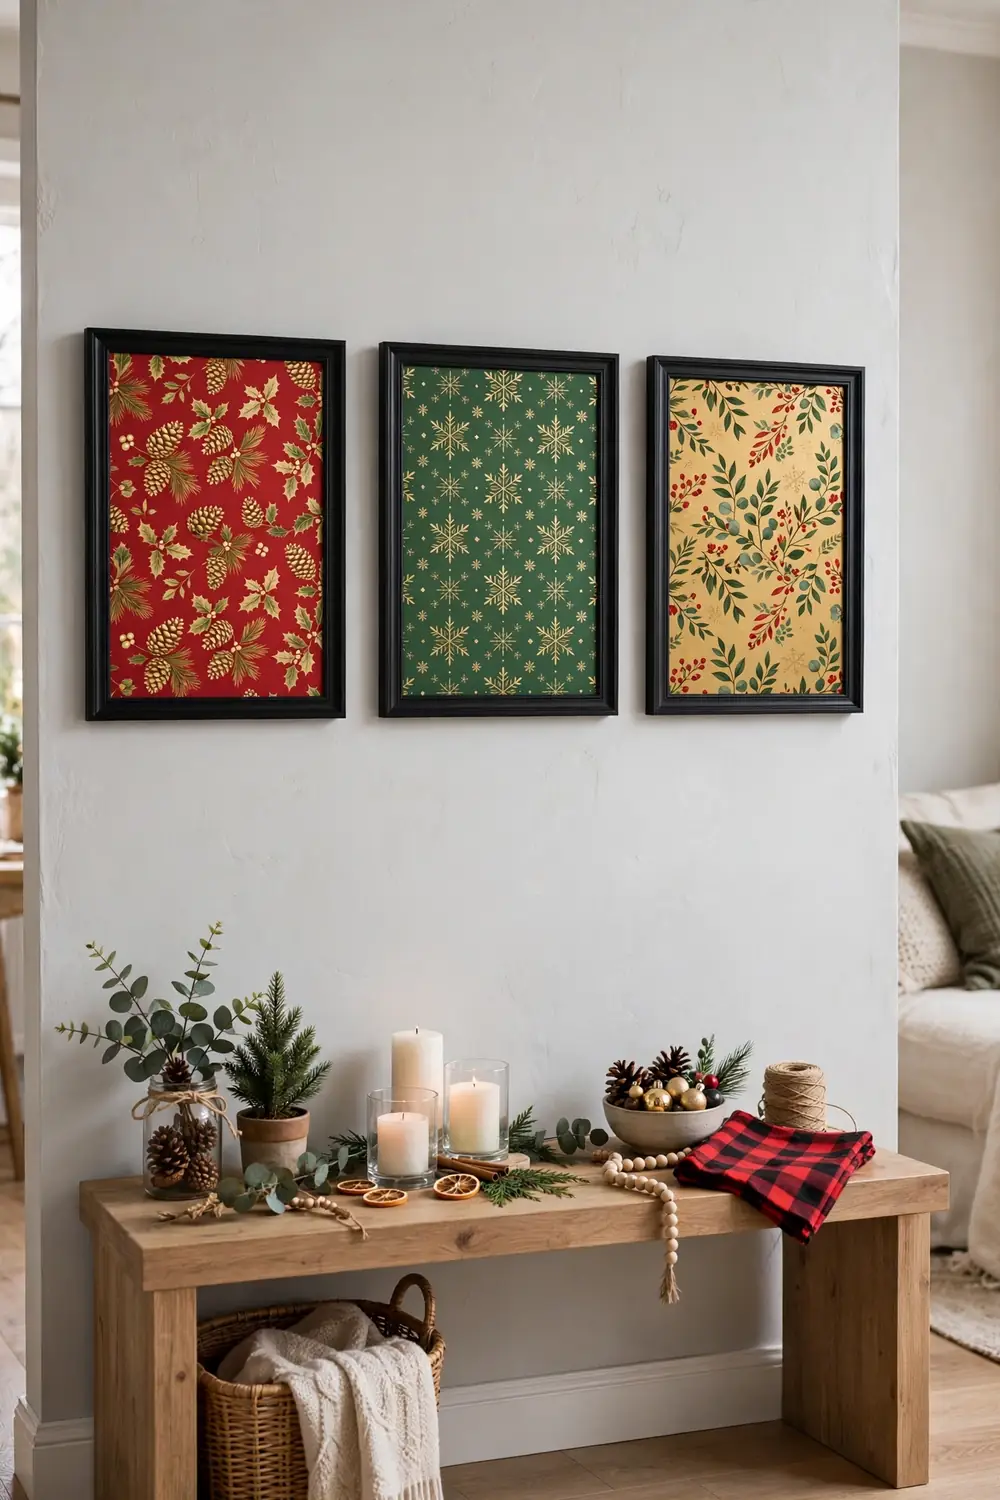
The prettiest wrapping paper deserves to be seen all season, not torn open in seconds. Frame three coordinating gift wrap patterns in simple black frames and hang them in a row for instant holiday wall art that costs under $8 total. It is the easiest project on this list and one of the most striking.
Choose one roll of quality looking wrap, or three coordinating patterns in your palette. Cut each piece an inch larger than the frame opening on all sides, then fold the edges neatly behind the backing board. Hang the trio 2 to 3 inches apart above a console table, centered at 57 inches high.
Styling tips:
- Pick coordinating patterns in one tight palette.
- Cut paper an inch larger and fold edges behind.
- Hang 2 to 3 inches apart in a straight row.
- Center the arrangement at 57 inches high.
7. Snowy Pinecone Centerpiece

Pinecones dusted with faux snow make a centerpiece that smells like a walk in the woods and costs less than a coffee. Arrange them in a rustic wooden tray with red berry picks, pine sprigs, and a string of warm fairy lights for a centerpiece that works from December first through New Year.
Bake gathered pinecones at 200 degrees for 30 minutes first to kill any critters, then brush the tips with white acrylic paint or spray with flocking for snow. Fill the tray generously, tucking fairy lights underneath so the whole arrangement glows. A 16 inch tray fits a standard dining table; go 20 inches for larger tables.
Styling tips:
- Bake real pinecones at 200 degrees for 30 minutes first.
- Brush paint only on tips for natural snowfall.
- Tuck fairy lights underneath for a warm glow.
- Size the tray to your table: 16 inches standard.
8. Painted Christmas Village Houses
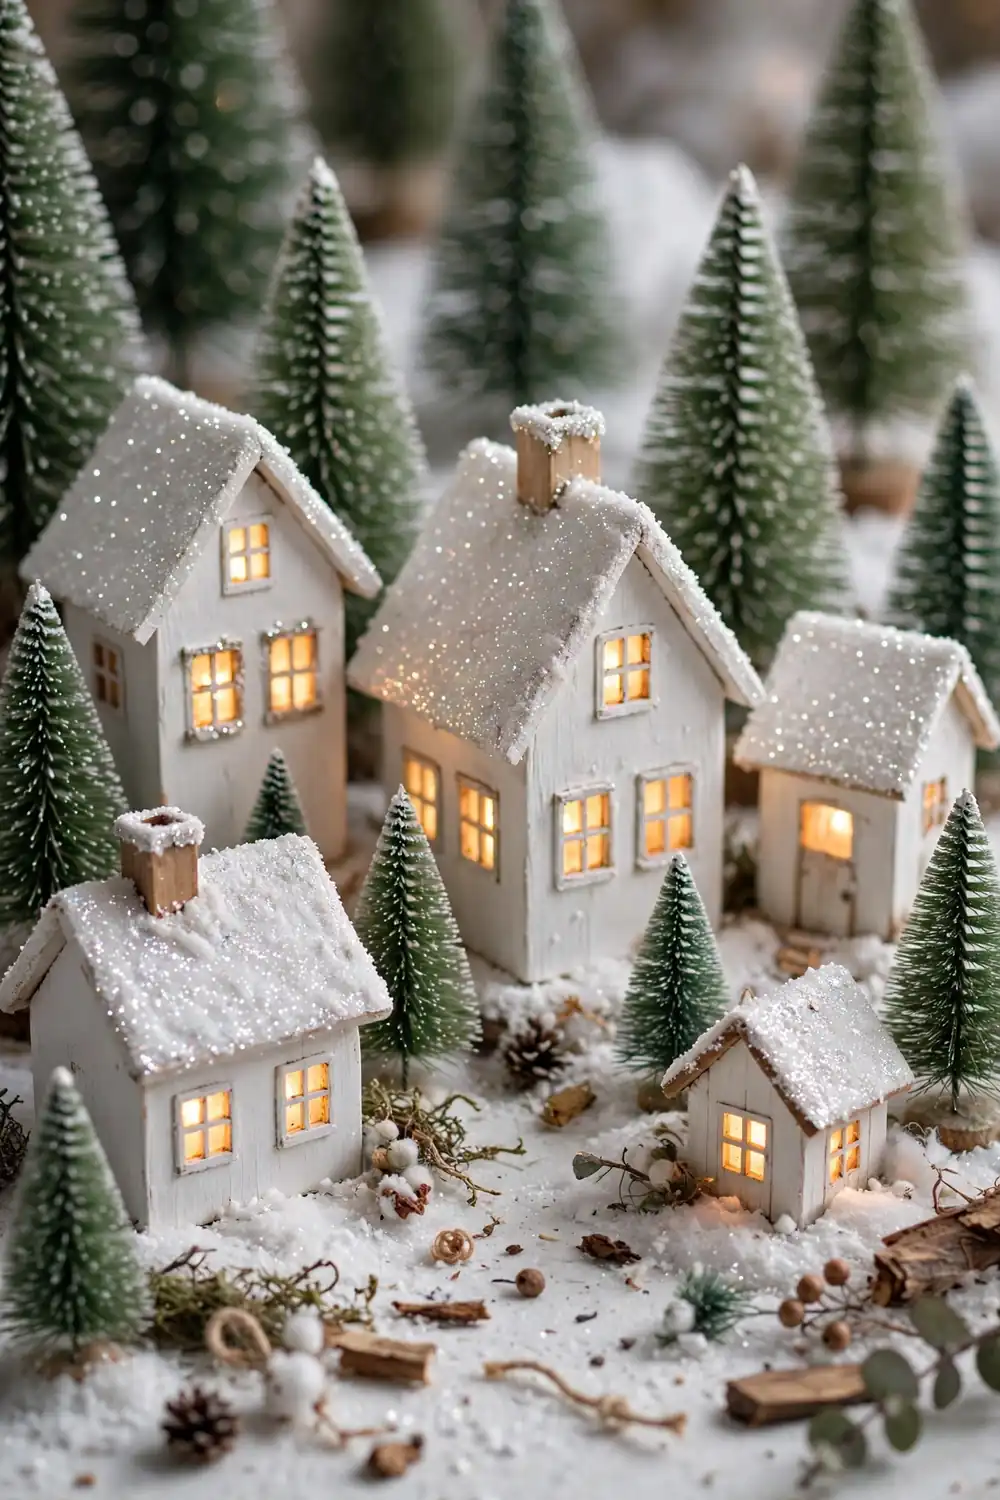
Those plain wooden houses at the dollar store become a glowing Christmas village with white paint, glitter, and tea lights. Paint each house crisp white, add glitter to the roofs for snow, and cut or paint warm glowing windows. Lined up on fake snow with bottle brush trees, they look like a $50 village set.
Sand the houses lightly first so paint adheres, then apply two thin coats of white acrylic. While the second coat is tacky, sprinkle fine white glitter on the roofs. Place an LED tea light inside each house so the windows glow, and arrange three to five houses on a bed of faux snow with mini trees between them.
Styling tips:
- Sand lightly before painting for best adhesion.
- Sprinkle glitter while the second coat is tacky.
- Use LED tea lights inside for glowing windows.
- Arrange an odd number on faux snow with mini trees.
9. Farmhouse Christmas Sign DIY
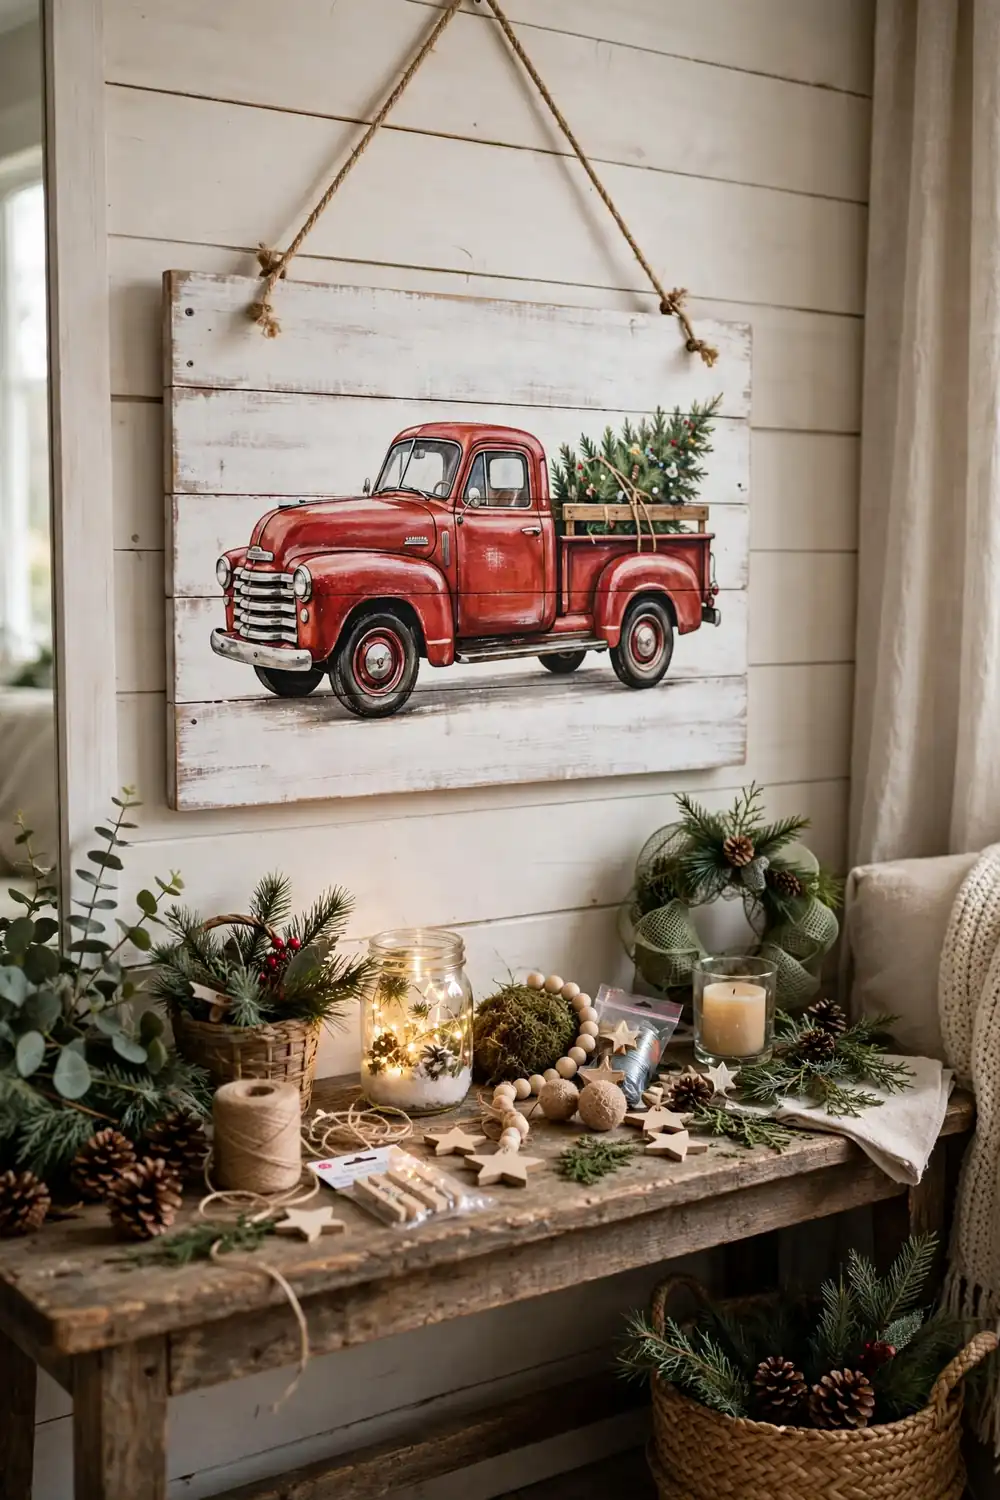
A hand painted farmhouse sign adds that designer farmhouse touch for about $6. Start with a whitewashed wood plank sign, then paint a simple red vintage truck carrying a Christmas tree. Even beginners can pull this off with a printed template and a steady hand.
Print your truck design, rub pencil on the back, and trace it onto the plank to transfer the outline. Fill in with acrylic paints: barn red for the truck, green for the tree, brown for the trunk. Two thin coats beat one thick coat for clean lines. Seal with clear matte sealer and hang with twine.
Styling tips:
- Transfer designs with the pencil rub trick.
- Use two thin coats for clean, even color.
- Seal with matte sealer for a professional finish.
- Hang with twine for farmhouse charm.
10. DIY Stocking Display on Twine

No mantel hooks? No problem. String twine across the mantel and hang stockings with wooden clothespins for a charming, casual display that costs under $10. The mix of red buffalo check and cream knit stockings looks cozy and collected, like a cabin Christmas.
Cut twine 6 inches longer than your mantel on each side and secure it with small removable hooks. Hang four to six stockings with clothespins, spacing them 6 to 8 inches apart, and drape a short faux garland with warm lights along the top. Weigh the stocking toes lightly so they hang straight.
Styling tips:
- Space stockings 6 to 8 inches apart.
- Use removable hooks; no mantel damage.
- Drape lit garland along the top for glow.
- Weigh toes lightly so stockings hang straight.
11. Tabletop Mini Tree Styling

A 2 foot tabletop tree styled with dollar store ornaments brings Christmas to side tables, desks, and bedrooms for under $15. The small scale is actually an advantage: every ornament shows, so a $1.25 pack of minis covers the whole tree.
Set the tree on a wooden crate or in a galvanized bucket for height and style. Hang 12 to 15 mini ornaments evenly, working from the inside out, then wrap a thin ribbon spiral from top to bottom. Tuck small wrapped gifts or faux presents around the base to finish. One string of 35 micro lights makes it glow.
Styling tips:
- Elevate the tree on a crate or bucket.
- Use 12 to 15 mini ornaments for a 2 foot tree.
- Wrap ribbon in a spiral from top to bottom.
- Add 35 micro lights for evening glow.
12. Luxe Looking Centerpiece: A Dollar Tree Christmas Decor DIY That Fools Everyone

This is the project that makes guests ask which boutique you shopped at. Tall gold candlesticks, glass vases with white faux flowers and greenery, and scattered gold ornaments on a table runner create a centerpiece dripping with luxury, all from $1.25 finds and one can of gold spray paint.
Spray paint plain candlesticks and vase bases metallic gold, two light coats for a smooth finish. Arrange the tallest pieces in the center and step down in height toward the ends of a 24 inch runner. Fill vases with white blooms and cedar sprigs, then scatter gold ornaments and a few pinecones along the runner. Keep the palette tight: gold, white, and green only.
Styling tips:
- Spray paint in two light coats for smooth metallic gold.
- Arrange tallest in the center, stepping down outward.
- Keep the palette to gold, white, and green.
- Scatter ornaments along the runner to fill gaps.
Dollar Tree Christmas Decor DIYs: Mistakes to Avoid
| Mistake | Why It Fails | Do This Instead |
|---|---|---|
| Buying without a project list | Impulse supplies pile up unused | Plan all 12 projects first, then shop once |
| Skipping the spray paint | Raw dollar store plastic looks cheap | One can of paint elevates everything |
| Using real flames in crafts | Fire risk in painted and paper crafts | LED tea lights and fairy lights only |
| One thick paint coat | Drips and uneven coverage | Two to three light coats with drying time |
| Ignoring scale | Mini supplies get lost on a big mantel | Cluster small items; go bigger on focal pieces |
| Forgetting drying time | Smudged paint ruins the finish | Build in 24 hours of drying before styling |
Final Thoughts
Twelve projects, one glue gun, and a fraction of the boutique price: that is the Dollar Tree Christmas promise. Start with the one or two DIYs that excited you most, finish them fully before starting the next, and let the handmade charm build room by room. By Christmas morning, your home will be full of decor that cost almost nothing and means so much more because you made it yourself. Happy crafting.
